Instructions
- Prepare the Crust: Preheat your oven to 350°F (175°C). Line a 9×13-inch baking pan with parchment paper, leaving an overhang on the sides to easily lift the squares out later.
- In a medium bowl, combine the graham cracker crumbs and ¼ cup granulated sugar. Pour in the ½ cup melted butter and mix well until the crumbs are evenly moistened and resemble wet sand.
- Press the mixture firmly and evenly into the bottom of the prepared baking pan. You can use the bottom of a flat glass or your fingers to get a compact layer.
- Bake the crust for 10-12 minutes, or until lightly golden brown and fragrant. Remove from the oven and let it cool slightly while you prepare the filling. Reduce oven temperature to 325°F (160°C).
- Make the Lemon Filling: In a large bowl, whisk together the 4 large eggs and 1 ½ cups granulated sugar until well combined and slightly pale.
- Gradually whisk in the ¼ cup all-purpose flour until no lumps remain. This helps to thicken the filling.
- Stir in the ½ cup fresh lemon juice and 2 tablespoons lemon zest until thoroughly incorporated.
- Finally, whisk in the ¼ cup melted and slightly cooled butter until the mixture is smooth.
- Pour the lemon filling evenly over the warm, pre-baked crust in the baking pan.
- Carefully return the pan to the oven and bake for 25-30 minutes, or until the filling is set. The center should be set but still have a slight jiggle when gently shaken.
- Remove the pan from the oven and let the lemon squares cool completely on a wire rack at room temperature. This is crucial for the filling to fully set. Once cooled, place the pan in the refrigerator for at least 2 hours, or preferably longer, to chill thoroughly.
- Prepare the Cream Topping: In a large, chilled mixing bowl (preferably a metal bowl that has been in the freezer for 10-15 minutes), combine the 1 ½ cups very cold heavy cream, ¼ cup powdered sugar, and 1 teaspoon vanilla extract.
- Using an electric mixer (handheld or stand mixer with a whisk attachment), beat the cream mixture on medium-high speed until stiff peaks form. Be careful not to overbeat, or it will turn into butter.
- Assemble and Serve: Once the lemon squares are completely chilled and firm, use the parchment paper overhang to carefully lift the entire slab out of the baking pan and transfer it to a cutting board.
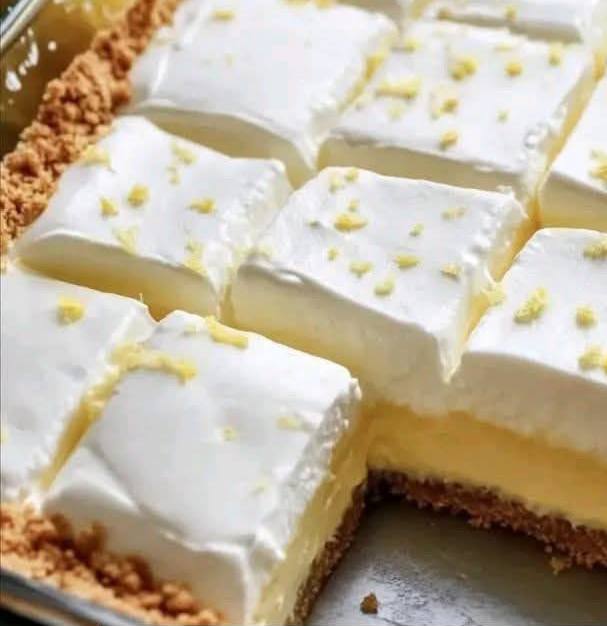
- Evenly spread the whipped cream topping over the chilled lemon filling.
- If desired, sprinkle with extra lemon zest for garnish.
- Using a sharp knife, cut the dessert into 16 squares. For clean cuts, wipe your knife with a damp cloth between each slice.
- Serve immediately and enjoy your delicious Creamy Lemon Squares Dessert!
Cooking Tips and Variations
For the best results with your Creamy Lemon Squares, always use fresh lemon juice and zest. Bottled lemon juice simply doesn’t compare in terms of vibrant flavor. When zesting, be sure to only get the yellow part of the peel, as the white pith underneath can be bitter. For a perfectly smooth lemon filling, you can strain the lemon juice before adding it, though the zest adds a lovely visual and textural element. Ensure your eggs are at room temperature for better incorporation into the sugar, which helps create a smoother, more stable filling. When baking the filling, watch it closely; overbaking can lead to a rubbery texture, while underbaking will result in a runny center. The slight jiggle is key!
If you’re short on time, you can use a store-bought graham cracker crust for the base, just make sure it’s a 9×13-inch size. For a gluten-free option, use gluten-free graham crackers or a nut-based crust (like almond flour mixed with butter and sugar). To make the lemon filling even more intensely yellow and flavorful, you can add a tiny pinch of turmeric, but be careful not to add too much as it can impart a distinct flavor. For those who prefer a different topping, a light meringue can be piped on top and lightly browned with a kitchen torch, or you can opt for a simple cream cheese frosting made by beating softened cream cheese with powdered sugar and a splash of milk or lemon juice. You can also experiment with other citrus flavors, like lime or a combination of lemon and orange, for a unique twist. For an extra touch of elegance, dust the finished squares with a light coating of powdered sugar before serving, in addition to or instead of the lemon zest.
Storage and Reheating
Creamy Lemon Squares Dessert are best enjoyed fresh, but they can be stored to savor later. To store, place the cut squares in an airtight container. If stacking them, separate layers with parchment paper to prevent the whipped cream from sticking. Store in the refrigerator for up to 3-4 days. The whipped cream topping may lose some of its volume and become slightly softer over time, but the flavor will remain delicious. Freezing is generally not recommended for this dessert, especially with the whipped cream topping, as the texture of the cream can become icy and separate upon thawing. However, if you’ve made the lemon squares without the cream topping, you can freeze them. Wrap the cooled, unfrosted lemon squares tightly in plastic wrap, then in aluminum foil, and freeze for up to 1 month. Thaw in the refrigerator overnight before adding the fresh cream topping and serving. This dessert is typically served chilled or at room temperature, so no reheating is necessary or recommended.
Frequently Asked Questions
Why did my lemon filling turn out runny?
A runny lemon filling is usually due to one of two reasons: either it was underbaked, or it didn’t chill long enough. The filling needs to bake until it’s set with just a slight jiggle in the center, allowing the eggs and flour to properly thicken it. Additionally, chilling the squares for at least 2 hours (and preferably longer) is crucial for the filling to firm up completely. Make sure your oven temperature is accurate and resist the urge to cut into them before they are fully chilled.
Can I make these Creamy Lemon Squares ahead of time?
Yes, you can absolutely make these ahead of time! The baked lemon squares (without the cream topping) can be prepared a day in advance and stored covered in the refrigerator. Prepare the whipped cream topping just before serving for the best texture and presentation. This makes them an excellent choice for entertaining, as most of the work can be done beforehand.
What’s the best way to get clean cuts for the squares?
For perfectly clean cuts, ensure the lemon squares are thoroughly chilled and firm. Use a long, sharp knife and wipe the blade clean with a damp cloth after each cut. This prevents the filling and topping from sticking to the knife and creating messy edges. You can also run the knife under hot water and dry it quickly before each cut to help it slice through smoothly.
My whipped cream topping isn’t getting stiff. What am I doing wrong?
The most common reasons for whipped cream not stiffening are using cream that isn’t cold enough, overfilling the mixing bowl, or using cream with a lower fat content. Always use heavy cream (at least 36% milk fat) that is very cold, straight from the refrigerator. Chilling your mixing bowl and whisk attachment for 10-15 minutes beforehand can also significantly help. Ensure you’re not trying to whip too much cream in a small bowl, as it needs aeration to stiffen.