Instructions
- Prepare the Biscuits: Begin by crushing your chosen biscuits. You can do this in a food processor for fine crumbs or place them in a large ziplock bag and crush them with a rolling pin for a coarser texture. Aim for a mix of fine and coarse crumbs for interesting texture. If you prefer a firmer base, you can mix the melted butter with about 1 cup of the crushed biscuits and press it into the bottom of your serving dish. Otherwise, simply keep the crushed biscuits ready for layering.
- Make the Pudding: In a large mixing bowl, combine the instant vanilla pudding mix with the 2 cups of cold milk. Whisk vigorously for 2-3 minutes, or until the pudding thickens. It’s important to whisk until it’s noticeably thick and smooth. Set aside to let it firm up slightly while you prepare the whipped cream.
- Whip the Cream: In a separate, chilled bowl, pour the cold heavy cream. Using an electric mixer (or a whisk and some elbow grease), beat the cream on medium-high speed until soft peaks form. If desired, add the granulated sugar and vanilla extract during the last minute of whipping and continue until stiff peaks form. Be careful not to over-whip, or it will turn grainy.
- Combine Pudding and Cream (Optional, for lighter texture): For an even lighter and airier pudding layer, gently fold about half of the prepared whipped cream into the thickened vanilla pudding. This step is optional, but it creates a wonderfully mousse-like consistency. Reserve the remaining whipped cream for topping or additional layers.
- Assemble the Budding: Choose your serving dish – a trifle bowl, individual glasses, or a square baking dish all work well. Start with a layer of crushed biscuits at the bottom.
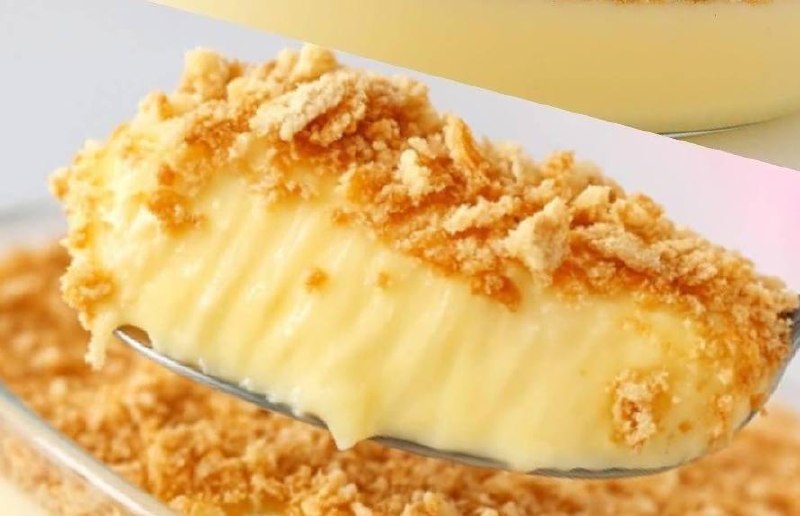
- Add the Pudding Layer: Evenly spread about one-third of the vanilla pudding mixture over the biscuit layer.
- Repeat Layers: Continue layering, alternating between crushed biscuits and pudding, until you’ve used all the ingredients, ending with a final layer of pudding on top. If you have reserved whipped cream, you can add a layer of whipped cream after each pudding layer, or simply use it as a generous topping.
- Chill to Perfection: Cover the dish tightly with plastic wrap and refrigerate for at least 3-4 hours. For best results and to allow the biscuits to fully soften and the flavors to meld, it’s ideal to chill it overnight.
- Garnish and Serve: Before serving, remove from the refrigerator. If desired, garnish with chocolate shavings, a sprinkle of extra biscuit crumbs, fresh berries, or a dollop of additional whipped cream. Serve cold and enjoy your delightful No Bake Biscuit Budding!
Cooking Tips and Variations
To achieve the perfect No Bake Biscuit Budding every time, consider these helpful tips. When crushing your biscuits, resist the urge to turn them into a fine powder. A mix of fine crumbs and slightly larger pieces adds a wonderful textural contrast that makes each bite more interesting. Using a food processor offers precision, but a ziplock bag and a rolling pin work just as effectively for a more rustic crumb. For the pudding, ensure your milk is very cold, as this helps the instant pudding set quickly and achieve that desired thick, creamy consistency. If you’re folding whipped cream into the pudding, do so gently to maintain the airiness, using a spatula in an upward motion rather than vigorous stirring.
The beauty of this recipe truly shines in its versatility. For a rich chocolate version, simply swap the vanilla instant pudding mix for a chocolate one. You can also use chocolate biscuits or even add a layer of chocolate ganache for an extra decadent touch. If you love a fruity twist, consider layering in fresh berries like strawberries, raspberries, or blueberries between the biscuit and pudding layers. Lemon pudding mix offers a bright, zesty alternative, especially when paired with vanilla wafers. For a spiced dessert, try using ginger snaps as your biscuits and add a pinch of cinnamon or nutmeg to your pudding. Coffee lovers can infuse their pudding with a teaspoon of instant espresso powder for a tiramisu-like flavor. Don’t be afraid to experiment with different types of biscuits too – graham crackers, shortbread, or even Biscoff cookies can create unique flavor profiles. For an adult-friendly version, a tablespoon of coffee liqueur or rum can be drizzled over the biscuit layers before adding the pudding. Finally, for an extra layer of indulgence, a sprinkle of toasted nuts or shredded coconut as a garnish can add both flavor and crunch.
Storage and Reheating
Storing your No Bake Biscuit Budding properly is key to maintaining its deliciousness and texture. Once assembled, the dessert should be covered tightly with plastic wrap or an airtight lid. This prevents it from absorbing odors from the refrigerator and keeps the pudding layers from drying out. Store it in the refrigerator for up to 3-4 days. Beyond this timeframe, the biscuits may become too soft, losing some of their pleasant texture, though the dessert will still be edible. It’s important to keep it consistently chilled, especially since it contains dairy products.
Given that this is a no-bake, chilled dessert, reheating is not applicable nor recommended. The essence of Biscuit Budding lies in its cool, creamy, and softened biscuit texture. Heating it would cause the pudding to melt and lose its set consistency, and the biscuits would become soggy rather than tender. Always serve your No Bake Biscuit Budding directly from the refrigerator, ensuring it is thoroughly chilled. If you’ve prepared it in individual servings, simply take out the desired portions. For a large dish, scoop out servings using a large spoon or spatula. Enjoy it cold, as intended, for the best possible experience.
Frequently Asked Questions
Can I make this dessert ahead of time?
Absolutely! In fact, making No Bake Biscuit Budding ahead of time is highly recommended. It needs at least 3-4 hours to chill and set properly, but chilling it overnight allows the biscuits to fully soften and the flavors to meld beautifully, resulting in a much more cohesive and delicious dessert. You can prepare it up to 24 hours in advance for optimal texture and taste.
What if my pudding doesn’t set?
If your pudding isn’t setting, there are a few common culprits. Ensure you’re using instant pudding mix, not cook-and-serve. Also, make sure your milk is very cold, and you whisked it vigorously for the full 2-3 minutes as directed on the pudding package. Using less milk than specified can also help it set firmer, but stick to the package instructions first. If it’s still too loose after chilling, you might need to add another half-packet of pudding mix and re-whisk, or simply embrace a softer, more custard-like consistency.
Can I use different types of milk?
While whole milk is recommended for the creamiest and best-setting pudding, you can use 2% milk with good results. Skim milk might result in a slightly less rich texture and may affect the pudding’s ability to set as firm. Non-dairy milks like almond or soy milk can be used, but be aware that they can sometimes affect the pudding’s setting time and final consistency. Always check the pudding mix package for specific recommendations regarding milk types.