Instructions
- In a large mixing bowl, combine the warm water, granulated sugar, and active dry yeast. Stir gently and let it sit for 5-10 minutes, or until the mixture becomes foamy. This indicates that your yeast is active.
- Add the salt and 2 tablespoons of olive oil to the yeast mixture. Stir well to combine.
- Gradually add the flour to the wet ingredients, about a cup at a time, mixing with a wooden spoon or a stand mixer with a dough hook attachment. Once all the flour is added, the dough will be shaggy and sticky.
- Turn the dough out onto a lightly floured surface. Knead the dough for 8-10 minutes until it becomes smooth, elastic, and no longer sticky. If the dough is too sticky, add a very small amount of flour, a teaspoon at a time, until it reaches the desired consistency. Avoid adding too much flour, as this can make the bread tough.
- Lightly grease a clean bowl with olive oil. Place the kneaded dough in the bowl, turning it once to coat all sides with oil. Cover the bowl tightly with plastic wrap or a clean kitchen towel.
- Let the dough rise in a warm place for 1 to 1.5 hours, or until it has doubled in size. The exact time will depend on the temperature of your kitchen.
- Once the dough has risen, gently punch it down to release the air. Turn the dough out onto a lightly floured surface.
- Divide the dough into 6-8 equal portions. Roll each portion into a smooth ball.
- Lightly flour your work surface and a rolling pin. Take one dough ball and roll it out into a circle, about 6-8 inches (15-20 cm) in diameter and about ¼ inch (0.6 cm) thick. The exact thickness can be adjusted to your preference – thinner will result in a crispier bread, while thicker will be softer and chewier. Repeat with the remaining dough balls.
- Heat a large, heavy-bottomed skillet or cast-iron griddle over medium-high heat. Add a teaspoon of olive oil to the pan and swirl to coat the bottom.
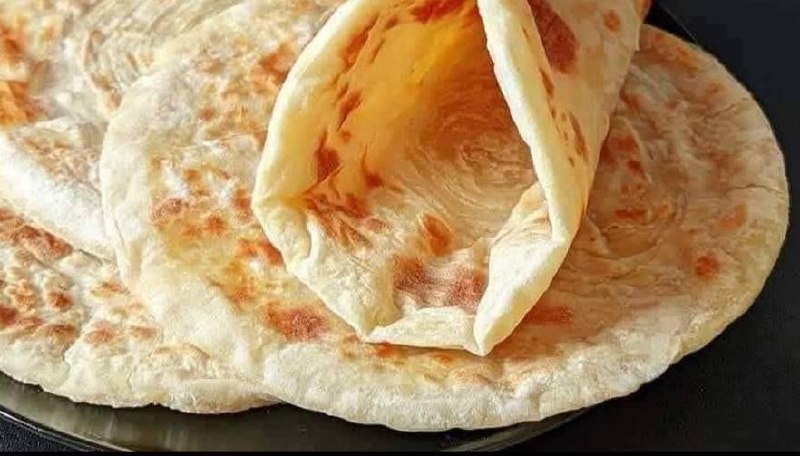
- Carefully place one rolled-out dough circle into the hot skillet. Cook for 2-3 minutes per side, or until golden brown spots appear and the bread puffs up. You may need to adjust the heat to prevent burning. The bread should cook evenly and develop a beautiful mottled brown color.
- Remove the cooked bread from the skillet and place it on a clean plate. Cover it with a clean kitchen towel to keep it warm and soft while you cook the remaining bread.
- Repeat the cooking process with the remaining dough circles, adding a little more olive oil to the pan as needed for each piece.
- Serve the Turkish bread warm, either as a side dish, with dips, or as a base for sandwiches.
Cooking Tips and Variations
Achieving the perfect Turkish bread is all about a few key techniques and a little patience. Firstly, ensure your yeast is active by letting it bloom in warm, sugary water until foamy. If it doesn’t foam, your yeast might be old or the water temperature was off, and you’ll need to start again to ensure a good rise. When kneading, resist the urge to add too much extra flour; a slightly sticky dough is often a sign of good hydration, which leads to a softer bread. Knead until the dough is smooth and elastic – this develops the gluten, giving the bread its structure and chewiness.
The rising environment is crucial. A warm, draft-free spot is ideal for the dough to double in size. If your kitchen is cool, you can place the covered bowl in a turned-off oven with just the light on, or near a warm (but not hot) appliance. When rolling out the dough, aim for an even thickness to ensure uniform cooking. Don’t roll them too thin, or they might become cracker-like; too thick, and they might not cook through properly. For cooking, a well-heated skillet is essential. The high heat helps the bread puff up quickly and creates those desirable golden-brown spots. Don’t overcrowd the pan; cook one or two pieces at a time, depending on your skillet size. Covering the cooked bread immediately with a towel after it comes off the pan traps steam and keeps it wonderfully soft and pliable.
For variations, consider adding flavor directly to the dough. A teaspoon of dried oregano, thyme, or even a pinch of red pepper flakes can infuse the bread with aromatic notes. Before cooking, you can brush the rolled dough with olive oil and sprinkle with sesame seeds or Nigella seeds for an authentic Turkish touch and a beautiful presentation. For a richer flavor, you can substitute a tablespoon of the olive oil in the dough with melted butter. You could also experiment with different flours; while all-purpose works wonderfully, a blend of all-purpose and whole wheat flour can add a nutty flavor and more fiber, though it might require a little more water.
Storage and Reheating
Turkish bread is best enjoyed fresh and warm, straight from the pan. However, if you have leftovers, they can be stored to maintain their softness and flavor for a short period. To store, allow the bread to cool completely to room temperature. Once cool, place the bread in an airtight container or a large resealable plastic bag. Store at room temperature for up to 2-3 days. Avoid refrigerating Turkish bread, as the cold air can cause it to dry out and become stale more quickly, losing its desirable soft texture.
For longer storage, Turkish bread freezes beautifully. Once cooled, wrap individual pieces tightly in plastic wrap, then place them in a freezer-safe bag or container. It can be stored in the freezer for up to 2-3 months. When you’re ready to enjoy, there’s no need to thaw it completely before reheating.
Reheating Turkish bread properly will bring back its delicious warmth and softness. If stored at room temperature, you can reheat the bread in a dry skillet over medium heat for 1-2 minutes per side, until warmed through and slightly crisp on the exterior. Alternatively, you can wrap it in foil and heat it in a preheated oven at 350°F (175°C) for 5-7 minutes. If reheating from frozen, you can place the frozen bread directly in a preheated oven (still wrapped in foil) at 375°F (190°C) for 10-15 minutes, or until soft and heated through. You can also lightly dampen the frozen bread with a few drops of water before reheating in a dry skillet over medium-low heat with a lid on for a few minutes, which helps to steam it back to life.
Frequently Asked Questions
What is the difference between Turkish bread and pita bread?
While both Turkish bread and pita bread are popular flatbreads, they have distinct characteristics. Pita bread typically has a distinctive pocket that forms during baking, making it ideal for stuffing. Turkish bread, especially the type often pan-fried like Bazlama, is usually softer, thicker, and doesn’t always form a pocket. It’s more commonly used for scooping, dipping, or as a base for open-faced toppings rather than being stuffed into a pocket.
Can I make Turkish bread without yeast?
While this recipe uses active dry yeast for a traditional soft and slightly airy texture, you can make a simpler, unleavened version of Turkish flatbread (similar to Gözleme without the filling, or a very thin Bazlama) using just flour, water, and salt. This will result in a denser, chewier bread that won’t puff up as much but can still be delicious. For a leavened bread without commercial yeast, you would need to use a sourdough starter, which is a more involved process.
What are some traditional ways to serve Turkish bread?
Turkish bread is incredibly versatile! It’s commonly served with a variety of Turkish breakfast items like cheeses (feta, kashkaval), olives, fresh tomatoes, cucumbers, and various jams or honey. It’s also perfect for scooping up dips such as hummus, baba ghanoush, or haydari (a yogurt-based dip). For lunch or dinner, it makes an excellent accompaniment to kebabs, stews, grilled meats, and fresh salads. You can also use it as a base for open-faced sandwiches with savory toppings.