Instructions
- Prepare Your Ingredients: If you don’t have pre-cooked chicken, start by cooking about 1.5 pounds of chicken breast or thighs. You can boil, bake, or pan-fry them until cooked through, then shred them using two forks or a stand mixer. Chop your onion and mince your garlic. Rinse and drain the canned Great Northern beans thoroughly. Gather all your spices so they are ready to go.
- Sauté Aromatics: Heat the olive oil in a large Dutch oven or heavy-bottomed pot over medium heat. Add the chopped onion and cook for 5-7 minutes, stirring occasionally, until it softens and becomes translucent. Add the minced garlic and cook for another 1-2 minutes until fragrant, being careful not to burn it.
- Build Flavor Base: Stir in the diced green chilies (undrained), ground cumin, dried oregano, chili powder, and cayenne pepper (if using). Cook for 1 minute, stirring constantly, to toast the spices and release their aromas. This step is crucial for developing a deep, rich flavor in your chili.
- Combine and Simmer: Pour in the chicken broth, then add the rinsed and drained Great Northern beans and the shredded cooked chicken. Stir everything together. Bring the mixture to a gentle simmer, then reduce the heat to low, cover, and let it simmer for at least 20-30 minutes. This simmering time allows all the flavors to meld beautifully and the chili to thicken slightly.
- Create the Creamy Finish: After simmering, remove the pot from the heat. In a small bowl, whisk together the milk or half-and-half with the softened sour cream or cream cheese until smooth. Gradually stir this creamy mixture into the chili in the pot. Stir until fully incorporated and the chili takes on a beautiful creamy consistency.
- Gentle Reheating and Seasoning: Return the pot to very low heat and warm the chili gently for about 5-10 minutes, stirring occasionally. It’s important not to bring the chili to a rolling boil after adding the dairy, as this can cause it to curdle. Just heat it through until it’s hot and creamy. Taste the chili and season with salt and black pepper as needed. You might find you need more or less depending on the saltiness of your chicken broth and personal preference.
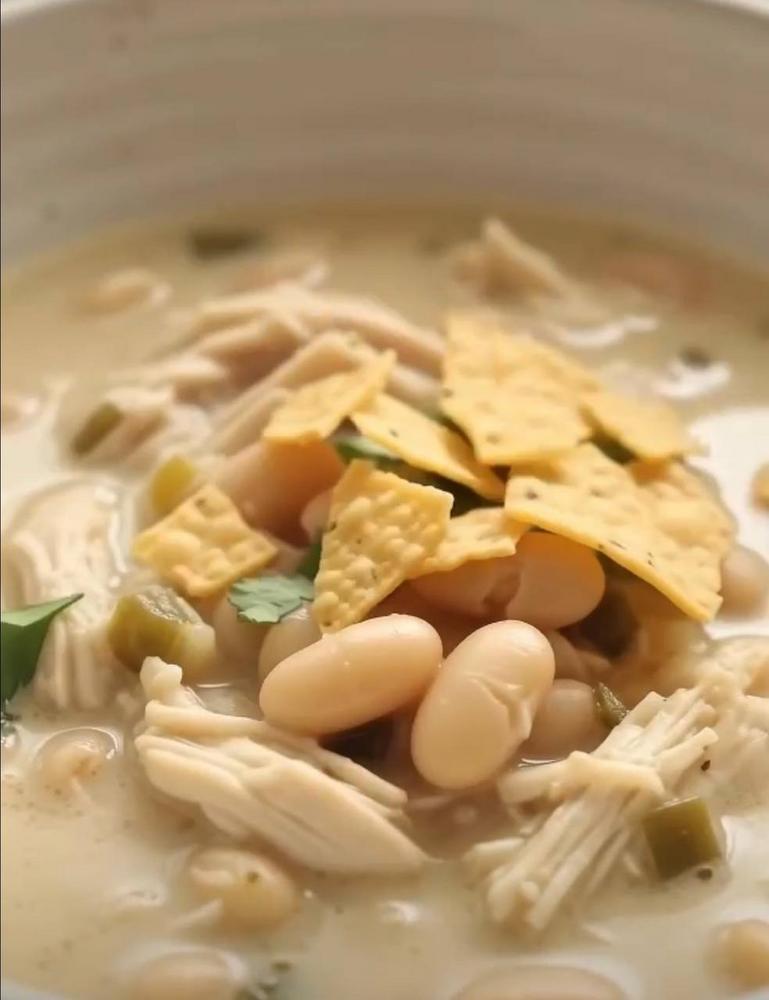
- Serve and Garnish: Ladle the hot White Chicken Chili into individual bowls. Garnish generously with your favorite toppings: crispy tortilla chips or strips, a sprinkle of fresh chopped cilantro, a handful of shredded Monterey Jack or cheddar cheese, a dollop of extra sour cream or Greek yogurt, and some fresh avocado slices. A squeeze of lime juice just before eating adds a bright, zesty finish that perfectly complements the creamy richness. Enjoy immediately!
Cooking Tips and Variations
Achieving the perfect White Chicken Chili is all about balancing flavors and textures, and there are several ways to elevate your dish or tailor it to your preferences. For the ultimate creamy factor, don’t shy away from using full-fat sour cream or cream cheese. If you prefer a slightly lighter touch, Greek yogurt can be a good substitute for sour cream, offering a similar tang and creaminess with added protein. To ensure your chili isn’t just creamy but also deeply flavorful, make sure to sauté your onions until they are very tender and translucent, almost caramelized, and toast your spices briefly before adding liquids. This unlocks their full aromatic potential, laying a strong foundation for the chili’s taste.
When it comes to the chicken, convenience is key. Using a store-bought rotisserie chicken is a fantastic shortcut that saves a lot of time and adds wonderful flavor. Alternatively, you can poach chicken breasts or thighs in seasoned water or broth, or even cook them in an Instant Pot for quick shredding. For the beans, always rinse canned beans thoroughly under cold water. This not only removes excess sodium but also improves their texture, preventing the chili from becoming too starchy or “beany.” If you want to add more vegetables, consider stirring in a cup of frozen corn or diced bell peppers during the last 10-15 minutes of simmering. They add extra color, sweetness, and nutritional value.
Spice control is entirely in your hands. The recipe calls for diced green chilies, which provide a mild, earthy heat. If you prefer a spicier chili, you can add a finely minced jalapeño or serrano pepper along with the garlic and onions, or a pinch of cayenne pepper with the other spices. For a smoky depth, a dash of smoked paprika can be a wonderful addition. To make this recipe dairy-free, you can substitute the milk/half-and-half with unsweetened full-fat coconut milk (for a subtle coconut flavor) or a plant-based milk like almond or oat milk. For the sour cream/cream cheese, a cashew cream (soaked and blended cashews) or a dairy-free cream cheese alternative works well. Remember to adjust the seasoning at the end; taste often and add salt and pepper as needed until it’s just right. Finally, consider setting up a “topping bar” when serving. This allows everyone to customize their bowl with their favorite garnishes, making the meal interactive and fun. Offer options like extra cheese, avocado, cilantro, lime wedges, jalapeño slices, hot sauce, and of course, plenty of crispy tortilla strips.
Storage and Reheating
White Chicken Chili is an excellent make-ahead meal and tastes even better the next day as the flavors have more time to meld. Proper storage is key to enjoying your leftovers safely and deliciously.
To store, allow the chili to cool completely to room temperature. This is important to prevent bacterial growth and condensation inside the container, which can lead to a watery texture. Once cooled, transfer the chili to an airtight container. It can be stored in the refrigerator for up to 3-4 days. For longer storage, White Chicken Chili freezes beautifully. Transfer the cooled chili to freezer-safe containers or heavy-duty freezer bags, leaving about an inch of headspace if using containers to allow for expansion. It can be frozen for up to 3 months. When freezing, it’s best to omit any fresh garnishes; add those when you reheat and serve.
When you’re ready to enjoy your leftovers, reheating is straightforward. If refrigerated, you can reheat individual portions in the microwave in 1-2 minute intervals, stirring in between, until heated through. Alternatively, transfer the chili to a saucepan and reheat gently over medium-low heat on the stovetop, stirring frequently, until simmering and hot. If the chili has thickened too much, you can add a splash of chicken broth or milk to reach your desired consistency. If reheating from frozen, it’s best to thaw the chili in the refrigerator overnight. Once thawed, reheat using the stovetop or microwave methods described above. Avoid boiling the chili vigorously when reheating, especially if it contains dairy, to prevent any separation or curdling. Always add fresh garnishes just before serving to maintain their crispness and vibrant flavor.
Frequently Asked Questions
Can I use a different type of beans for this chili?
Absolutely! While Great Northern beans or cannellini beans are traditionally used for their creamy texture and mild flavor, you can certainly experiment with other white beans. Navy beans are a great alternative and will yield a similar result. Some people even enjoy using a mix of different white beans for added texture. Just be sure to rinse and drain them well before adding them to the chili.
How can I make this chili spicier without adding too much heat?
If you’re looking for more flavor complexity rather than just intense heat, consider adding a pinch of smoked paprika along with the other spices. For a gentle, lingering warmth, a small amount of finely minced poblano pepper (which is milder than jalapeño) can be sautéed with the onions and garlic. You can also increase the amount of diced green chilies or add a dash of your favorite mild hot sauce at the table for individual preference. For a controlled kick, a pinch of white pepper can also provide a subtle heat without altering the color.
Can I make this chili in a slow cooker?
Yes, White Chicken Chili adapts wonderfully to a slow cooker! To convert, sauté the onions and garlic on the stovetop first, then add them to the slow cooker along with the green chilies, spices, chicken broth, beans, and cooked shredded chicken. Cook on low for 4-6 hours or on high for 2-3 hours. About 30 minutes before serving, stir in the milk/half-and-half and sour cream/cream cheese. Heat through until creamy and hot. This method is fantastic for hands-off cooking and allows the flavors to deepen beautifully.
What are some other great toppings besides the ones listed?
The sky’s the limit when it comes to toppings for White Chicken Chili! Beyond the classic tortilla chips, cilantro, cheese, sour cream, avocado, and lime, consider adding pickled jalapeños for a tangy kick, thinly sliced radishes for a peppery crunch, or a sprinkle of crispy fried onions for extra texture. Crumbled bacon bits can add a smoky, savory dimension, and a dollop of a vibrant salsa verde can introduce a fresh, zesty element. Don’t be afraid to get creative and personalize your bowl!