Instructions
- Prepare the Dough: In a large mixing bowl, combine the all-purpose flour, salt, and sugar (if using). Make a well in the center.
- Pour the warm water and 2 tablespoons of oil or melted ghee into the well.
- Using your hands or a wooden spoon, gradually mix the wet ingredients into the dry ingredients until a shaggy dough forms.
- Transfer the dough to a lightly floured surface and knead for 8-10 minutes, or until the dough is smooth, elastic, and no longer sticky. It should be soft and pliable. If the dough is too sticky, add a little more flour, one teaspoon at a time. If it’s too dry, add a few drops of water.
- Rest the Dough: Lightly grease the mixing bowl with a little oil. Place the kneaded dough back into the bowl, turning it once to coat. Cover the bowl with plastic wrap or a damp cloth and let it rest at room temperature for at least 30 minutes, or up to 2 hours. This resting period is crucial for gluten relaxation, making the dough easier to roll and contributing to the flakiness.
- Divide the Dough: After resting, gently punch down the dough and divide it into 8-10 equal pieces. Roll each piece into a smooth ball.
- First Roll and Oil: Lightly flour your work surface. Take one dough ball and roll it out into a very thin circle, about 8-10 inches in diameter. The thinner you roll it, the more delicate your layers will be.
- Generously brush the entire surface of the rolled-out dough with melted ghee or oil. Don’t be shy; this fat is essential for creating the layers.
- Create the Layers (Spiral Method): Starting from one edge, tightly roll the dough into a long, thin log.
- Once you have a log, gently stretch it a little longer, if possible, without tearing.
- Now, starting from one end of the log, coil it into a tight spiral, like a snail shell. Tuck the end underneath.
- Gently flatten the coiled dough with the palm of your hand. Repeat this process for all the remaining dough balls.
- Second Rest: Place the prepared coiled dough balls on a lightly floured or greased tray, cover them loosely with plastic wrap, and let them rest for another 15-20 minutes. This second rest helps the dough relax again, making the final rolling easier.
- Final Rolling: Take one coiled dough ball. Gently press it down and then roll it out into a 6-7 inch circle, about 1/4 inch thick. Be gentle to avoid pressing out all the layers you’ve created. Aim for an even thickness.
- Cook the Flatbreads: Heat a non-stick pan or cast-iron skillet (tawa) over medium heat. Once hot, add about 1-2 teaspoons of melted ghee or oil to the pan.
- Carefully place one rolled flatbread onto the hot pan.
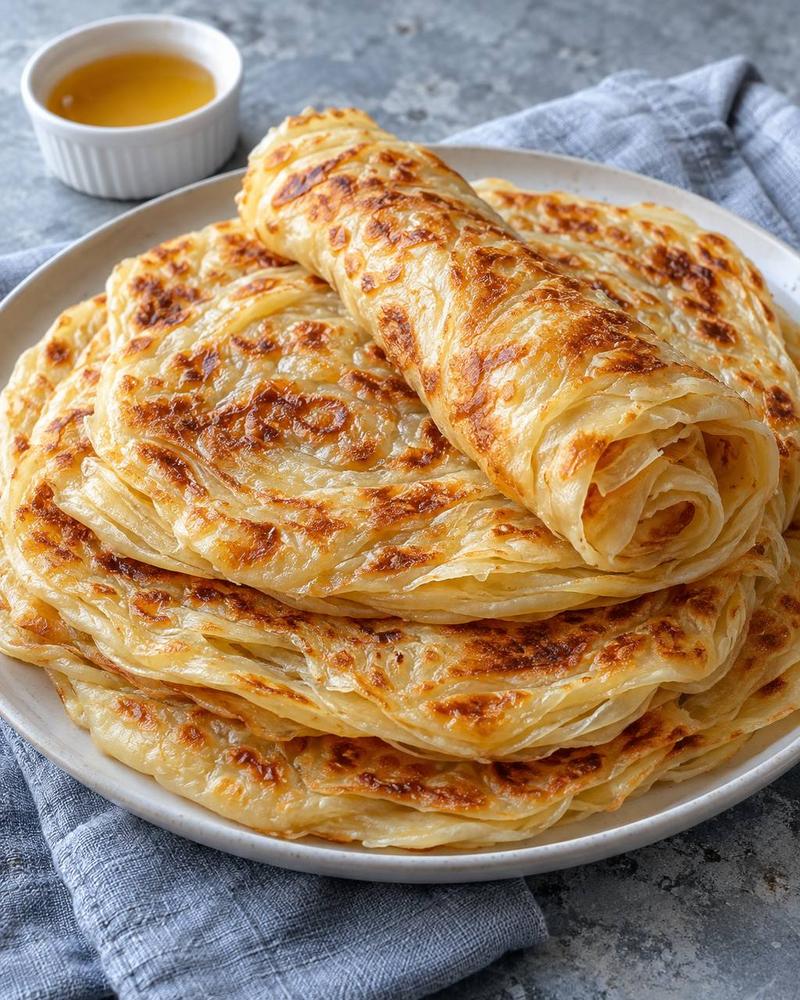
- Cook for 1-2 minutes per side, or until golden brown spots appear and the flatbread begins to puff up. Brush the top side with a little more ghee or oil before flipping.
- Flip the flatbread and cook the other side until it’s also golden brown and cooked through. You might need to gently press the flatbread with a spatula while cooking to ensure even browning and to encourage puffing.
- “Crush” and Serve: Once cooked, remove the flatbread from the pan. While it’s still hot, gently scrunch or clap the flatbread between your hands a few times. This helps to separate the layers and makes it even flakier and softer.
- Stack the cooked flatbreads on a plate. Serve immediately, either plain, with a drizzle of honey or maple syrup, or alongside your favorite savory dishes.
Cooking Tips and Variations
Dough Consistency is Key: The dough should be soft, pliable, and slightly tacky but not sticky after kneading. A soft dough is easier to roll thinly and results in a more tender flatbread. If your dough feels stiff, knead in a tiny bit more water, a teaspoon at a time. If it’s too sticky, add a little flour.
Don’t Skip the Resting Times: Both resting periods are crucial. The first rest allows the gluten to relax, making the dough elastic and easy to roll without tearing. The second rest after coiling helps the dough relax again, preserving the layers you’ve worked hard to create and preventing them from springing back when you do the final roll.
Generous Oiling for Layers: The melted ghee or oil brushed onto the dough before rolling into a log is vital. Don’t be stingy! This fat acts as a barrier, preventing the layers from sticking together and allowing them to separate and puff during cooking, creating that signature flakiness. Ghee offers a richer, nuttier flavor, but a neutral oil works perfectly too.
Roll Thin, but Gently: For the flakiest results, aim to roll your initial dough circles as thin as possible without tearing. However, when doing the final roll of the coiled dough, be gentle. Too much pressure can compress the layers you’ve already formed.
Hot Pan, Medium Heat: Preheat your pan over medium heat. If the pan isn’t hot enough, the flatbread will dry out before browning. If it’s too hot, the outside will burn before the inside cooks through. Medium heat allows for even browning and puffing.
The “Crushing” Technique: Don’t be afraid to gently scrunch or clap the hot flatbread between your hands immediately after taking it off the pan. This helps to loosen and separate the layers, making it even fluffier and more delightful to eat.
Flavor Variations:
- Savory Spiced Flatbread: Add 1/2 teaspoon of cumin powder, 1/4 teaspoon of turmeric, and a pinch of red chili flakes to the flour mixture for a savory twist. You can also mix finely chopped fresh herbs like cilantro or mint into the dough.
- Garlic & Herb: Brush the rolled dough with a mixture of melted ghee/oil, minced garlic, and chopped parsley before coiling.
- Cheese-Stuffed: After rolling out the final circle, place a small amount of shredded cheese (like mozzarella or cheddar) in the center, gather the edges to seal it, and then gently re-roll the ball into a flatbread.
- Sweetened Dough: Increase the sugar to 2-3 tablespoons in the dough for a sweeter flatbread, perfect for pairing with fruit or sweet toppings.
Make-Ahead Dough: The dough can be prepared ahead of time. After the first rest and dividing into balls, lightly oil each ball, place them in an airtight container, and refrigerate for up to 2 days. Bring them to room temperature for about 30-60 minutes before proceeding with the rolling and layering steps.
Storage and Reheating
Storing Cooked Flatbreads:
Once your flaky flatbreads are cooked and cooled, they can be stored for later enjoyment. For best results, allow them to cool completely to prevent condensation, which can make them soggy. Stack them with a piece of parchment paper between each flatbread to prevent sticking. Place the stack in an airtight container or a large zip-top bag.
- Room Temperature: Cooked flatbreads can be kept at room temperature for up to 1-2 days.
- Refrigeration: For longer storage, refrigerate the flatbreads for up to 4-5 days.
- Freezing: These flatbreads freeze exceptionally well. Wrap individual flatbreads tightly in plastic wrap, then place them in a freezer-safe bag or container. They can be frozen for up to 2-3 months.
Reheating Cooked Flatbreads:
The key to reheating is to bring them back to their warm, soft, and slightly crispy glory without drying them out. Avoid the microwave if possible, as it can make them chewy and tough.
- On the Stovetop (Recommended): This is the best method for restoring texture. Heat a non-stick pan or cast-iron skillet over medium heat. Place a flatbread directly onto the dry pan (no oil needed for reheating). Heat for 1-2 minutes per side, flipping once, until it’s warmed through and the layers begin to separate and crisp up again. You can add a tiny bit of ghee or oil if you want extra crispiness.
- In the Oven/Toaster Oven: Preheat your oven to 350°F (175°C). Place the flatbreads directly on a baking sheet. Heat for 3-5 minutes, or until warmed through and slightly crisp. If reheating from frozen, you can place them directly in the oven (no need to thaw) and heat for 8-10 minutes, or until hot and pliable.
Frequently Asked Questions
Why isn’t my flatbread getting flaky?
Flakiness comes from three main factors: generous oiling between layers, proper rolling and folding techniques to create distinct layers, and adequate resting time for the dough. Ensure you’re brushing enough melted ghee or oil onto the rolled dough before coiling, that you’re rolling the initial dough thinly, and that you’re giving the dough enough time to rest (both after kneading and after coiling) so the gluten can relax and the layers don’t stick together.
Can I use whole wheat flour instead of all-purpose flour?
Yes, you can, but it will result in a denser, less flaky flatbread. Whole wheat flour has more fiber and less gluten development for elasticity, so the texture will be different. You can try a 50/50 blend of whole wheat and all-purpose flour for a balance of flavor and texture, though you might need to adjust the water slightly as whole wheat flour absorbs more liquid.
My dough is too sticky or too dry, what should I do?
If your dough is too sticky after kneading, add a teaspoon of flour at a time and continue kneading until it reaches a smooth, pliable consistency that is no longer tacky. If the dough is too dry and crumbly, add a teaspoon of warm water at a time and knead until it becomes soft and elastic. Humidity and flour type can affect water absorption, so slight adjustments are common.
What’s the best fat to use for layering and cooking?
Melted ghee (clarified butter) is traditionally preferred for its rich flavor and high smoke point, which contributes to excellent browning and crispiness. Neutral oils like vegetable, canola, or sunflower oil are also excellent choices, especially if you prefer a dairy-free option or a milder flavor. Butter can be used, but it has a lower smoke point and can burn more easily, so keep an eye on the heat.