Instructions
- Prepare the Custard Base: In a medium-sized heavy-bottomed saucepan, whisk together 3/4 cup of the granulated sugar, all-purpose flour, and salt. This dry mixture will prevent lumps.
- Whisk in Egg Yolks: In a separate bowl, lightly beat the four large egg yolks. Gradually whisk the beaten egg yolks into the dry mixture in the saucepan until well combined and smooth.
- Add Milk and Cook: Gradually whisk in the whole milk until fully incorporated. Place the saucepan over medium heat, stirring constantly with a whisk, especially scraping the bottom corners, to prevent scorching.
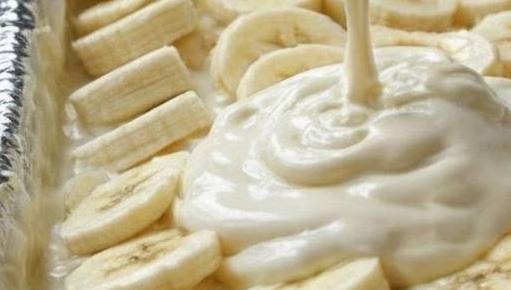
- Thicken the Custard: Continue to cook and stir until the mixture thickens significantly and comes to a gentle boil, about 8-10 minutes. Once boiling, reduce the heat to low and continue to cook, stirring for another minute or two, ensuring it’s thick enough to coat the back of a spoon. This smooth, thick consistency is key to our mind-blowing texture, as hinted at by the pouring custard in the image.
- Finish the Custard: Remove the saucepan from the heat. Stir in the unsalted butter until it’s completely melted and incorporated. Then, stir in the pure vanilla extract.
- Cool the Custard: Transfer the hot custard to a clean bowl. Press a piece of plastic wrap directly onto the surface of the custard to prevent a skin from forming. Allow it to cool completely to room temperature, then refrigerate for at least 2 hours, or until thoroughly chilled. This chilling step is crucial for the custard to firm up and for the flavors to meld beautifully.
- Prepare the Bananas: While the custard is chilling, slice your ripe bananas into uniform 1/4-inch rounds. If you’re concerned about browning, you can lightly toss them with a tiny amount of lemon juice, but the pudding layers will largely protect them.
- Whip the Cream: In a large, chilled mixing bowl, combine the cold heavy cream and powdered sugar. Beat with an electric mixer on medium-high speed until stiff peaks form. Be careful not to overbeat, or it will become grainy.
- Assemble the Pudding: This is where the magic of layering happens, as seen in the image! Choose a 9×13-inch baking dish or a large trifle bowl. Start by creating a single layer of vanilla wafers on the bottom of the dish.
- Add Bananas: Arrange a generous layer of sliced bananas over the vanilla wafers. As depicted in the image, ensure a good, even distribution of banana slices.
- Pour the Custard: Spoon or pour about one-third of the chilled custard evenly over the banana layer, making sure to cover all the bananas and wafers. The image perfectly illustrates this critical step of pouring the creamy custard.
- Repeat Layers: Repeat the layering process: another layer of vanilla wafers, followed by another layer of sliced bananas, and then another third of the custard.
- Final Layer: Add a third and final layer of vanilla wafers, followed by the remaining sliced bananas, and then the last of the creamy custard, spreading it smoothly to the edges.
- Top with Whipped Cream: Gently spread the prepared whipped cream over the top layer of custard, creating a beautiful, fluffy topping.
- Chill Thoroughly: Cover the dish loosely with plastic wrap and refrigerate for at least 6 hours, or preferably overnight. This extended chilling time is absolutely essential for the wafers to soften and for all the incredible flavors to fully develop and meld, transforming it into truly “blow your mind” banana pudding.
- Garnish and Serve: Before serving, you can garnish with a few extra vanilla wafers, fresh banana slices, or a sprinkle of cinnamon, if desired.
Cooking Tips and Variations
To truly achieve a “blow your mind” experience with this banana pudding, attention to detail is key. First and foremost, the bananas are critical. Use firm, ripe bananas – those that are bright yellow with just a few brown flecks. Avoid green bananas, which lack sweetness, and overly brown, mushy ones, which can turn the pudding watery and have an overpowering flavor. For the custard, constant whisking is non-negotiable. This prevents lumps and ensures a silky-smooth texture, which is a hallmark of a truly great banana pudding. Don’t rush the thickening process; it should be thick enough to coat the back of a spoon. When chilling the custard, pressing plastic wrap directly onto its surface prevents a “skin” from forming, keeping it perfectly smooth. The quality of your vanilla wafers also makes a difference; while store-bought are fine, seek out a good quality brand, or for an extra special touch, consider making homemade vanilla wafers. Finally, the chilling time is not a suggestion but a requirement. At least 6 hours, or ideally overnight, allows the wafers to soften to a cake-like consistency and the flavors to deepen and marry, transforming all the individual components into a cohesive, delicious dessert.
For variations, the possibilities are endless. To create a Caramel Banana Pudding, drizzle homemade or store-bought caramel sauce between the layers of custard and bananas. A pinch of sea salt with the caramel can elevate the flavor even further. For a decadent Chocolate Banana Pudding, fold 1/2 cup of melted dark chocolate into the warm custard after removing it from the heat, or add a layer of chocolate shavings during assembly. If you enjoy a boozy kick, a Bourbon-Spiked Banana Pudding is fantastic; simply add 2 tablespoons of good quality bourbon to the custard along with the vanilla extract. For a lighter touch, you could fold in 1/2 cup of toasted shredded coconut into the whipped cream topping. You can also experiment with different crunchy elements beyond vanilla wafers, such as shortbread cookies, graham crackers, or even a spiced ginger snap for a unique twist. For an elegant presentation, assemble the pudding in individual parfait glasses instead of a large dish. If you encounter common issues like a runny custard, ensure you cooked it long enough over medium heat until it visibly thickened and gently boiled. If your bananas are browning too quickly, remember that the custard layers will largely protect them, but a very light toss in lemon juice can help if you’re assembling far in advance. Don’t be afraid to experiment and make this recipe your own!
Storage and Reheating
This “Blow Your Mind Banana Pudding” is best enjoyed chilled and fresh, ideally within 2-3 days of assembly. To store leftovers, ensure the pudding is tightly covered with plastic wrap or transferred to an airtight container. This will help prevent the bananas from browning further and keep the custard fresh and creamy. Store it in the refrigerator. While the pudding is delicious on subsequent days as the flavors continue to meld, the vanilla wafers will soften more over time, and the bananas may become slightly softer. This dessert is not suitable for freezing, as the custard can separate and the bananas will turn mushy upon thawing, compromising the texture that makes this pudding so extraordinary. There is no need to reheat banana pudding; it is traditionally served cold, straight from the refrigerator, which enhances its refreshing and creamy qualities. Simply scoop and serve!
Frequently Asked Questions
How do I prevent my bananas from turning brown in the pudding?
While the layers of custard and whipped cream naturally protect the banana slices from excessive browning, you can take an extra step if you’re making the pudding far in advance or are particularly concerned. Lightly tossing the sliced bananas with about half a teaspoon of lemon juice or a fruit protector like Fruit Fresh can help. However, the slightly acidic custard also helps, and a little natural browning won’t affect the delicious flavor of this mind-blowing pudding.
Can I use instant pudding mix instead of making homemade custard?
While instant pudding mix would certainly make the recipe quicker, it won’t achieve the “blow your mind” creamy, rich, and deeply flavorful texture that homemade custard provides. The cooked custard is a cornerstone of what makes this recipe exceptional, offering a depth of flavor and luxurious mouthfeel that instant mixes simply can’t replicate. For the best results and a truly unforgettable banana pudding, we highly recommend making the custard from scratch.
My custard turned out lumpy. What did I do wrong?
Lumpy custard often occurs when the dry ingredients (sugar, flour, salt) aren’t thoroughly whisked together before adding the wet ingredients, or if the mixture isn’t stirred constantly while cooking. To avoid lumps, ensure you whisk the dry ingredients very well to break up any flour clumps. When adding the milk and cooking, stir continuously with a whisk, making sure to scrape the bottom and corners of the saucepan. If you do end up with a few lumps, you can easily press the warm custard through a fine-mesh sieve before chilling to achieve that silky-smooth texture.
How far in advance can I make this banana pudding?
For the absolute best taste and texture, this “Blow Your Mind Banana Pudding” should be assembled and chilled for at least 6 hours, but ideally overnight. While it can be made up to 2 days in advance, keep in mind that the vanilla wafers will soften more over time, becoming very cake-like. The bananas will also soften further. It’s generally at its prime within 12-24 hours after assembly, offering the perfect balance of softened wafers and fresh, creamy layers.