Instructions
- Line a 9×13 inch baking pan with parchment paper, leaving an overhang on the sides to easily lift the bars out later. Lightly grease the parchment paper with cooking spray.
- Prepare the Caramel Base: In a large, heavy-bottomed saucepan, combine the butter, light brown sugar, granulated sugar, heavy cream, and 1/2 teaspoon of salt.
- Place the saucepan over medium heat, stirring constantly until the butter is melted and the sugars are dissolved.
- Bring the mixture to a gentle boil, stirring occasionally. Reduce the heat to medium-low and continue to boil for 5-7 minutes, or until the caramel reaches 220°F (104°C) on a candy thermometer. If you don’t have a thermometer, drop a small amount into cold water; it should form a soft, pliable ball.
- Remove the caramel from the heat and stir in the vanilla extract.
- Immediately add the crispy rice cereal and chopped peanuts to the caramel mixture. Stir gently but quickly until all the cereal and nuts are evenly coated with the caramel.
- Pour the caramel-cereal mixture into the prepared 9×13 inch pan. Using a spatula or the back of a greased spoon, firmly and evenly press the mixture into the bottom of the pan. Make sure it’s packed down well to create a solid base.
- Allow the caramel base to cool at room temperature for at least 30 minutes, or place it in the refrigerator for 15-20 minutes, until it is firm to the touch.
- Prepare the Chocolate Topping: In a microwave-safe bowl, combine the milk chocolate chips, semi-sweet chocolate chips, and optional vegetable or coconut oil.
- Microwave on medium power in 30-second intervals, stirring well after each interval, until the chocolate is completely melted and smooth. Be careful not to overheat the chocolate, as it can seize. Alternatively, you can melt the chocolate using a double boiler method.
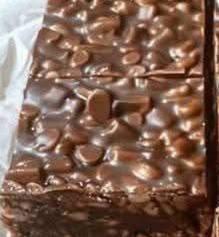
- Once the caramel base is firm, pour the melted chocolate evenly over the top. Use an offset spatula or the back of a spoon to spread the chocolate all the way to the edges, creating a smooth layer.
- If desired, sprinkle flaky sea salt over the melted chocolate immediately after spreading.
- Return the pan to the refrigerator for at least 1-2 hours, or until the chocolate layer is completely set and firm.
- Once fully set, use the parchment paper overhangs to carefully lift the entire slab out of the pan and onto a cutting board.
- Using a large, sharp knife (you can lightly warm the knife under hot water and wipe it dry for cleaner cuts), cut the bars into desired sizes. A 6×4 grid will yield 24 bars.
- Store the Caramel Chocolate Crunch Bars in an airtight container.
Cooking Tips and Variations
Perfect Caramel Consistency: Achieving the right caramel consistency is key. Using a candy thermometer is highly recommended for accuracy. If your caramel doesn’t reach 220°F (104°C), it might be too soft and the bars could be sticky. Don’t rush the caramel-making process; patience pays off!
Preventing Chocolate Seizing: When melting chocolate, stir frequently and heat gently. Moisture is chocolate’s enemy, so ensure your bowl and utensils are completely dry. Adding a touch of vegetable or coconut oil helps create a smoother, more pourable chocolate that’s less prone to seizing, and gives it a nice shine.
Clean Cuts: For neat, professional-looking bars, use a large, sharp knife. For even cleaner cuts, run your knife under hot water for a few seconds, wipe it completely dry, and then make your cuts. Repeat this process as needed. This helps to melt through the chocolate slightly, preventing cracking.
Nut Variations: While salted peanuts offer a fantastic salty-sweet crunch, feel free to experiment with other nuts. Chopped almonds, pecans, or even walnuts would be delicious. For a nut-free version, simply omit them or replace them with an equal amount of additional crispy rice cereal.
Chocolate Choice: Adjust the chocolate to your preference. A mix of milk and semi-sweet offers a balanced sweetness, but you could use all milk chocolate for a sweeter bar or all dark chocolate for a more intense, less sweet flavor. White chocolate could also be used for a decorative drizzle.
Add-ins for the Base: For extra flavor and texture in the crunch layer, consider adding a handful of mini pretzels (for extra saltiness and crunch) or even a sprinkle of mini marshmallows (they’ll melt into the caramel slightly).
Flaky Sea Salt: Don’t skip the flaky sea salt! It’s optional but highly recommended. The touch of salt perfectly balances the sweetness of the caramel and chocolate, elevating the entire flavor profile.
Storage and Reheating
Caramel Chocolate Crunch Bars are best stored in an airtight container at room temperature for up to 5-7 days. If your kitchen is particularly warm, you can store them in the refrigerator, but allow them to come to room temperature for about 15-20 minutes before serving for the best texture (the chocolate and caramel will be quite firm when cold).
For longer storage, these bars freeze beautifully. Place them in a single layer on a baking sheet and freeze until firm (about 1-2 hours). Then, transfer them to a freezer-safe airtight container or freezer bag, separating layers with parchment paper to prevent sticking. They can be frozen for up to 2-3 months. Thaw them at room temperature for several hours or overnight in the refrigerator before enjoying. Reheating is not recommended for these bars, as it can alter the texture of the chocolate and caramel. They are best enjoyed at room temperature.
Frequently Asked Questions
Why did my caramel turn out too hard or too soft?
The most common reason for caramel issues is not reaching the correct temperature. If your caramel is too hard, it was likely cooked to too high a temperature. If it’s too soft and sticky, it didn’t reach a high enough temperature. Using a candy thermometer is crucial for consistent results, aiming for 220°F (104°C) for a soft, chewy caramel.
Can I use store-bought caramel for this recipe?
While you could technically use melted store-bought caramel, it might result in a different texture than the homemade caramel. Store-bought caramels are often softer and might not hold the crispy cereal as well once set. For the best “crunch bar” experience, the homemade caramel provides the perfect binding and chewiness.
My chocolate layer cracked when I cut the bars. How can I prevent this?
Cracking often happens if the chocolate is too cold and brittle when cut. Ensure your knife is very sharp, and for the cleanest cuts, warm the knife under hot water, wipe it completely dry, and then slice. The warmth helps the knife glide through the chocolate without breaking it. You can also let the bars sit at room temperature for 10-15 minutes before cutting if they came directly from the refrigerator.