Instructions
- Prepare Your Workspace: Clear a large, clean surface for rolling. Gather your tools: a large mixing bowl, a pastry blender (or your fingertips), a sturdy rolling pin, and a piece of plastic wrap. Ensure your butter is straight from the refrigerator and cut into small, uniform cubes. Have your ice water ready.
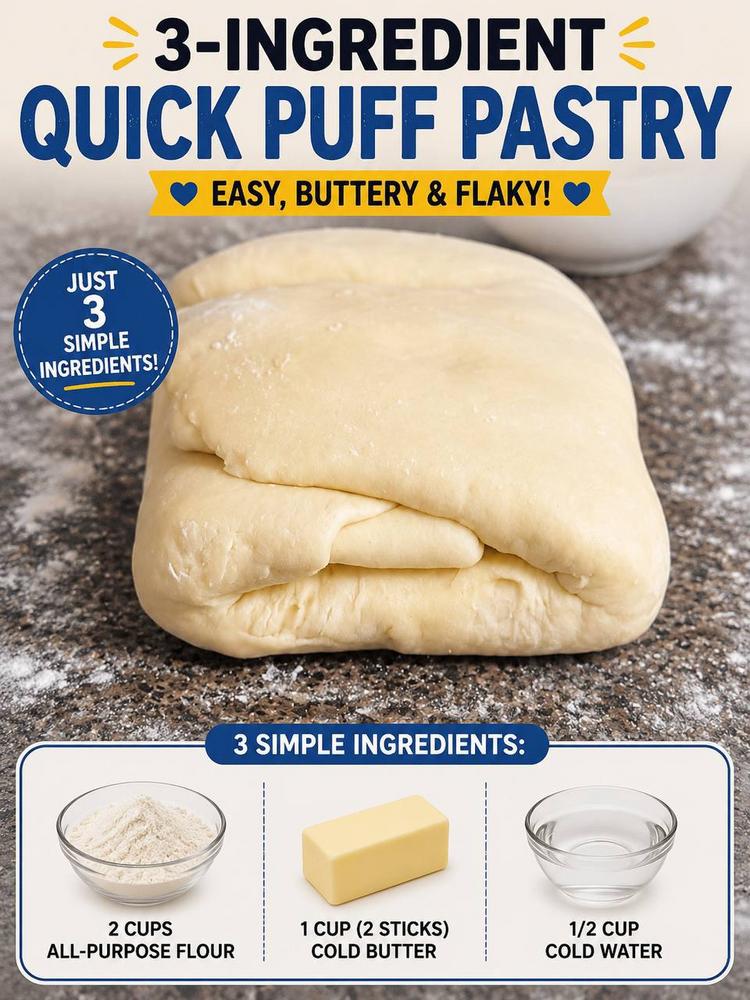
- Combine Flour and Butter: In the large mixing bowl, add the 2 cups of all-purpose flour. Add the very cold, cubed butter to the flour. Using a pastry blender, or your fingertips, cut the butter into the flour until the mixture resembles coarse crumbs with some pea-sized and even slightly larger chunks of butter remaining. It’s crucial not to overwork the butter here; visible chunks are essential for creating those flaky layers. The goal is to coat the butter in flour while keeping it as cold as possible.
- Add Cold Water: Gradually add the 1/2 cup of ice water, a tablespoon at a time, mixing lightly with a fork or your hands until the dough just comes together into a shaggy mass. You may not need all the water, or you might need an extra tablespoon or two, depending on the humidity and your flour. The dough should be moist enough to hold together but not sticky. Avoid kneading; simply bring the dough together.
- Form and Chill the Dough: Turn the shaggy dough out onto a lightly floured surface. Gently press and gather it into a rough rectangle. Wrap the dough tightly in plastic wrap and refrigerate for at least 30 minutes. This chilling period is vital as it allows the gluten to relax and the butter to firm up, making the dough easier to handle.
- First Roll and Fold (Turn 1): Lightly flour your work surface and rolling pin. Unwrap the chilled dough and place it on the floured surface. Roll the dough into a rectangle approximately 1/2-inch thick, about 16×8 inches (don’t worry about perfect dimensions, just aim for a general rectangle). Try to keep the edges as straight as possible.
- Perform a Letter Fold: Imagine dividing the dough into three equal sections lengthwise. Fold one-third of the dough over the middle section, then fold the remaining third over that, as if folding a letter. You should now have a three-layered rectangle. Gently press down on the edges to seal.
- Chill Again: Rotate the dough 90 degrees (so the open edges are facing left and right). Wrap it tightly in plastic wrap and return it to the refrigerator for another 20-30 minutes. This chilling step is essential after each fold to keep the butter cold and prevent it from melting into the dough, which would inhibit flakiness.
- Second Roll and Fold (Turn 2): Unwrap the chilled dough and place it back on your lightly floured surface. Roll it out again into a rectangle, aiming for similar dimensions as before (approx. 16×8 inches). Once again, perform the letter fold as described in step 6.
- Final Chill: Rotate the dough 90 degrees, wrap it securely in plastic wrap, and refrigerate for at least 30 minutes, or up to 2 days, before using. This final chill allows the layers to set properly and the gluten to fully relax, resulting in a tender and flaky pastry. For best results, a longer chill (1-2 hours) is ideal before its final use.
- Ready to Use: When you’re ready to bake, remove the dough from the refrigerator and let it sit at room temperature for 5-10 minutes to make it slightly more pliable, but still very cold. Roll it out to your desired thickness for your chosen recipe.
Cooking Tips and Variations
Achieving that coveted flaky texture in rough puff pastry relies heavily on temperature control and proper handling. Here are some essential tips and variations to ensure your success:
- Keep Everything Cold: This is the golden rule for puff pastry. Use ice-cold butter, ice water, and even consider chilling your flour in the freezer for 15-20 minutes before starting if your kitchen is warm. Cold ingredients prevent the butter from melting into the dough, which is what creates those distinct layers. If at any point the butter feels too soft or starts to ooze, immediately return the dough to the refrigerator for a quick chill (15-20 minutes) before continuing.
- Don’t Overwork the Dough: Handle the dough as little as possible. Overworking develops gluten, leading to a tough rather than tender pastry. When mixing, just bring the ingredients together. When rolling, use even, firm strokes, but avoid excessive pressure or stretching.
- Visible Butter Chunks are Good: Unlike traditional pastry where butter is fully incorporated, in rough puff, you want to see distinct pieces of butter (pea-sized to small almond-sized) distributed throughout the dough after the initial mixing. These chunks will flatten into layers during rolling and folding, creating pockets that steam and puff in the oven.
- Chill Between Folds: Never skip the chilling steps between each roll and fold. This allows the butter to re-solidify and the gluten to relax, making the dough easier to roll without tearing and preventing the butter from squishing out.
- Light Flour Dusting: Use just enough flour to prevent sticking, but no more. Too much extra flour can dry out the dough and make it tough. Brush off any excess flour before folding.
- Rolling Technique: When rolling, apply even pressure from the center outwards. If the dough resists, let it rest for a few minutes to allow the gluten to relax before continuing. Roll in one direction, then rotate, rather than rolling back and forth over the same spot repeatedly.
- Letter Fold vs. Book Fold: This recipe uses a simple letter fold (folding into thirds). For even more layers and puff, you could try a “book fold” (folding both ends towards the center, then folding in half like a book), but the letter fold is perfectly sufficient for a fantastic rough puff.
- Egg Wash for Golden Finish: For a beautiful golden sheen on your baked goods, brush the top surface of the pastry with an egg wash (one egg beaten with a tablespoon of water or milk) before baking.
- Baking Temperature: Most puff pastry recipes call for a high initial baking temperature (e.g., 400-425°F or 200-220°C) to create a rapid burst of steam that forces the layers apart, followed by a slightly lower temperature to cook through and brown. Always follow the specific baking instructions of the recipe you’re using the pastry for.
Storage and Reheating
Proper storage is key to extending the life of your homemade rough puff pastry, allowing you to prepare it in advance and use it when inspiration strikes.
- Unbaked Dough in the Refrigerator: After its final fold and chill, the unbaked dough can be stored tightly wrapped in plastic wrap in the refrigerator for up to 2-3 days. Ensure it’s sealed well to prevent it from drying out or absorbing odors from other foods. When ready to use, remove it from the fridge 5-10 minutes before rolling to make it slightly more pliable, but still very cold.
- Unbaked Dough in the Freezer: For longer storage, wrap the finished dough rectangle tightly in several layers of plastic wrap, then an additional layer of aluminum foil, or place it in an airtight freezer bag. It can be frozen for up to 1 month. To use, transfer the frozen dough to the refrigerator and thaw overnight. Do not attempt to thaw at room temperature, as this can cause the butter to melt and separate from the dough. Once thawed, proceed with rolling and baking as usual. Do not refreeze thawed unbaked pastry.
- Baked Pastry: Baked puff pastry is best enjoyed fresh, as its crispness is at its peak. However, leftovers can be stored.
- Room Temperature: If left at room temperature, baked puff pastry will soften within a few hours. It’s generally not recommended for extended storage this way, especially if it contains fillings.
- Refrigerator: For items like savory pastries or tarts with fillings, store loosely covered in the refrigerator for 1-2 days.
- Freezer: Plain baked puff pastry (e.g., palmiers, pastry shells) can be frozen in an airtight container for up to 2 weeks.
- Reheating Baked Pastry:
- For Crispness: To restore some of the crispness to baked puff pastry (especially plain items or those with dry fillings), reheat in a preheated oven or toaster oven at 300-325°F (150-160°C) for 5-10 minutes, or until warmed through and re-crisped. Avoid microwaving, as this will make the pastry soggy.
- For Filled Pastries: Reheat savory filled pastries in a conventional oven at 350°F (175°C) until warmed through, usually 10-15 minutes, depending on the size and filling. Cover loosely with foil if the top is browning too quickly.
Frequently Asked Questions
What is the difference between “rough puff” and traditional puff pastry?
The main difference lies in the butter incorporation and lamination process. Traditional puff pastry involves encasing a solid block of butter within a sheet of dough and then repeatedly folding and rolling (up to 6 times) to create hundreds of distinct, thin layers. Rough puff, on the other hand, cuts cold butter into the flour mixture, leaving visible chunks, before performing fewer folds (typically 2-3). This simpler method is quicker and less precise but still yields excellent flakiness because the butter chunks flatten into layers during rolling and folding, creating steam pockets when baked.
Why is it so important to keep the butter and water cold?
Keeping the butter and water cold is absolutely critical for flaky puff pastry. Cold butter remains solid and in distinct pieces throughout the mixing and rolling process. When the pastry bakes, these solid butter pieces melt and release steam, which pushes apart the layers of dough, creating that characteristic puff and flakiness. If the butter melts or softens too much before baking, it gets absorbed into the dough, resulting in a tougher, less flaky, and more cookie-like texture.
Can I make this pastry without a pastry blender?
Yes, absolutely! While a pastry blender is convenient, you can achieve the same results using your fingertips or two knives. If using your fingertips, work quickly and lightly to rub the cold butter into the flour until pea-sized chunks remain, being careful not to overwork the dough or allow the heat from your hands to melt the butter. If using two knives, cross them through the butter and flour mixture, repeatedly cutting the butter until it reaches the desired consistency.