Instructions
- Prepare the Chicken Wings: Thoroughly pat the chicken wings dry with paper towels. This step is crucial for achieving crispy skin. In a large bowl, toss the dried wings with baking powder, salt, and black pepper until evenly coated. The baking powder helps to draw out moisture and crisp up the skin.
- Chill the Wings (Optional but Recommended): For even crispier results, arrange the seasoned wings in a single layer on a wire rack set over a baking sheet. Refrigerate uncovered for at least 1 hour, or preferably overnight. This allows the skin to dry out further.
- Preheat Oven and Bake Wings: Preheat your oven to 400°F (200°C). If you chilled the wings, remove them from the refrigerator. Arrange the wings in a single layer on a wire rack set over a baking sheet (line the baking sheet with foil for easier cleanup). Bake for 45-50 minutes, flipping halfway through, until the wings are golden brown and crispy, and the internal temperature reaches 165°F (74°C).
- Prepare the Glaze: While the wings are baking, prepare the glaze. In a medium saucepan, combine the soy sauce, honey (or maple syrup), brown sugar, rice vinegar, grated ginger, minced garlic, sesame oil, and red pepper flakes (if using). Bring the mixture to a gentle simmer over medium heat, stirring occasionally, until the sugar dissolves.
- Thicken the Glaze: Once the glaze is simmering, whisk in the cornstarch slurry (cornstarch mixed with cold water). Continue to simmer, stirring constantly, for 2-3 minutes, or until the glaze thickens to a syrupy consistency that coats the back of a spoon. Remove from heat.
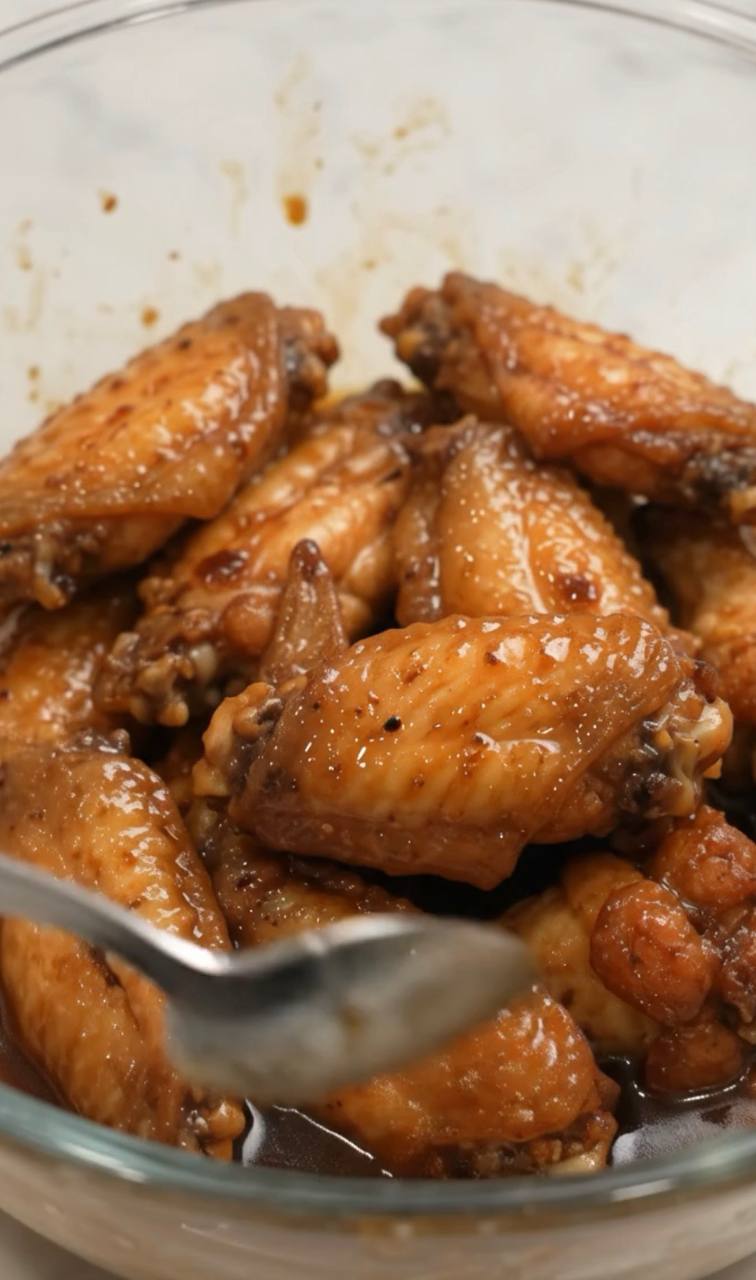
- Glaze the Wings: Once the wings are cooked and crispy, remove them from the oven. Transfer the hot wings to a large bowl. Pour about two-thirds of the prepared glaze over the wings. Using tongs or a large spoon, toss the wings gently until they are evenly coated with the sticky glaze.
- Final Bake/Broil for Caramelization: For an extra sticky and caramelized finish, you have two options:
- Option A (Bake): Return the glazed wings to the wire rack on the baking sheet. Bake for another 10-15 minutes at 400°F (200°C), flipping once, until the glaze is bubbling and caramelized.
- Option B (Broil): If you prefer a quicker, more charred finish, set your oven to broil. Place the glazed wings back on the wire rack. Broil for 2-4 minutes, watching them very carefully to prevent burning, until the glaze is bubbly and slightly charred in spots.
- Serve: Transfer the glazed wings to a serving platter. Drizzle with the remaining glaze (you can warm it slightly if it has cooled and thickened too much). Garnish with sesame seeds and chopped green onions, if desired. Serve immediately and enjoy your irresistible glazed chicken wings!
Cooking Tips and Variations
Achieving truly perfect chicken wings is an art, but with a few simple tricks and some creative variations, you can master it every time. The key is to focus on both texture and flavor, ensuring each bite is a memorable experience.
Tips for Best Results:
- The Power of Patting Dry: This cannot be stressed enough. Moisture is the enemy of crispy skin. Use plenty of paper towels to thoroughly dry each wing piece before seasoning. The drier they are, the crispier they’ll get.
- Baking Powder is Your Friend: Aluminum-free baking powder, when mixed with salt and pepper, creates tiny air bubbles on the chicken skin as it cooks. These bubbles expand and help render the fat, leading to an incredibly crispy, almost crackly skin. Don’t skip this step!
- Don’t Overcrowd the Pan: When baking or air frying, ensure the wings are in a single layer with enough space between them. Overcrowding traps steam, which prevents browning and crisping. If necessary, cook in batches.
- Wire Rack for Even Cooking: Baking wings on a wire rack set over a baking sheet allows air to circulate all around the wings. This promotes even cooking and ensures the bottom of the wings gets just as crispy as the top.
- Reserve Some Glaze: Always set aside a small amount of the glaze before tossing the wings. This reserved glaze can be warmed and drizzled over the finished wings for an extra burst of flavor and a beautiful presentation. It’s also great for dipping!
- Internal Temperature Matters: Always cook chicken wings to an internal temperature of 165°F (74°C) to ensure they are safe to eat. A meat thermometer is a valuable tool for this.
- Broil for the Finish: A quick broil at the very end (after glazing) is a fantastic way to caramelize the glaze further, creating those delightful slightly charred bits and enhancing the sticky texture. Keep a close eye on them, as broilers can be intense and burn quickly.
Recipe Variations:
- Spicy Kick: If you love heat, increase the amount of red pepper flakes in the glaze. You can also add a dash of cayenne pepper or a teaspoon of sriracha to the glaze mixture for a more intense spice.
- Smoky BBQ Wings: Replace the soy sauce and rice vinegar with your favorite BBQ sauce. Add a teaspoon of liquid smoke to the glaze for an authentic smoky flavor. Finish with a sprinkle of smoked paprika.
- Lemon-Garlic Herb: For a brighter, fresher flavor, omit the soy sauce and brown sugar. Instead, use lemon juice, olive oil, minced garlic, dried oregano, and thyme in your glaze. Finish with fresh parsley.
- Asian Orange Zest: Add the zest of one orange and 2 tablespoons of fresh orange juice to the glaze for a bright, citrusy note that complements the ginger and soy.
- Honey Mustard: Combine honey, Dijon mustard, a touch of apple cider vinegar, and a pinch of garlic powder for a classic and beloved flavor profile.
- Sweet Chili: Use a store-bought sweet chili sauce as the base for your glaze, enhancing it with a bit of extra garlic, ginger, and a splash of lime juice.
- Garlic Parmesan: After baking the wings, toss them in melted butter, minced garlic, and a generous amount of grated Parmesan cheese instead of a sticky glaze.
Storage and Reheating
While glazed chicken wings are undoubtedly best enjoyed fresh out of the oven, sometimes you have leftovers, or you want to make a batch ahead of time. Proper storage and reheating techniques will ensure your wings remain delicious.
Storage:
Allow the cooked and glazed chicken wings to cool completely to room temperature (this prevents condensation, which can make them soggy). Once cooled, transfer them to an airtight container. Store in the refrigerator for up to 3-4 days. For longer storage, you can freeze glazed chicken wings for up to 2-3 months. To freeze, arrange the cooled wings in a single layer on a baking sheet and freeze until solid. Once frozen, transfer them to a freezer-safe bag or container, separating layers with parchment paper to prevent sticking.
Reheating:
Reheating glazed chicken wings requires a method that will crisp up the skin again without drying out the meat or making the glaze gummy.
- Oven (Recommended for Best Results): Preheat your oven to 350°F (175°C). Arrange the wings in a single layer on a wire rack set over a baking sheet. Reheat for 15-20 minutes, or until heated through and the skin is crispy again. If they seem dry, you can brush them with a little extra fresh glaze or a tiny bit of water or chicken broth before reheating.
- Air Fryer: This is an excellent method for reheating wings, as it quickly restores crispiness. Preheat your air fryer to 375°F (190°C). Place the wings in a single layer in the air fryer basket (do not overcrowd). Cook for 6-8 minutes, shaking the basket halfway through, until hot and crispy.
- Microwave (Not Recommended for Crispiness): While you can microwave wings to heat them through, this method will make the skin soft and the glaze sticky and potentially chewy. Only use the microwave if you prioritize speed over texture. Heat in 30-second intervals until warmed through.
Frequently Asked Questions
What makes the chicken skin crispy when baking?
The key to crispy skin when baking lies in two main factors: patting the wings thoroughly dry and using baking powder. Patting dry removes surface moisture, which is essential because moisture creates steam and prevents browning. Baking powder, when combined with salt, raises the pH level of the chicken skin, which helps break down proteins and create tiny air bubbles. These bubbles expand during cooking, leading to a much crispier, almost crackly texture. Additionally, baking on a wire rack allows for 360-degree air circulation, further promoting even crisping.
Can I use whole chicken wings instead of split drumettes and flats?
Yes, you can absolutely use whole chicken wings. However, you’ll need to adjust the cooking time. Whole wings will take longer to cook through, typically an additional 10-15 minutes, depending on their size. It’s also a good idea to separate the drumette, flat, and tip yourself before cooking, as this allows for more even cooking and makes them easier to eat. Simply locate the joints and cut through them with a sharp knife or kitchen shears.
How far in advance can I make the glaze?
The glaze can be made well in advance, which is a great time-saver. You can prepare the glaze up to 3-4 days ahead of time and store it in an airtight container in the refrigerator. When you’re ready to use it, gently reheat the glaze in a small saucepan over low heat, stirring frequently, until it’s warmed through and pourable. If it’s too thick, you can thin it with a tablespoon or two of water or chicken broth until it reaches your desired consistency.
My glaze isn’t thick enough. What did I do wrong?
If your glaze isn’t thickening, it’s likely due to one of two reasons: either it hasn’t simmered long enough for the cornstarch to activate, or you didn’t add enough cornstarch. Ensure you bring the glaze to a gentle simmer after adding the cornstarch slurry and let it cook for at least 2-3 minutes, stirring constantly. If it still isn’t thickening, you can create a second slurry with another 1 teaspoon of cornstarch mixed with 1 tablespoon of cold water, and slowly whisk it into the simmering glaze until it reaches your desired consistency. Be careful not to add too much at once, as it can thicken quickly.