Instructions
- Prepare Your Workspace: Line two large baking sheets with parchment paper or silicone baking mats. This will prevent the clusters from sticking and make cleanup much easier. Set them aside.
- Melt the Chocolate: Combine the milk chocolate chips/chopped chocolate, semi-sweet chocolate chips/chopped chocolate, and the optional butter in a large, microwave-safe bowl. Heat in the microwave on high power for 30-second intervals, stirring thoroughly after each interval. Continue heating and stirring until the chocolate is completely melted and smooth. This usually takes about 1.5 to 3 minutes total, depending on your microwave’s wattage. Alternatively, you can melt the chocolate in a double boiler over simmering water, stirring constantly until smooth. Be very careful not to get any water or steam into the chocolate, as this can cause it to seize.
- Add the Peanuts: Once the chocolate is fully melted and smooth, add the 4 cups of dry roasted, salted peanuts to the bowl. Use a sturdy spatula or spoon to fold the peanuts into the chocolate, ensuring every peanut is thoroughly coated. Mix gently but efficiently until all the peanuts are evenly distributed throughout the chocolate mixture.
- Form the Clusters: Using a tablespoon or a small cookie scoop (a 1.5-inch scoop works well for uniform clusters), drop spoonfuls of the chocolate-peanut mixture onto the prepared baking sheets. Leave a little space between each cluster. Aim for roughly 20-24 clusters, depending on your desired size.
- Add Optional Sea Salt: If desired, immediately sprinkle a tiny pinch of flaky sea salt over the top of each wet chocolate cluster. The salt will adhere as the chocolate cools, adding an extra layer of flavor and visual appeal.
- Set the Clusters: Allow the clusters to set completely. You can do this at room temperature, which will take 1-2 hours depending on the warmth of your kitchen. For faster setting, place the baking sheets in the refrigerator for 20-30 minutes, or until the chocolate is firm to the touch. Once set, gently peel the clusters off the parchment paper.
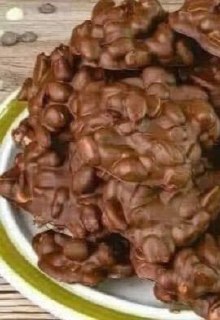
- Serve and Enjoy: Once firm, your Chocolate Peanut Clusters are ready to be enjoyed!
Cooking Tips and Variations
For the best Chocolate Peanut Clusters, attention to a few details can make all the difference. When melting chocolate, especially in the microwave, go slowly. Overheating chocolate is a common mistake that can lead to a grainy or seized texture. Always stir well after each short burst of heat to distribute the warmth and prevent scorching. If using a double boiler, ensure the bottom of the bowl does not touch the simmering water, and absolutely no steam or water gets into your chocolate, as even a tiny drop can cause it to seize and become unusable. Adding a teaspoon of coconut oil or vegetable shortening along with the butter can also help create an even smoother, more pliable chocolate coating, making it easier to work with.
The type of chocolate you choose significantly impacts the final taste. While milk chocolate provides a classic, sweet flavor, a blend of milk and semi-sweet offers a more balanced sweetness with a deeper chocolate note, which is why this recipe suggests using both. For a more intense, less sweet cluster, you could use all semi-sweet chocolate or even a high-quality dark chocolate (60-70% cacao). White chocolate clusters are also a delicious option, though they tend to be sweeter. You can also vary the nuts; while peanuts are traditional, try substituting or combining them with roasted almonds, cashews, pecans, or walnuts for different flavor profiles. Just make sure they are roasted and salted to provide that crucial counterpoint to the sweet chocolate.
Beyond nuts and chocolate, there are endless ways to customize your clusters. For an extra layer of flavor, try adding a teaspoon of pure vanilla extract to the melted chocolate before adding the peanuts. A pinch of cinnamon or a tiny dash of cayenne pepper can also introduce an interesting warmth or subtle spice. For added texture, consider stirring in a cup of crispy rice cereal along with the peanuts for a delightful crunch. Decorative additions are also fun; think sprinkles for a festive touch, or a drizzle of contrasting melted white chocolate over the set dark chocolate clusters for an elegant finish. For a truly gourmet feel, a sprinkle of high-quality flaky sea salt (like Maldon) on top of the still-wet clusters is a must, enhancing both the flavor and visual appeal.
Storage and Reheating
Chocolate Peanut Clusters are wonderfully easy to store and maintain their deliciousness for an extended period. Once fully set, transfer the clusters to an airtight container. If you need to stack them, place a piece of parchment paper between layers to prevent them from sticking together. Store the container at room temperature in a cool, dry place away from direct sunlight. Stored this way, they will remain fresh and delicious for up to 2 weeks. In warmer climates or during summer months, or if your kitchen tends to be warm, storing them in the refrigerator is a good option. However, be aware that refrigerating chocolate can sometimes cause a slight “bloom” (a white, powdery film on the surface) due to sugar or fat crystallization, which is harmless but can affect the appearance. If refrigerated, let them come to room temperature for 10-15 minutes before serving for the best texture and flavor. Freezing is also an option for longer storage; place the set clusters in an airtight freezer-safe container or bag for up to 3 months. Thaw them in the refrigerator overnight or at room temperature for a few hours before serving. There is no “reheating” required for these clusters, as they are meant to be enjoyed at room temperature or slightly chilled.
Frequently Asked Questions
Why did my chocolate seize or become grainy?
Chocolate seizes when even a tiny amount of water or steam comes into contact with it during melting. This causes the sugar in the chocolate to crystallize, turning it thick, lumpy, and unusable. To prevent this, ensure your melting bowl and utensils are completely dry. If using a double boiler, make sure the water is simmering gently, not boiling vigorously, and that the bottom of your bowl doesn’t touch the water. When microwaving, heat in short intervals and stir thoroughly to prevent overheating, which can also lead to a grainy texture.
Can I use any type of peanuts?
For the best results, use dry roasted, salted peanuts. The roasting process enhances their flavor and crunch, and the salt provides a crucial salty counterpoint to the sweet chocolate. Raw peanuts will not have the same flavor or texture. Avoid using honey-roasted or heavily flavored peanuts, as their coatings might not adhere well to the chocolate, and their sweetness could overwhelm the clusters.
How can I make these clusters set faster?
The quickest way to set chocolate peanut clusters is to place the baking sheets in the refrigerator. They will usually be firm and ready to eat within 20-30 minutes. If you’re in a hurry, the freezer can also work, but be cautious not to leave them in for too long, as extreme cold can sometimes cause chocolate to bloom or become brittle.
Can I make these dairy-free or vegan?
Yes, you can absolutely make dairy-free or vegan chocolate peanut clusters! Simply use a high-quality dairy-free chocolate (many brands of dark chocolate are naturally dairy-free, but always check the ingredients) and omit the butter. The process remains the same. Ensure your peanuts are also plain roasted and salted without any animal-derived ingredients.