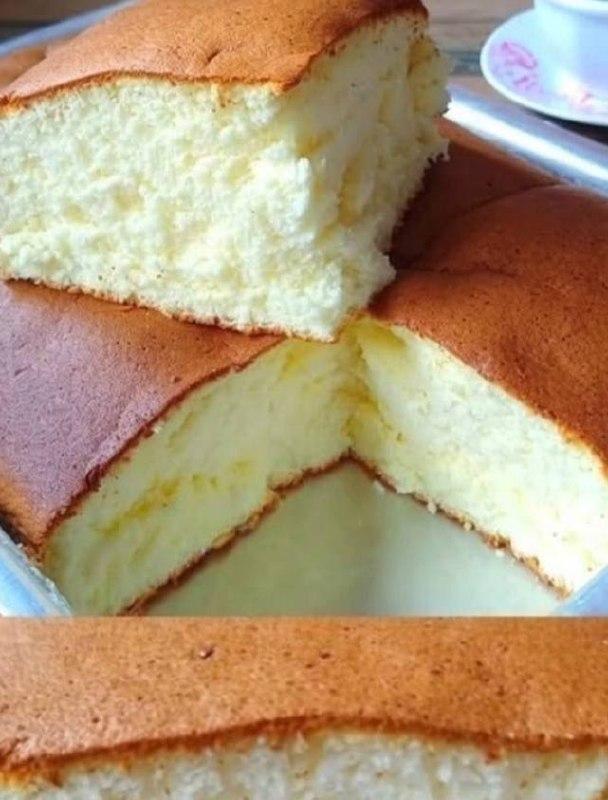
Instructions
- Preheat your oven to 350°F (175°C). Grease and flour a 9×13 inch baking pan, or line with parchment paper, leaving an overhang on the sides for easy removal.
- In a medium bowl, whisk together the sifted all-purpose flour, baking powder, and salt. Set aside.
- In a large, clean, dry bowl, using an electric mixer with the whisk attachment, beat the egg whites on medium speed until foamy. Add the cream of tartar (if using) and continue beating. Gradually add ½ cup (100g) of the granulated sugar, 1 tablespoon at a time, continuing to beat on high speed until stiff, glossy peaks form. Be careful not to overbeat. Set aside.
- In another large bowl, using the same electric mixer (no need to clean the beaters if you’re careful), beat the egg yolks with the remaining ½ cup (100g) of granulated sugar on high speed until the mixture is pale yellow, thick, and almost ribbons when the beaters are lifted (this will take 3-5 minutes).
- Reduce the mixer speed to low and gradually beat in the warmed milk, melted and cooled butter, and pure vanilla extract into the egg yolk mixture until just combined. Do not overmix.
- Add about one-third of the dry ingredients to the egg yolk mixture and gently fold them in with a spatula until just incorporated. Repeat with the remaining dry ingredients in two more additions, folding gently until no streaks of flour remain. Be careful not to deflate the mixture.
- Now, gently fold in about one-third of the whipped egg whites into the batter to lighten it. This step helps to incorporate the remaining egg whites more easily without deflating the batter.
- Add the remaining whipped egg whites to the batter in two additions, folding very gently with a spatula until just combined. The key here is to maintain as much air as possible in the batter. Overmixing will result in a dense cake.
- Pour the batter evenly into the prepared 9×13 inch baking pan. Gently tap the pan on the counter a few times to release any large air bubbles.
- Bake for 25-30 minutes, or until the cake is golden brown, springs back when lightly touched in the center, and a wooden skewer or toothpick inserted into the center comes out clean.
- Remove the cake from the oven and let it cool in the pan on a wire rack for 10-15 minutes.
- After cooling slightly, carefully invert the cake onto the wire rack to cool completely. If you used parchment paper, you can lift it out by the overhang. Peel off the parchment paper if used.
- Once completely cool, your Classic Vanilla Sponge Sheet Cake is ready to be frosted, decorated, or enjoyed plain!
Cooking Tips and Variations
Achieving the perfect Classic Vanilla Sponge Sheet Cake is all about technique and attention to detail. For the lightest, most ethereal crumb, ensure your eggs are at room temperature. Cold eggs don’t whip to the same volume as room temperature eggs, which is crucial for the airiness of a sponge. When separating eggs, be meticulous; even a tiny speck of yolk in the whites can prevent them from whipping properly. Use a very clean, dry bowl for whipping egg whites – any grease or moisture will hinder their ability to stiffen. The cream of tartar, though optional, acts as a stabilizer, helping the egg whites maintain their volume and structure. When folding ingredients, always use a gentle hand and a spatula, cutting down through the center and folding over, rotating the bowl as you go. This technique preserves the air incorporated into the eggs, which is the primary leavening agent for a truly light sponge. Overmixing develops gluten, leading to a tough, rubbery cake, so stop folding as soon as no streaks of flour or egg white are visible.
To ensure your cake doesn’t stick, proper pan preparation is key. Greasing and flouring the pan thoroughly, or lining it with parchment paper that extends beyond the edges, will make removal much easier. Once baked, avoid opening the oven door too early, as the sudden temperature change can cause the cake to sink. Test for doneness by gently pressing the center – if it springs back, it’s ready. A clean toothpick inserted into the center is another reliable indicator. Allow the cake to cool completely on a wire rack before frosting or cutting; cooling in the pan for too long can make the bottom soggy, while cutting it warm can cause it to crumble.
This versatile vanilla sponge is a blank canvas for your culinary creativity. For a simple yet elegant finish, dust with powdered sugar or spread with a classic vanilla buttercream. Elevate it with a lemon curd filling and a light meringue frosting for a zesty twist, or layer it with whipped cream and fresh berries for a delightful summer dessert. To vary the flavor, you can infuse the milk with citrus zest before warming, or replace a portion of the vanilla extract with almond extract for a subtle nutty note. For a chocolate version, substitute a small amount of the flour with unsweetened cocoa powder. This recipe can also be adapted for cupcakes or mini cakes by adjusting the baking time; simply reduce the baking time and monitor closely for doneness. Experiment with different glazes, from a simple lemon glaze to a rich chocolate ganache, to transform this basic cake into a showstopper for any occasion.
Storage and Reheating
For optimal freshness, store your Classic Vanilla Sponge Sheet Cake at room temperature in an airtight container for up to 3 days. If the cake is frosted with a cream cheese frosting or contains fresh fruit, it should be stored in the refrigerator. When refrigerated, ensure it’s well-covered to prevent drying out; it will keep for up to 5 days. If refrigerated, allow the cake to come to room temperature for about 30 minutes before serving for the best texture and flavor. To freeze the cake, wrap individual slices or the entire cooled, unfrosted cake tightly in plastic wrap, then in aluminum foil. It can be frozen for up to 2-3 months. Thaw frozen cake overnight in the refrigerator, then bring to room temperature before serving or frosting. Reheating is generally not recommended for sponge cakes as it can dry them out; this cake is best enjoyed at room temperature.
Frequently Asked Questions
Why did my sponge cake turn out dense and not airy?
A dense sponge cake is typically a result of overmixing the batter, which deflates the air incorporated into the egg whites, or not whipping the egg whites to stiff peaks in the first place. Ensure your egg whites are whipped until they hold their shape firmly, and then fold them into the batter very gently to preserve that precious air. Also, make sure all ingredients, especially eggs, are at room temperature.
Can I make this cake ahead of time?
Yes, this Classic Vanilla Sponge Sheet Cake can be baked a day in advance. Once completely cooled, wrap it tightly in plastic wrap and store it at room temperature. If you plan to frost it, it’s often easier to frost a slightly firm, day-old cake. If you need to store it longer, refer to the freezing instructions above.
What type of vanilla extract is best for this cake?
For the best flavor, use a good quality pure vanilla extract. While vanilla essence is an option, pure extract offers a more complex and authentic vanilla flavor that truly shines in a simple cake like this. You can also experiment with vanilla bean paste for visible specks of vanilla and an even richer taste.
My cake sank in the middle after baking. What went wrong?
A cake sinking in the middle can be caused by several factors: opening the oven door too early during baking, underbaking the cake, or having too much leavening agent. Ensure your oven temperature is accurate and resist the urge to open the door until the last 5-10 minutes of baking. Always test for doneness with a toothpick to confirm it’s fully baked through.