Instructions
- Prepare the Chicken Wings: Start by thoroughly rinsing your chicken wings under cold water. Pat them absolutely dry with paper towels. This step is crucial for achieving maximum crispiness, as excess moisture creates steam and prevents the skin from crisping up. You want them as dry as possible. Place the dried wings in a large bowl.
- Season the Wings: In a small bowl, whisk together 1 teaspoon of salt, 1/2 teaspoon of black pepper, 1/2 teaspoon of garlic powder, 1/2 teaspoon of onion powder, 1/4 teaspoon of smoked paprika, and the optional pinch of cayenne pepper. Sprinkle this seasoning mixture evenly over the dried chicken wings, tossing them well to ensure every piece is coated.
- Prepare the Wet Batter: In a separate medium bowl, whisk together the egg and buttermilk until well combined.
- Prepare the Dry Dredge: In another large, shallow bowl or a gallon-sized resealable bag, combine the all-purpose flour, cornstarch, remaining 1 teaspoon of salt, 1/2 teaspoon of black pepper, 1/2 teaspoon of garlic powder, 1/2 teaspoon of onion powder, 1/4 teaspoon of smoked paprika, and the remaining 1/4 teaspoon of cayenne pepper (if using). Whisk or shake until all ingredients are evenly distributed. The cornstarch is key here for that extra crisp factor.
- Breading Process (Two-Stage):
- Working in batches, dip each seasoned chicken wing into the buttermilk mixture, ensuring it’s fully coated, allowing any excess to drip off.
- Immediately transfer the wet wing into the dry dredge mixture. Toss or press the flour mixture onto the wing, making sure it’s completely coated. For an extra craggy and crispy crust, you can gently press the flour onto the wing, creating more surface area. Place the breaded wings on a wire rack set over a baking sheet. Repeat with all remaining wings. Let the breaded wings rest for at least 15-20 minutes at room temperature. This allows the coating to adhere better and prevents it from falling off during frying.
- Prepare for Frying: While the wings are resting, pour the peanut, canola, or vegetable oil into a large, heavy-bottomed pot, Dutch oven, or deep fryer. Fill the pot with oil to about 3-4 inches deep, ensuring there’s enough space for the wings to be submerged without overflowing. Attach a deep-fry thermometer to the side of the pot, making sure the tip is submerged in the oil but not touching the bottom.
- Heat the Oil: Heat the oil over medium-high heat until it reaches a steady temperature of 350-375°F (175-190°C). Maintaining a consistent oil temperature is vital for perfectly cooked and crispy wings.
- Fry the Chicken Wings: Carefully lower a few breaded wings into the hot oil using tongs. Do not overcrowd the pot, as this will lower the oil temperature and result in soggy wings. Fry in batches, leaving plenty of space between each wing.
- Cook Until Golden Brown and Crispy: Fry the wings for about 8-12 minutes, or until they are deep golden brown, crispy, and cooked through. Flip them occasionally to ensure even cooking and browning. The internal temperature of the chicken should reach 165°F (74°C).
- Drain and Season: Once cooked, carefully remove the wings from the oil and place them on a clean wire rack set over a baking sheet lined with paper towels. This allows excess oil to drain off and helps maintain crispiness. Immediately sprinkle the hot wings with a little extra salt to enhance their flavor. Repeat with the remaining batches of wings, ensuring the oil returns to the desired temperature between batches.
- Make the Creamy Dipping Sauce: While the wings are frying or resting, prepare the dipping sauce. In a small bowl, combine the mayonnaise, ketchup, hot sauce, apple cider vinegar, Worcestershire sauce, Dijon mustard, garlic powder, smoked paprika, and optional pinch of cayenne pepper. Whisk everything together until smooth and well combined. Taste and adjust seasonings as needed, adding more salt, pepper, or hot sauce to your preference.
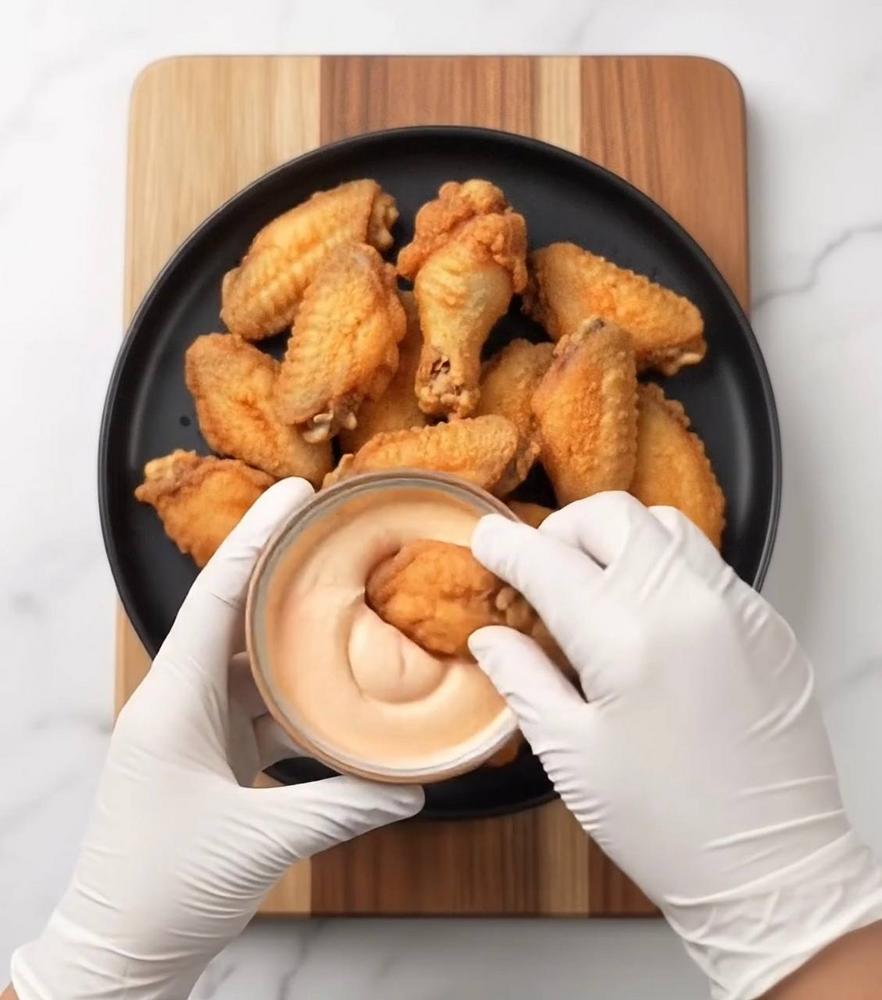
- Serve Immediately: Arrange the crispy fried chicken wings on a serving platter alongside the creamy dipping sauce. Garnish with fresh parsley or chives, if desired. Serve hot and enjoy!
Cooking Tips and Variations
Achieving truly crispy fried chicken wings is a delicate balance of preparation, technique, and temperature control. Here are some invaluable tips to ensure your wings are always a resounding success, along with some exciting variations to keep things interesting.
Tips for Best Results:
- Pat Dry, Pat Dry, Pat Dry: We cannot stress this enough. Moisture is the enemy of crispiness. Even after washing, take the time to meticulously pat each wing piece completely dry with paper towels. You can even let them air dry in the refrigerator for an hour or two on a wire rack for extra insurance.
- Don’t Skip the Cornstarch: The addition of cornstarch to the flour dredge is a game-changer. It helps absorb moisture, creates a lighter, crispier coating, and contributes to that desirable craggy texture that makes for a satisfying crunch.
- The Buttermilk Soak: Buttermilk not only tenderizes the chicken but also provides a sticky surface for the dry dredge to adhere to, ensuring a thick, even coating. If you don’t have buttermilk, a quick substitute (milk + acid) works perfectly well.
- Resting the Breaded Wings: Allowing the breaded wings to rest for 15-20 minutes before frying is crucial. This step gives the flour coating time to hydrate and adhere firmly to the chicken, preventing it from flaking off in the hot oil.
- Oil Temperature is King: Invest in a good deep-fry thermometer. Maintaining the oil temperature between 350-375°F (175-190°C) is paramount. If the oil is too cool, the wings will absorb too much oil and become greasy and soggy. If it’s too hot, the outside will burn before the inside is cooked through. Adjust your heat as needed between batches.
- Do Not Overcrowd the Pot: Frying too many wings at once will drastically drop the oil temperature, leading to less crispy results. Fry in small batches, giving the oil time to recover its temperature between additions.
- Drain on a Wire Rack: After frying, never place the wings directly on paper towels to drain for an extended period. While paper towels initially absorb oil, they can also trap steam, making the bottom of the wings soggy. A wire rack allows air to circulate, keeping all sides crispy.
- Season Immediately After Frying: Salt adheres best to hot, freshly fried food. A light sprinkle of fine salt right after they come out of the oil will significantly boost their flavor.
- Use the Right Oil: Oils with a high smoke point, such as peanut oil, canola oil, or vegetable oil, are best for deep frying. They can withstand high temperatures without breaking down or imparting off-flavors.
Flavor Variations for Wings:
- Spicy Sensation: Increase the cayenne pepper in the dry dredge, or add a pinch of chili powder. You can also toss the cooked wings in a spicy buffalo sauce or a ghost pepper-infused glaze for an extreme kick.
- Garlic Parmesan: After frying, toss the hot wings in a mixture of melted butter, minced fresh garlic, and grated Parmesan cheese. A sprinkle of fresh parsley adds color and freshness.
- Lemon Herb: Add dried oregano, thyme, and rosemary to the dry dredge. After frying, a squeeze of fresh lemon juice over the hot wings will brighten the flavors.
- Asian Inspired: For a different take, skip the breading and opt for a cornstarch-only coating. Fry the wings until crispy, then toss them in a sticky sauce made from soy sauce, honey, ginger, garlic, and sesame oil. Garnish with sesame seeds and chopped green onions.
- Smoky BBQ: Toss the fried wings in your favorite BBQ sauce, then pop them under the broiler for a few minutes to caramelize the sauce.
Dipping Sauce Variations:
- Classic Blue Cheese: A traditional choice, typically made with mayonnaise, sour cream, blue cheese crumbles, white vinegar, garlic powder, and black pepper.
- Honey Mustard: A sweet and tangy option made with mayonnaise, Dijon mustard, honey, and a splash of apple cider vinegar.
- Ranch Dressing: A beloved creamy herb dressing that pairs well with almost anything fried.
- Sriracha Mayo: A simple mix of mayonnaise and Sriracha for a spicy, creamy dip.
- Garlic Aioli: Homemade or store-bought, a rich garlic mayonnaise adds a touch of gourmet.
- Sweet Chili Sauce: A ready-made sauce that offers a delightful balance of sweet and spicy without any extra effort.
Storage and Reheating
While crispy fried chicken wings are undoubtedly best enjoyed fresh, sometimes you end up with leftovers (a rare but possible occurrence!). Proper storage and reheating techniques can help you preserve their deliciousness and, most importantly, their crispiness.
Storage:
- Cool Completely: Before storing, it’s essential to allow the fried chicken wings to cool down completely to room temperature. Storing them while still warm will create condensation, leading to soggy wings and potentially promoting bacterial growth.
- Airtight Container: Once cooled, transfer the wings to an airtight container. You can place a paper towel at the bottom of the container to absorb any residual moisture.
- Refrigerate: Store the container in the refrigerator for up to 3-4 days.
- Freezing (Optional): For longer storage, you can freeze fried wings. Place the cooled wings in a single layer on a baking sheet and freeze until solid (about 1-2 hours). Then transfer them to a freezer-safe bag or container, removing as much air as possible. They can be frozen for up to 2-3 months. Freezing might slightly alter the texture, but they will still be enjoyable.
Reheating:
The goal of reheating is always to bring back that glorious crispiness without drying out the meat. Avoid the microwave at all costs, as it will inevitably lead to rubbery, soggy wings.
- Oven Method (Recommended for Best Crispiness):
- Preheat your oven to 375°F (190°C).
- Arrange the cold wings in a single layer on a wire rack placed over a baking sheet. This allows air to circulate around the wings, ensuring even heating and crisping.
- Bake for 15-20 minutes, or until the wings are heated through and the skin is crispy again. For frozen wings, you might need to bake them for 25-30 minutes, or until heated through.
- Air Fryer Method (Excellent for Crispiness and Speed):
- Preheat your air fryer to 375°F (190°C).
- Place the cold wings in a single layer in the air fryer basket, ensuring not to overcrowd. Work in batches if necessary.
- Air fry for 8-12 minutes, flipping halfway through, until heated through and crispy. Frozen wings may take 12-18 minutes.
- Toaster Oven Method (Good for Smaller Batches):
- Preheat your toaster oven to 375°F (190°C).
- Place wings on the toaster oven tray in a single layer.
- Bake for 10-15 minutes, checking frequently, until crispy and hot.
Reheating the dipping sauce is not usually necessary. If it has thickened in the fridge, you can give it a good stir, and if it’s too thick, add a tiny splash of water or milk to reach your desired consistency.
Frequently Asked Questions
Why are my fried chicken wings not crispy, or why do they get soggy quickly?
The most common culprits for non-crispy or quickly soggy wings are excess moisture on the chicken before breading, insufficient oil temperature during frying, or overcrowding the pot. Ensure your wings are bone-dry before breading. Maintain a consistent oil temperature between 350-375°F (175-190°C) – use a thermometer! Frying too many wings at once will drop the oil temperature, leading to greasy, soggy results. Also, make sure to drain them on a wire rack, not directly on paper towels, which can trap steam.
Can I make these wings in an air fryer or oven instead of deep frying?
While deep frying yields the absolute crispiest results, you can achieve a very good level of crispiness in an air fryer or oven. For an air fryer, follow the breading steps, then air fry at 375°F (190°C) for 20-25 minutes, flipping halfway, until golden and cooked through. For oven baking, place breaded wings on a wire rack over a baking sheet and bake at 400°F (200°C) for 40-50 minutes, flipping once, until crispy. While these methods are healthier, they may not achieve the exact same “shatteringly crispy” texture as deep frying.
What type of oil is best for deep frying, and how can I dispose of it safely?
For deep frying, choose an oil with a high smoke point and neutral flavor, such as peanut oil, canola oil, vegetable oil, or sunflower oil. These oils can withstand the high temperatures required without breaking down or imparting unwanted tastes. To dispose of used oil safely, allow it to cool completely. Once cool, pour it back into its original container or another non-recyclable container with a lid. Do not pour it down the drain, as it can clog pipes. Check with your local waste management for specific guidelines on disposing of cooking oil, as some areas have recycling programs.
Can I prepare the wings ahead of time?
You can prepare the wings to a certain extent. You can separate and pat them dry a day in advance and store them uncovered on a wire rack in the refrigerator to further dry out the skin. You can also mix the dry dredge ingredients and the wet batter ingredients ahead of time and store them separately. However, it’s best to bread the wings just before frying (allowing the 15-20 minute rest period) to ensure the freshest and crispiest coating. The dipping sauce can definitely be made a day or two in advance and stored in an airtight container in the refrigerator to allow the flavors to meld.
Conclusion
And there you have it – your definitive guide to creating the most irresistibly crispy fried chicken wings right in your own kitchen! From the meticulous preparation that ensures every bite is a crunch-fest to the precise frying techniques that guarantee golden perfection, you now possess all the secrets to culinary triumph. We’ve explored the importance of dry wings, the magic of cornstarch, and the critical role of oil temperature, transforming what might seem like a daunting task into an enjoyable and rewarding cooking adventure.
But the journey doesn’t end with the wings themselves. The accompanying creamy, savory dipping sauce is the perfect foil to the rich, crispy chicken, adding a layer of tangy, spicy complexity that elevates the entire experience. This duo is more than just a meal; it’s a celebration of flavor and texture, a dish designed to bring smiles and satisfied sighs.
So, go forth and conquer your cravings! Don’t be afraid to experiment with the suggested variations, making this recipe truly your own. Whether you’re hosting a gathering, enjoying a quiet night in, or simply treating yourself to some homemade deliciousness, these crispy fried chicken wings are guaranteed to be a showstopper. Trust the process, follow these steps, and prepare to bask in the glory of your crispy creation. Happy frying, and most importantly, enjoy every single delicious bite!