Instructions
- Ensure all your ingredients are well-chilled before you begin. This is crucial for whipping the cream properly and achieving the best texture. Place your heavy cream, sweetened condensed milk, and even your mixing bowl and whisk attachment (if using a stand mixer) in the refrigerator or freezer for at least 15-20 minutes prior to starting.
- In a large mixing bowl, pour the very cold heavy cream. Using an electric hand mixer or a stand mixer with the whisk attachment, beat the heavy cream on medium-high speed until stiff peaks form. This means the cream will hold its shape firmly when you lift the whisk. Be careful not to overbeat, or it will turn grainy.
- Once stiff peaks are achieved, gently fold in the chilled sweetened condensed milk and vanilla extract using a spatula. Add a tiny pinch of salt if desired, as it helps to balance the sweetness and enhance the overall flavor. Fold until just combined, being careful not to deflate the whipped cream. The mixture should remain light and airy.
- Divide the ice cream base into two roughly equal portions in separate bowls. Leave one portion as your vanilla base.
- Into the second portion of the ice cream base, gently fold in your chocolate syrup or melted chocolate until just combined. If using melted chocolate, ensure it’s cooled enough not to melt the cream, but still liquid enough to incorporate smoothly. Overmixing will deflate the cream, so fold gently until no streaks of chocolate remain.
- Prepare a freezer-safe, airtight container (a 9×5-inch loaf pan or a 2-quart container works well).
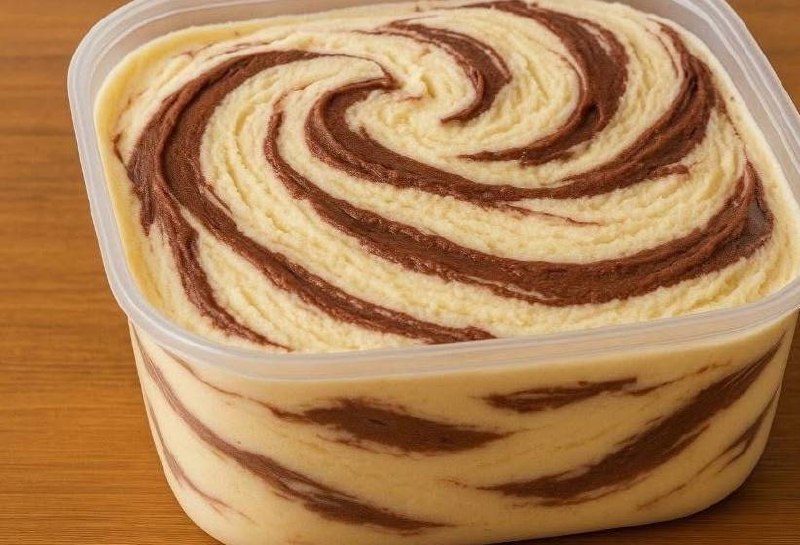
- Spoon alternating dollops of the vanilla ice cream base and the chocolate ice cream base into the prepared container. Don’t worry about being too precise; the beauty is in the natural swirls.
- Once all the ice cream mixtures are in the container, take a butter knife or a skewer and gently swirl through the mixtures once or twice. Be careful not to over-swirl, as this will blend the colors too much and you’ll lose the distinct marble effect. You want clear streaks of both flavors.
- Smooth the top surface of the ice cream with a spatula.
- Cover the container tightly with plastic wrap, pressing the plastic wrap directly onto the surface of the ice cream to prevent ice crystals from forming. Then, place the lid on the container if it has one.
- Freeze for a minimum of 6 hours, or preferably overnight, until the ice cream is firm. For the best texture, allow it to freeze completely.
- When ready to serve, remove the ice cream from the freezer and let it sit at room temperature for 5-10 minutes to soften slightly. This will make it easier to scoop and enhance its creamy texture.
- Scoop and enjoy your delicious homemade ice cream!
Cooking Tips and Variations
- Chill Everything: This cannot be stressed enough for no-churn ice cream. Cold cream whips better, and cold condensed milk helps maintain the airy texture.
- Don’t Overbeat the Cream: Beat the heavy cream until it forms stiff peaks, but no further. Overbeating will result in a grainy texture, which you want to avoid for a smooth ice cream.
- Gentle Folding: When combining the sweetened condensed milk and any flavorings, use a light hand and fold gently with a spatula. You want to preserve as much of the air whipped into the cream as possible.
- Prevent Ice Crystals: Press plastic wrap directly onto the surface of the ice cream before putting on the lid. This creates a barrier that prevents air from reaching the surface, which is a common cause of ice crystals.
- Soften Before Scooping: For the creamiest scoop, let the ice cream sit out at room temperature for 5-10 minutes before serving.
- Caramel Swirl: Instead of chocolate, swirl in 1/2 cup of high-quality caramel sauce. You can even sprinkle in a pinch of sea salt for a salted caramel swirl.
- Coffee Swirl: Dissolve 1-2 tablespoons of instant espresso powder in 2 tablespoons of hot water, let it cool completely, then mix it into a portion of the base for a coffee swirl.
- Berry Swirl: Puree 1 cup of fresh or frozen berries (strawberries, raspberries, blueberries) with 1-2 tablespoons of sugar (to taste), then strain to remove seeds if desired. Swirl this fruit puree into a portion of the base.
- Cookie Dough/Brownie Bites: After swirling, fold in small chunks of edible cookie dough or crumbled brownies for a chunky ice cream.
- Nut Butter Swirl: Gently warm 1/2 cup of your favorite nut butter (peanut, almond, cashew) until it’s pourable, then swirl it into a portion of the base.
- Mint Chocolate Chip: Add 1 teaspoon of peppermint extract to the vanilla base, and then fold in 1/2 cup of mini chocolate chips instead of a chocolate swirl.
Storage and Reheating
Easy homemade ice cream, especially no-churn varieties, stores very well in the freezer. To maintain its rich, creamy texture and prevent ice crystals, it’s essential to store it correctly. Use an airtight, freezer-safe container. Before placing the lid, press a layer of plastic wrap directly onto the surface of the ice cream. This creates an additional barrier against air, which is the primary cause of freezer burn and ice crystal formation. Stored this way, your homemade ice cream will remain fresh and delicious for up to 2-3 weeks. Beyond that, while it will still be safe to eat, its texture may start to degrade slightly.
Unlike many other foods, ice cream is not meant for “reheating” in the traditional sense. Its appeal lies in its frozen, creamy state. However, if your ice cream is rock-hard straight from the freezer, it’s best to let it “soften” slightly before serving. Simply remove the container from the freezer and let it sit on your countertop at room temperature for about 5-10 minutes. The exact time will depend on the ambient temperature of your kitchen and how deeply frozen the ice cream is. This brief softening period allows the ice cream to become scoopable and brings out its full creamy texture and flavor profile. Avoid using a microwave to soften it, as this can lead to uneven melting and a less desirable texture.
Can I make this ice cream without an electric mixer?
While an electric mixer (either hand-held or stand mixer) is highly recommended for whipping the heavy cream to stiff peaks, it is technically possible to do it by hand with a whisk. However, be prepared for a significant arm workout, as it will take much longer and require continuous vigorous whisking. The key is to get the cream very cold before you start, which will help it whip up more easily.
Why did my ice cream turn out icy?
Icy ice cream is usually caused by too much water content or improper freezing. Ensure you’re using full-fat heavy cream and not half-and-half or milk. Also, make sure to whip the cream to stiff peaks, as the air incorporated helps prevent iciness. Most importantly, cover the ice cream tightly with plastic wrap pressed directly onto the surface before freezing, and use an airtight container. This prevents air from getting to the surface, which causes ice crystals to form.
How long does it take for the ice cream to freeze completely?
For best results, this homemade ice cream needs at least 6 hours to freeze completely. However, freezing it overnight (8-12 hours) is ideal, ensuring it’s thoroughly firm and has developed its optimal creamy texture. Rushing the freezing process can lead to a softer, less satisfying consistency.