Instructions
- Prepare the Chicken Wings: Begin by thoroughly rinsing the chicken wings under cold water. Pat them meticulously dry with paper towels. This step is crucial for achieving crispy skin, so don’t skip it! If your wings are whole, use a sharp knife to separate them at the joint into drumettes and flats. Place the dried wings in a large mixing bowl.
- Season the Wings: In a small bowl, combine the salt, black pepper, smoked paprika, garlic powder, onion powder, cayenne pepper (if using), and dried oregano. Mix well to create your seasoning blend.
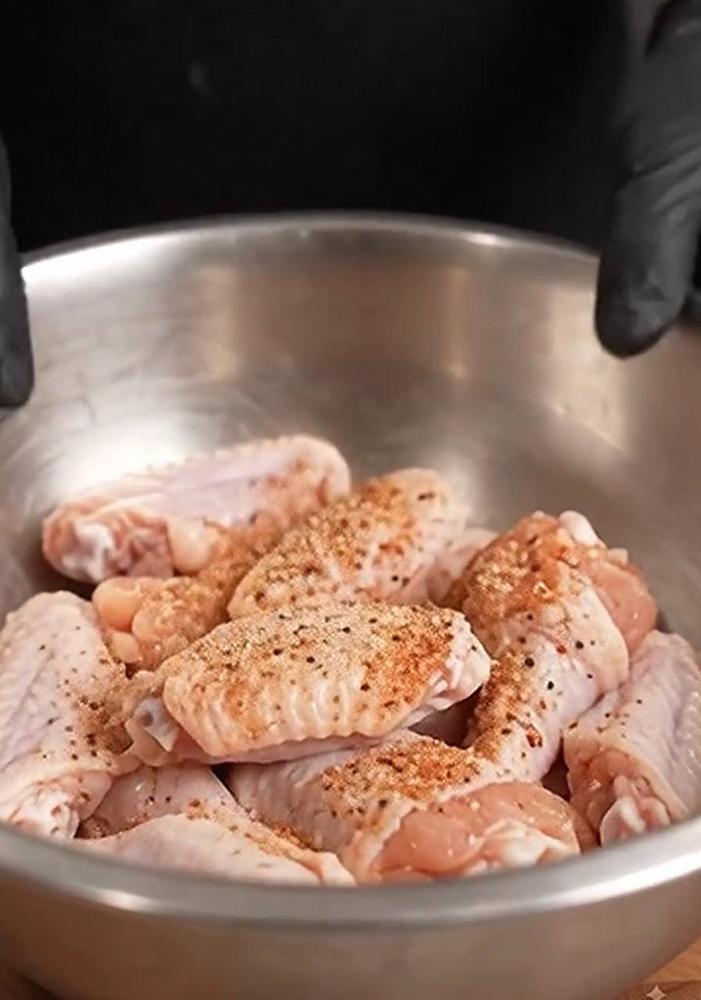
- Coat Evenly: Drizzle the olive oil over the chicken wings in the large mixing bowl. Using clean hands (or food-safe gloves, as shown in the image, which is excellent for hygiene and even coating), sprinkle the seasoning blend generously over the wings. Toss and massage the wings thoroughly to ensure every piece is completely and evenly coated with the seasoning.
- Rest (Optional but Recommended): For best flavor penetration, cover the bowl with plastic wrap and refrigerate the seasoned wings for at least 30 minutes, or even up to 4 hours. If time allows, an overnight rest can yield even deeper flavor. If you’re short on time, you can proceed directly to cooking.
- Choose Your Cooking Method:
- Oven Baking: Preheat your oven to 400°F (200°C). Line a large baking sheet with parchment paper or foil, and place an oven-safe wire rack on top. Arrange the seasoned wings in a single layer on the wire rack, ensuring there’s space between each wing for air circulation. Bake for 25-30 minutes, then flip the wings and bake for another 20-25 minutes, or until the internal temperature reaches 165°F (74°C) and the skin is golden brown and crispy. For extra crispiness, you can broil for the last 2-3 minutes, watching carefully to prevent burning.
- Air Frying: Preheat your air fryer to 375°F (190°C). Place the seasoned wings in a single layer in the air fryer basket, being careful not to overcrowd it (you’ll likely need to cook in batches). Air fry for 15 minutes, then flip the wings. Continue to air fry for another 10-15 minutes, or until they are golden brown, crispy, and cooked through to 165°F (74°C) internal temperature.
- Grilling: Preheat your grill to medium-high heat (around 400°F / 200°C). Lightly oil the grill grates. Place the seasoned wings directly on the grill. Grill for 15-20 minutes, turning every 4-5 minutes, until they are cooked through, have nice char marks, and the internal temperature is 165°F (74°C).
- Serve Hot: Once cooked, transfer the crispy seasoned chicken wings to a serving platter. Garnish with fresh chopped parsley and serve immediately with your favorite dipping sauces and sides.
Cooking Tips and Variations
For truly crispy wings, the secret lies in removing as much moisture as possible before cooking. After rinsing, patting them dry with paper towels is paramount. For an even crispier result, you can even let the wings air dry in the refrigerator on a wire rack for an hour or two (or overnight) after seasoning, uncovered, to further dehydrate the skin. When baking or air frying, avoid overcrowding the pan or basket. Air circulation is key to achieving that desirable crispy texture. Cook in batches if necessary.
Don’t be afraid to make this recipe your own! The beauty of these “Easy Seasoned Chicken Wings” is their adaptability. For a smoky BBQ flavor, add a teaspoon of brown sugar to the seasoning blend and finish with a brush of your favorite BBQ sauce during the last 5-10 minutes of cooking. If you love heat, increase the cayenne pepper or add a pinch of red pepper flakes. For an herbaceous touch, include dried thyme or rosemary. A squeeze of fresh lemon juice over the finished wings adds a bright, zesty counterpoint that is simply delightful. You could also experiment with a lemon pepper seasoning blend, a Cajun spice mix, or even a simple garlic-parmesan sprinkle after cooking. The possibilities are endless!
Storage and Reheating
To store any leftover seasoned chicken wings, allow them to cool completely to room temperature. Once cooled, transfer them to an airtight container and refrigerate for up to 3-4 days. For longer storage, cooked wings can be frozen for up to 2-3 months. To freeze, spread the cooled wings in a single layer on a baking sheet and flash freeze until solid, then transfer to a freezer-safe bag or container.
When reheating, the goal is to restore that delicious crispiness without drying out the meat. The best methods are typically the oven or air fryer. Preheat your oven to 350°F (175°C) and place the wings on a wire rack set over a baking sheet. Reheat for 10-15 minutes, or until heated through and crispy. For an air fryer, preheat to 350°F (175°C) and reheat for 5-8 minutes, flipping halfway, until hot and crispy. Microwaving is generally not recommended as it can make the wings soggy.
Frequently Asked Questions
Do I need to separate the drumettes and flats before seasoning?
While you can season and cook whole chicken wings, separating them into drumettes and flats allows for more even cooking and makes them easier to eat. It also increases the surface area for seasoning, meaning more flavor in every bite!
Can I prepare the wings ahead of time?
Absolutely! You can season the wings and let them rest in the refrigerator for several hours, or even overnight. This actually helps the flavors penetrate the meat more deeply, resulting in a more delicious wing. Just make sure to keep them covered.
What’s the best way to ensure my wings are crispy?
The top three tips for crispy wings are: 1) Pat them very dry before seasoning, 2) Don’t overcrowd your cooking vessel (whether it’s a baking sheet, air fryer basket, or grill), and 3) Cook them at a sufficiently high temperature.
Can I use frozen chicken wings for this recipe?
Yes, you can use frozen chicken wings, but it’s crucial to thaw them completely in the refrigerator before proceeding with the recipe. Once thawed, pat them very dry before seasoning to ensure proper crispiness.