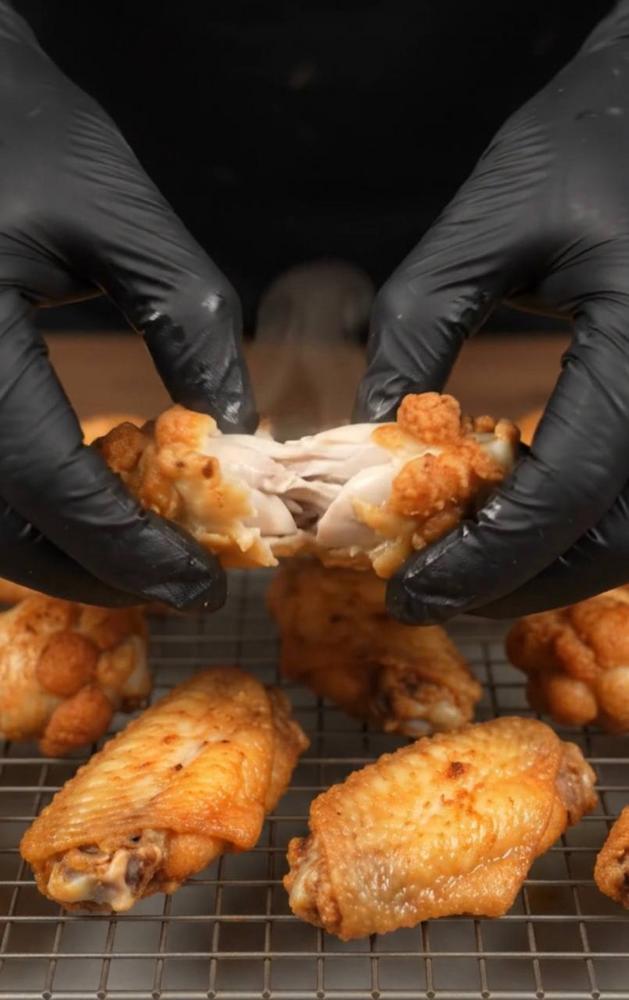
Instructions
- Prepare Your Workspace: Preheat your oven to 425°F (220°C). Line a large baking sheet with aluminum foil for easier cleanup, then place an oven-safe wire rack on top of the foil-lined baking sheet. This setup is crucial for air circulation, which is key to crispiness.
- Dry the Wings Thoroughly: This is arguably the most critical step! Using paper towels, pat the chicken wings absolutely as dry as possible. Any moisture left on the skin will steam rather than crisp. Take your time with this step; it makes a huge difference.
- Season the Wings: In a large bowl, combine the baking powder, kosher salt, black pepper, garlic powder, onion powder, and smoked paprika (if using). Add the dried chicken wings to the bowl. If using, drizzle with olive oil. Toss the wings thoroughly with your hands (wearing gloves is helpful here!) to ensure every piece is evenly coated with the seasoning mixture. The baking powder will create a thin, almost paste-like layer on the skin.
- Arrange on the Rack: Arrange the seasoned chicken wings in a single layer on the prepared wire rack, ensuring there is space between each wing. Do not overcrowd the rack, as this will prevent proper air circulation and result in steaming instead of crisping. You may need to use two baking sheets if your wings are too crowded on one.
- Initial Bake: Place the baking sheet with the wings in the preheated oven. Bake for 25-30 minutes. During this phase, the fat will begin to render, and the skin will start to dehydrate and firm up.
- Flip and Continue Baking: After the initial bake, carefully flip each wing to ensure even browning and crisping on both sides. Reduce the oven temperature to 400°F (200°C) and continue baking for another 20-30 minutes, or until the wings are deep golden brown, incredibly crispy, and cooked through. The internal temperature should reach 165°F (74°C) when checked with a meat thermometer.
- Crispiness Check (Optional Broil): If your wings aren’t as crispy as you’d like after the baking time, you can briefly switch your oven to the broiler setting for 2-5 minutes. Watch them *very carefully* during this stage, as they can go from perfectly crispy to burnt in seconds.
- Serve Immediately: Once baked to perfection, remove the wings from the oven. Let them rest on the wire rack for a few minutes before transferring them to a serving platter. This allows any excess fat to drain and helps maintain their crispness. Serve hot with your favorite dipping sauces.
Cooking Tips and Variations
The Baking Powder Secret: Aluminum-free baking powder is key! It raises the pH level of the chicken skin, which helps break down proteins and promotes faster browning and crisping. It also creates tiny air bubbles on the surface, contributing to that incredible crunch. Don’t confuse it with baking soda, which is too strong and will leave a metallic taste.
Master the Dry: Seriously, pat those wings dry! Moisture is the enemy of crispiness. For an even better result, after patting dry, you can place the seasoned wings uncovered in the refrigerator for 1-2 hours (or even overnight) to allow the skin to air-dry further. This step takes crispiness to the next level.
Don’t Crowd the Pan: Give your wings space! Overcrowding leads to steaming, not crisping. If you have too many wings for one rack, use two baking sheets. Air circulation is paramount.
The Wire Rack is Non-Negotiable: A wire rack elevates the wings, allowing hot air to circulate all around them. Without it, the bottoms will sit in rendered fat and become soggy.
Temperature Transition: Starting at a higher temperature (425°F) helps to quickly render fat and kickstart the crisping process. Reducing the temperature to 400°F allows the wings to cook through evenly without burning the exterior, while continuing to crisp.
Flavor Variations:
- Buffalo Wings: After baking, toss the hot crispy wings in a mixture of melted butter and your favorite hot sauce (e.g., Frank’s RedHot).
- BBQ Wings: Once crispy, brush with your preferred BBQ sauce and return to the oven for 5-10 minutes, or until the sauce is caramelized.
- Lemon Pepper: Add 1 teaspoon of lemon pepper seasoning to your dry rub mixture.
- Garlic Parmesan: After baking, toss with melted butter, minced fresh garlic, and grated Parmesan cheese.
- Spicy Korean: Combine gochujang, soy sauce, honey, rice vinegar, and sesame oil for a sticky, sweet, and spicy glaze. Toss baked wings in the sauce.
Don’t Sauce Too Early: If you plan to sauce your wings, do it *after* they are fully crispy from the oven. Applying sauce too early will reintroduce moisture and make them soggy.
Storage and Reheating
Storage: Leftover extra-crispy baked chicken wings can be stored in an airtight container in the refrigerator for up to 3-4 days. While they will lose some of their initial crispness upon cooling, they can be re-crisped.
Reheating: To bring back some of that amazing crispiness, reheating in an oven or air fryer is best. Avoid the microwave, as it will make them rubbery and soft.
- Oven: Preheat your oven to 375°F (190°C). Place the wings on a wire rack set over a baking sheet. Heat for 10-15 minutes, or until heated through and crispy to your liking.
- Air Fryer: Preheat your air fryer to 375°F (190°C). Arrange the wings in a single layer in the air fryer basket (work in batches if necessary). Air fry for 5-8 minutes, shaking the basket halfway through, until hot and re-crisped.
Frequently Asked Questions
Why do I need baking powder for crispy wings?
Baking powder is a game-changer! It’s an alkaline substance that raises the pH of the chicken skin. This helps break down the protein in the skin, allowing it to brown and crisp up more effectively. It also creates tiny air bubbles on the surface, which contribute to that desirable shatteringly crisp texture. Make sure to use aluminum-free baking powder to avoid any metallic aftertaste.
Can I make these wings in an air fryer?
Absolutely! The principles for crispiness (drying the wings, baking powder, not overcrowding) apply to the air fryer as well. For air fryer wings, follow the same prep steps. Arrange them in a single layer in the air fryer basket and air fry at 375-400°F (190-200°C) for 20-30 minutes, flipping halfway through, until golden brown and crispy. Cooking times may vary depending on your air fryer model.
My wings aren’t getting crispy enough. What went wrong?
The most common culprits for less-than-crispy wings are insufficient drying, overcrowding the baking sheet, or not using a wire rack. Ensure you pat the wings as dry as possible, leave plenty of space between each wing on the rack, and don’t skip the baking powder. Also, make sure your oven is preheated to the correct temperature and cooks evenly.
Can I prepare the wings ahead of time?
You can definitely do some prep work in advance. After patting the wings dry and tossing them with the baking powder and seasonings, you can arrange them on the wire rack and refrigerate them uncovered for several hours or even overnight. This extra air-drying time will further dehydrate the skin, leading to even crispier results when you bake them.