Instructions
- In a large mixing bowl, whisk together the dry ingredients: flour, granulated sugar, baking powder, baking soda, and salt. Ensure there are no clumps and all ingredients are well combined.
- In a separate medium-sized bowl, whisk together the wet ingredients: milk, large egg, melted butter, and vanilla extract. Whisk until the egg is fully incorporated and the mixture is smooth.
- Pour the wet ingredients into the dry ingredients. Using a whisk or a rubber spatula, gently mix until just combined. It’s crucial not to overmix the batter; a few lumps are perfectly fine and even desirable for fluffy pancakes. Overmixing develops gluten, which can lead to tough pancakes. Let the batter rest for 5-10 minutes at room temperature. This allows the flour to fully hydrate and the leavening agents to activate, contributing to a lighter, fluffier texture.
- Heat a large non-stick frying pan or griddle over medium heat. Once hot, lightly grease the pan with a small pat of butter or a tiny bit of oil. You want just enough to coat the surface thinly; too much can make the pancakes greasy, and too little will cause sticking.
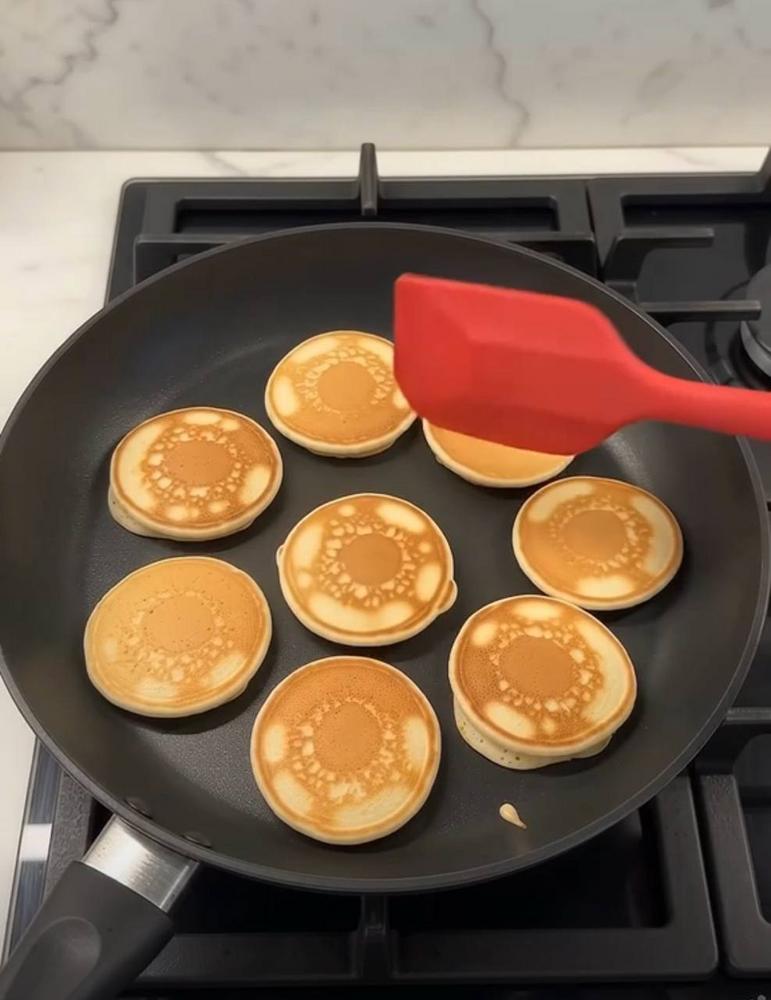
- Using a small spoon (a teaspoon or a measuring tablespoon works well) or a squeeze bottle for more precision, drop small dollops of batter onto the hot pan. Aim for pancakes about 1-1.5 inches in diameter. Leave enough space between each pancake to allow for easy flipping. Do not overcrowd the pan.
- Cook the mini pancakes for 1-2 minutes per side, or until golden brown. You’ll know they’re ready to flip when small bubbles appear on the surface of the batter and the edges look set and slightly dry. Use a thin spatula to gently lift and flip each pancake.
- Once flipped, cook for another 1-2 minutes on the second side until they are also golden brown and cooked through.
- As the pancakes finish cooking, transfer them to a plate. To keep them warm while you cook the remaining batter, you can place the plate in a warm oven (around 200°F or 90°C).
- Repeat the process of greasing the pan and cooking the remaining batter in batches until all the mini pancakes are made.
- Serve immediately with your favorite toppings and enjoy your perfectly fluffy mini pancakes!
Cooking Tips and Variations
Achieving the perfect fluffy mini pancake is an art, but with a few simple tips and tricks, you’ll be a master in no time. The secret to their incredible texture lies in careful mixing and proper heat control. Always remember the golden rule: do not overmix your batter! Lumps are your friends here, as overmixing develops gluten, which results in tough, chewy pancakes instead of light, airy ones. A gentle stir until just combined is all you need. Allowing the batter to rest for 5-10 minutes after mixing is another game-changer. This brief pause gives the flour time to fully hydrate and allows the baking powder and baking soda to start working their magic, producing more bubbles and thus, more fluffiness.
Heat control is equally vital. Cook your mini pancakes over medium heat. If the pan is too hot, the outsides will burn before the insides cook through. If it’s too cool, they’ll take too long to cook and might become dense. A good test is to flick a tiny bit of water onto the pan; if it sizzles and evaporates immediately, your pan is ready. Lightly greasing your non-stick pan between batches is also important. Too much oil can make the pancakes greasy, while too little will cause them to stick. A small pat of butter or a light spray of cooking oil is ideal. For perfectly round pancakes, consider using a measuring spoon (like a tablespoon) to scoop the batter, or even a squeeze bottle for ultimate precision. Don’t overcrowd the pan; give each mini pancake space to breathe and cook evenly, and make flipping easier.
Beyond the basic recipe, these mini pancakes are a canvas for creativity! For a touch of warmth and spice, add ½ teaspoon of ground cinnamon or a pinch of nutmeg to your dry ingredients. A teaspoon of lemon zest can brighten the flavor profile beautifully. For chocolate lovers, mini chocolate chips are a classic addition; simply stir them into the batter just before cooking. Fresh berries like blueberries or finely diced strawberries can also be folded into the batter for bursts of fruity goodness. If you’re feeling adventurous, try a savory twist by omitting the sugar, adding a pinch more salt, and stirring in cooked bacon bits or finely chopped chives. These variations transform the mini pancakes from a breakfast staple into a versatile treat for any time of day. Don’t be afraid to experiment and find your favorite flavor combinations!
Storage and Reheating
Fluffy mini pancakes are so delicious, you might not have any leftovers! However, if you do, they store and reheat beautifully, making them an excellent candidate for meal prepping breakfasts or snacks throughout the week. Proper storage is key to maintaining their delicious texture and flavor. Once your mini pancakes have cooled completely to room temperature, stack them with small pieces of parchment paper or wax paper in between each pancake. This prevents them from sticking together and makes it easier to grab individual portions later. Place the stacked pancakes in an airtight container or a freezer-safe bag. They can be stored in the refrigerator for up to 3-4 days, or in the freezer for up to 1-2 months.
When it comes to reheating, you have several convenient options, depending on how many you’re warming up and how much time you have. For a quick reheat, the microwave is your fastest friend. Place a few mini pancakes on a microwave-safe plate and heat for 15-30 seconds, or until warm. Be careful not to overheat, as this can make them rubbery. If you prefer a slightly crispier exterior, the toaster oven or a regular oven works wonderfully. Preheat your toaster oven to 300°F (150°C) or your regular oven to 350°F (175°C). Place the mini pancakes in a single layer on a baking sheet and heat for 5-10 minutes, or until warmed through and lightly crispy. From frozen, you can often reheat directly in the toaster oven or a regular oven, adding a few extra minutes to the cooking time.
Another excellent method for reheating, especially if you want that fresh-from-the-griddle feel, is to use a dry non-stick pan over medium-low heat. Place the mini pancakes directly in the pan and heat for 1-2 minutes per side, until warmed through. This method can help restore some of their original crispness. No matter which reheating method you choose, your fluffy mini pancakes will be ready to be topped and enjoyed, tasting almost as good as they did fresh off the griddle. This makes them a perfect make-ahead option for busy mornings or for satisfying sudden pancake cravings!
Frequently Asked Questions
Why aren’t my pancakes fluffy?
The most common culprits for dense or flat pancakes are overmixing the batter and using old or inactive leavening agents. Overmixing develops gluten, making the pancakes tough. Mix only until the wet and dry ingredients are just combined, leaving some small lumps. For fluffiness, ensure your baking powder and baking soda are fresh; they lose their potency over time. Also, don’t skip the resting step for the batter, as this allows the leavening agents to fully activate.
Why are my mini pancakes sticking to the pan?
Pancakes typically stick for a few reasons: the pan isn’t hot enough, it’s not sufficiently greased, or it’s not a truly non-stick surface. Ensure your pan is preheated to medium heat before adding batter. Lightly grease the pan with butter or oil between batches; too little can cause sticking, but too much can make them greasy. If you’re still having trouble, your pan might need re-seasoning, or it might be time for a new non-stick pan.
How can I get perfectly round mini pancakes?
For consistent, perfectly round mini pancakes, there are a few tricks. Using a measuring spoon (like a tablespoon or a 1.5 tablespoon scoop) to portion out the batter helps maintain uniform size and shape. Another popular method is to use a squeeze bottle (like a clean ketchup bottle or a pastry bag with a round tip). This allows you to precisely control the flow of batter and create neat circles. Just make sure the batter isn’t too thick to flow easily through the nozzle.
Can I make the batter ahead of time?
While fresh batter yields the fluffiest results, you can prepare the batter a few hours in advance and store it in an airtight container in the refrigerator. However, be aware that the baking powder and baking soda will start to lose their potency over time, which might result in slightly less fluffy pancakes. If making ahead, you might want to add an extra ¼ teaspoon of baking powder just before cooking to boost the leavening. Avoid making it more than 24 hours in advance for best results.