Instructions
- Prepare Your Pot: Choose a heavy-bottomed pot that is larger than you think you’ll need, preferably a 3-quart or 4-quart saucepan. This is crucial for preventing boil-overs as the milk heats and foams.
- Combine Ingredients: Pour the whole milk into the pot. Add the granulated sugar, and if using, the pinch of salt.
- Dissolve the Sugar: Place the pot over medium heat. Stir constantly with a whisk or wooden spoon until the sugar is completely dissolved. This should take about 3-5 minutes. Do not let the milk come to a full boil yet.
- Bring to a Simmer: Once the sugar is dissolved, increase the heat slightly to bring the milk mixture to a gentle simmer. You’ll see small bubbles forming around the edges of the pot.
- Reduce the Milk: Once simmering, reduce the heat to low or medium-low. The goal is to maintain a consistent, gentle simmer, not a rolling boil.
- Stir Frequently: This is the most important step for success. Stir the mixture frequently, every 5-10 minutes, especially as it begins to thicken, to prevent the milk from scorching on the bottom of the pot. If you notice a film forming on top, you can skim it off, but it’s not strictly necessary as it will integrate back in.
- Continue Simmering and Reducing: Allow the milk to simmer uncovered for 1 to 1.5 hours, or until the mixture has reduced by about half to two-thirds of its original volume. It will become noticeably thicker, creamier, and take on a pale yellow to light golden hue.
- Check for Doneness: To test for doneness, dip a spoon into the mixture. It should coat the back of the spoon. When warm, it will be similar in consistency to heavy cream, but it will thicken significantly as it cools. Another good indicator is when you can see the bottom of the pot for a second or two when stirring.
- Remove from Heat and Add Vanilla: Once it reaches the desired consistency, remove the pot from the heat. If using, stir in the vanilla extract.
- Cool Completely: Transfer the sweetened condensed milk to a heatproof bowl or directly into clean, sterilized jars. Allow it to cool completely to room temperature. As it cools, it will continue to thicken to the familiar consistency of store-bought sweetened condensed milk.
- Store: Once completely cool, cover the jars tightly with lids.
Cooking Tips and Variations
Achieving that perfect, luscious homemade sweetened condensed milk is all about a few key techniques and a little patience. Firstly, stirring is your best friend. As the milk reduces, the sugars and milk solids can easily stick and scorch on the bottom of the pot, imparting an unpleasant burnt flavor. Stir frequently, especially as the mixture begins to thicken, to prevent this. A good silicone spatula or wooden spoon that can scrape the bottom of the pot thoroughly is ideal. Secondly, heat control is paramount. While you want a gentle simmer to encourage evaporation, too high heat will cause the milk to boil over or burn quickly. Keep it on a consistent low to medium-low heat throughout the reduction process. If you notice it bubbling too vigorously, reduce the heat immediately.
The choice of pot size is also critical. Always use a pot that is significantly larger than the initial volume of milk. Milk tends to foam and rise as it heats, and a larger pot provides the necessary headspace to prevent messy boil-overs. A 3-quart or 4-quart saucepan for 4 cups of milk is a good starting point. Don’t rush the process; patience is truly a virtue here. The reduction takes time, and trying to speed it up with higher heat will likely result in scorching or an unevenly cooked product. Trust the process, let it simmer gently, and you’ll be rewarded with a superior result.
When it comes to testing for doneness, look for visual cues. The mixture should reduce by about half to two-thirds of its original volume and take on a slightly golden or pale yellow color. It should coat the back of a spoon, and when you run your finger across the back of the spoon, it should leave a clear path. Remember that it will thicken considerably more as it cools, so don’t over-reduce it while it’s hot. If it looks a little thinner than you expect when warm, don’t worry; cooling will do the rest of the work.
For variations, while whole milk yields the richest and creamiest result, you can experiment with other types. Using 2% milk will still work, though the final product might be slightly less rich. For a truly indulgent version, some recipes call for a combination of heavy cream and milk. If you’re looking for a dairy-free alternative, full-fat canned coconut milk (the kind used for curries, not the beverage) can be a fantastic substitute. Just be aware that it will impart a subtle coconut flavor. You can also infuse your sweetened condensed milk with other flavors. Try adding a cinnamon stick, a few cardamom pods, or even a star anise during the simmering process, removing them before jarring. A scraped vanilla bean pod simmered with the milk will also provide a much deeper vanilla flavor than extract alone.
Finally, if you plan on making a larger batch or want to ensure maximum shelf life, sterilizing your jars is a good practice. Wash jars and lids thoroughly in hot, soapy water, rinse well, and then either boil them for 10 minutes, run them through a dishwasher’s sanitizing cycle, or heat them in a 250°F (120°C) oven for 10-15 minutes. This helps prevent bacterial growth and ensures your homemade treat stays fresh longer.
Storage and Reheating
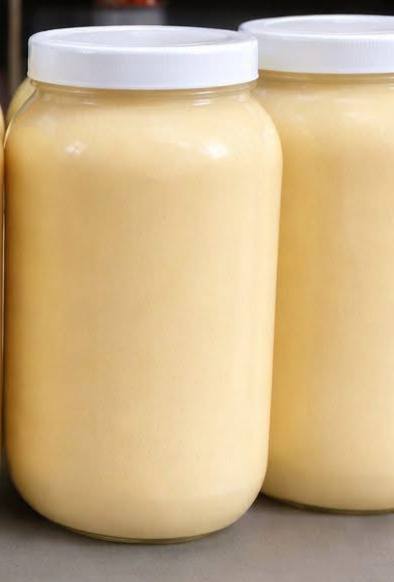
Proper storage is key to enjoying your homemade sweetened condensed milk for as long as possible. Once your sweetened condensed milk has completely cooled to room temperature, transfer it into clean, sterilized glass jars with tight-fitting lids, like the ones shown in the image. Mason jars or recycled jam jars work perfectly. Ensure the jars are completely dry before filling to prevent any moisture from compromising the product. Store the sealed jars in the refrigerator. Homemade sweetened condensed milk, without the commercial preservatives, typically lasts for about 2-3 weeks in the refrigerator. While some sources suggest it can last longer, it’s always best to err on the side of caution and consume it within this timeframe for optimal freshness and safety. Always check for any signs of spoilage, such as an off smell, discoloration, or mold, before using. Do not store homemade sweetened condensed milk at room temperature once made, as it is not shelf-stable without proper canning techniques and higher sugar content than typical homemade versions.
Reheating sweetened condensed milk is generally not necessary, as it is typically used directly from the refrigerator in its thick, cold state for most recipes, especially for no-bake desserts, fudge, or stirred into cold beverages. However, if a recipe specifically calls for warm or slightly thinner sweetened condensed milk, you can gently warm it. The best way to do this is to scoop out the desired amount into a microwave-safe bowl and heat it in 15-second intervals, stirring in between, until it reaches your desired consistency. Alternatively, you can place the jar (without its lid) in a bowl of warm water for a few minutes, or transfer the desired amount to a small saucepan and warm it over very low heat, stirring constantly, until it thins slightly. Avoid overheating, as this can cause it to become too thin or even scorch. Remember, its primary function is as a thick, sweet base, so only warm it if your recipe explicitly requires it.
Frequently Asked Questions
Can I use different types of milk for this recipe?
While whole milk is highly recommended for the richest and creamiest results, you can experiment with 2% milk. Keep in mind that lower-fat milk might yield a slightly less thick or rich final product. For dairy-free options, full-fat canned coconut milk (not the beverage type) can be used, but it will impart a distinct coconut flavor. Skim milk is generally not recommended as it lacks the fat content necessary for the desired creamy texture and richness.
Why did my sweetened condensed milk turn out too thin?
If your homemade sweetened condensed milk is too thin, it likely means it wasn’t reduced enough. The key is patience during the simmering process. It needs to reduce by about half to two-thirds of its original volume. Remember that it will thicken considerably more as it cools. If it’s still warm and seems too thin, you can return it to the stovetop and continue simmering gently until it reaches the desired consistency, making sure to stir frequently.
What if my sweetened condensed milk burned or scorched on the bottom?
Scorching can happen if the heat is too high or if the mixture isn’t stirred frequently enough, especially as it thickens. If you notice a burnt smell or dark brown bits sticking to the bottom of the pot, immediately stop stirring and carefully pour the unburnt portion into a clean pot, leaving the scorched bits behind. Unfortunately, if the burnt flavor has permeated the entire batch, it’s best to discard it and start over, paying closer attention to heat control and stirring frequency.
Can I freeze homemade sweetened condensed milk?
Yes, you can freeze homemade sweetened condensed milk! It freezes quite well. Transfer the cooled condensed milk into freezer-safe containers or heavy-duty freezer bags, leaving a little headspace for expansion. It can be frozen for up to 3 months. When ready to use, thaw it in the refrigerator overnight. You may need to give it a good stir or whisk after thawing to restore its smooth consistency.