Instructions
- Prepare the Chicken: Remove the chicken from its packaging and pat it thoroughly dry inside and out with paper towels. This is a crucial step for achieving crispy skin. Place the chicken on a roasting rack set inside a roasting pan.
- Season the Chicken: In a small bowl, combine the softened butter, olive oil, salt, pepper, dried thyme, and dried rosemary. Mix well to form a paste. Carefully loosen the skin over the breast and thigh meat using your fingers, then spread about half of the butter mixture directly onto the meat under the skin. Rub the remaining butter mixture all over the exterior of the chicken skin.
- Stuff with Aromatics: Place the quartered onion, smashed garlic cloves, and lemon halves inside the chicken cavity. If desired, you can truss the chicken’s legs together with kitchen twine, though it’s optional. Trussing helps the chicken cook more evenly and creates a neater presentation.
- Preheat Oven & Initial Roast: Preheat your oven to 425°F (220°C). Once preheated, place the roasting pan with the chicken into the oven. Roast for 20-25 minutes at this high temperature. This initial blast of heat helps to crisp the skin.
- Lower Heat & Continue Roasting: Reduce the oven temperature to 375°F (190°C). Continue to roast for another 60-90 minutes, or until an instant-read meat thermometer inserted into the thickest part of the thigh (avoiding the bone) registers 165°F (74°C). During this time, you can baste the chicken every 20-30 minutes with the pan juices to help keep it moist, though this is not strictly necessary if you’ve seasoned well under the skin.
- Rest the Chicken: Once the chicken reaches the target internal temperature, carefully remove the roasting pan from the oven. Transfer the chicken to a cutting board and tent it loosely with aluminum foil. Let it rest for at least 15-20 minutes before carving. This resting period is absolutely essential for the juices to redistribute throughout the meat, ensuring a truly juicy result.
- Make the Pan Gravy: While the chicken is resting, prepare the gravy. Carefully pour off most of the fat from the roasting pan, leaving behind the flavorful pan drippings and any browned bits. Place the roasting pan over two burners on your stovetop over medium heat.
- Deglaze the Pan: Pour the chicken broth or stock into the hot pan. Use a wooden spoon or spatula to scrape up all the browned bits (fond) from the bottom of the pan. These bits are packed with flavor! Bring the mixture to a simmer.
- Thicken the Gravy: In a small bowl, whisk together the all-purpose flour and cold water to create a smooth slurry. Gradually whisk the flour slurry into the simmering pan drippings. Continue to whisk constantly as the gravy thickens.
- Simmer and Season: Reduce the heat to low and let the gravy simmer gently for 3-5 minutes, allowing it to thicken and the flour taste to cook out. Taste the gravy and adjust seasoning with additional salt and pepper as needed. If the gravy is too thick, add a splash more chicken broth or water. If it’s too thin, you can simmer it a bit longer or add a tiny bit more slurry.
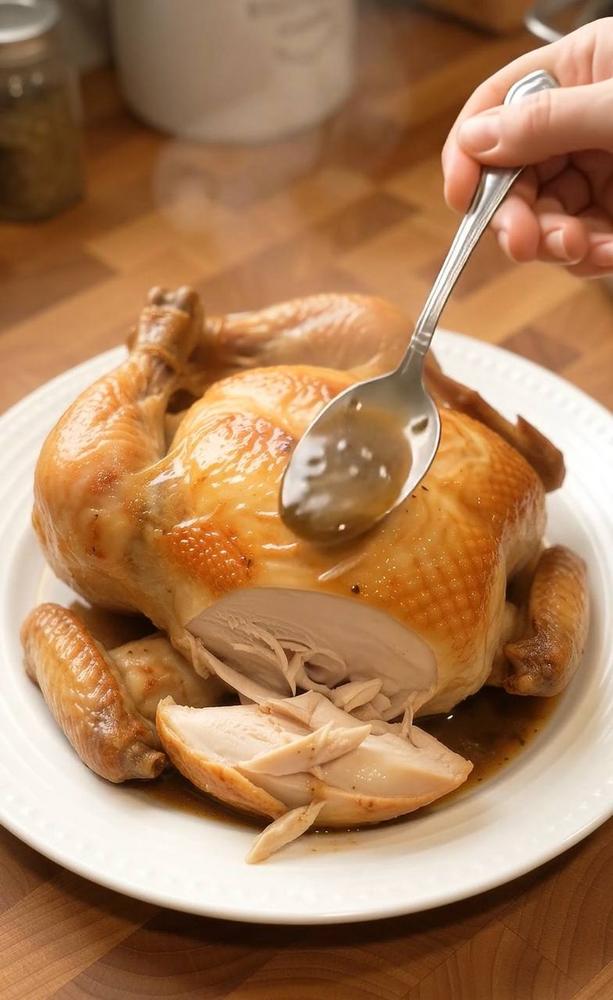
- Carve and Serve: Carve the rested chicken into desired pieces. Serve immediately with the warm pan gravy drizzled generously over the top.
Cooking Tips and Variations
For Crispy Skin: The key to truly crispy skin lies in patting the chicken extremely dry before seasoning. You can even leave it uncovered in the refrigerator for a few hours or overnight after patting dry to further dehydrate the skin. The initial high heat also contributes significantly to crispiness.
Ensuring Juicy Meat: The most important tip for juicy meat is to avoid overcooking. Use a reliable meat thermometer and pull the chicken from the oven as soon as it hits 165°F (74°C). The resting period is equally critical; it allows the muscle fibers to relax and reabsorb juices that would otherwise run out if carved immediately.
Lump-Free Gravy: The secret to lump-free gravy is creating a smooth flour or cornstarch slurry with cold liquid before adding it to the hot pan. Whisking constantly as you add the slurry also helps prevent lumps from forming.
Flavor Variations for the Chicken:
- Citrus Boost: In addition to lemon, try stuffing the cavity with orange or lime halves for a brighter flavor.
- Herb Powerhouse: Experiment with different fresh herbs like sage, oregano, or marjoram.
- Spicy Kick: Add a pinch of cayenne pepper or paprika to your butter rub for a subtle warmth.
- Root Vegetables: For an all-in-one meal, chop potatoes, carrots, and parsnips and toss them with olive oil, salt, and pepper. Arrange them around the chicken in the roasting pan during the last 45-60 minutes of cooking. They’ll absorb the delicious chicken drippings.
Gravy Variations:
- Herb Gravy: Add a sprig of fresh thyme or rosemary to the gravy as it simmers, then remove before serving.
- Mushroom Gravy: Sauté sliced mushrooms in the pan before adding the broth for an earthy flavor.
- Wine Gravy: Deglaze the pan with ½ cup of dry white wine before adding the chicken broth for a more complex gravy.
Serving Suggestions: This roast chicken is a star on its own, but it pairs beautifully with classic sides like creamy mashed potatoes (perfect for soaking up that gravy!), roasted asparagus, green bean casserole, or a simple garden salad.
Storage and Reheating
Storage: Leftover roast chicken should be cooled completely and then stored in an airtight container in the refrigerator within 2 hours of cooking. It will keep well for 3-4 days. The gravy can also be stored in a separate airtight container in the refrigerator for the same duration.
Reheating:
- Chicken: To reheat, slice the chicken meat off the bone if not already done. Place the chicken in an oven-safe dish with a splash of chicken broth or water to prevent it from drying out. Cover tightly with foil and reheat in a preheated oven at 300°F (150°C) for 15-20 minutes, or until heated through. Alternatively, individual portions can be reheated gently in the microwave with a splash of liquid, but be careful not to overcook, which can dry out the meat.
- Gravy: Reheat gravy gently on the stovetop over low heat, whisking occasionally, until simmering. If it has thickened too much in the refrigerator, you can thin it out with a little more chicken broth or water.
Frequently Asked Questions
Why is patting the chicken dry so important?
Patting the chicken thoroughly dry removes surface moisture. Moisture on the skin creates steam in the oven, which prevents the skin from crisping up. A dry surface allows the skin to render fat and become beautifully golden and crispy.
How do I know when my chicken is fully cooked?
The most reliable way to determine if your chicken is cooked through is by using an instant-read meat thermometer. Insert it into the thickest part of the thigh, avoiding the bone. The chicken is done when the internal temperature reaches 165°F (74°C).
My gravy is too thin/thick. How can I fix it?
If your gravy is too thin, you can create a small slurry with 1 teaspoon of flour or cornstarch mixed with 1 tablespoon of cold water, then whisk it into the simmering gravy and cook for another minute until thickened. If it’s too thick, simply whisk in a splash more chicken broth or hot water until it reaches your desired consistency.