Instructions
- Prepare the Filling: In a large saucepan or Dutch oven, melt the butter over medium heat. Add the diced onion and celery and cook until softened, about 5-7 minutes, stirring occasionally.
- Stir in the diced carrots and cook for another 3-5 minutes until slightly tender-crisp. Add the frozen peas and cook for 2 minutes more, stirring.
- Sprinkle the flour over the vegetables and stir constantly for 1 minute to cook out the raw flour taste, creating a roux.
- Gradually whisk in the chicken broth, then the milk or half-and-half, ensuring no lumps form. Bring the mixture to a gentle simmer, stirring constantly, until the sauce thickens, about 5-7 minutes.
- Stir in the cooked chicken, dried thyme, poultry seasoning, salt, and black pepper. Taste and adjust seasonings as needed. Remove the filling from the heat and set aside to cool slightly.
- Preheat Oven and Prepare Muffin Tins: Preheat your oven to 375°F (190°C). Lightly grease a 12-cup standard muffin tin.
- Prepare the Crusts (Biscuit Dough Method): Open the cans of refrigerated biscuit dough. Flatten each biscuit slightly with your hands or a rolling pin until it’s about 3-4 inches in diameter. Carefully press each flattened biscuit into the prepared muffin cups, forming a cup shape that extends slightly over the edges.
- Prepare the Crusts (Puff Pastry Method): If using puff pastry, unfold the thawed sheets. Using a 3.5-4 inch round cookie cutter or a glass, cut out 12 circles for the bottoms and 12 slightly smaller circles (about 3 inches) for the tops. Gently press the larger circles into the prepared muffin cups.
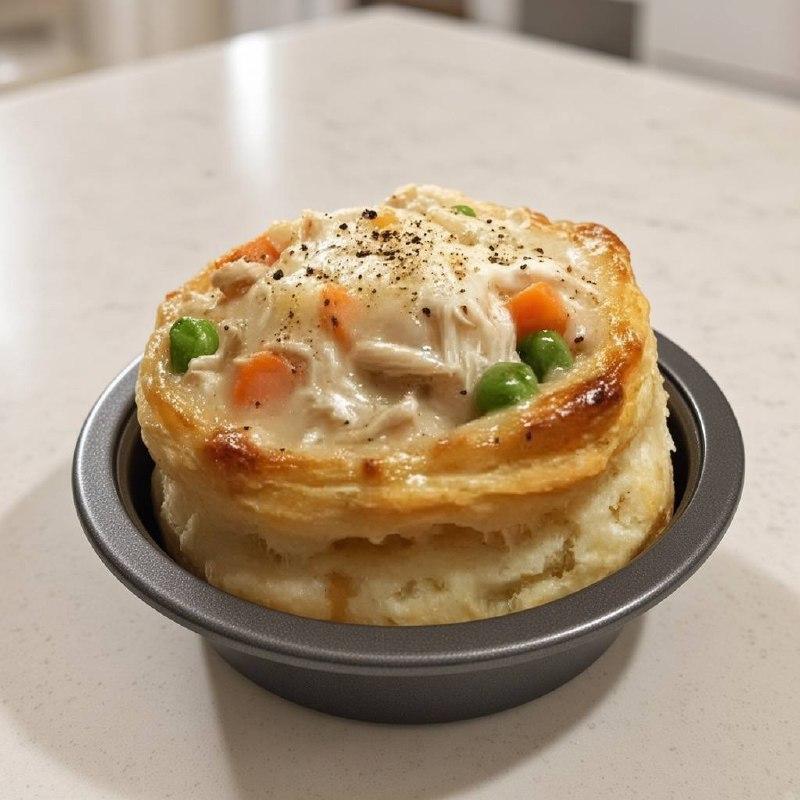
- Assemble the Pies: Spoon the cooled chicken pot pie filling evenly into each crust-lined muffin cup, filling them about two-thirds full. Do not overfill.
- Top the Pies:
- For Biscuit Dough: If you have extra biscuit dough, you can cut out smaller circles to place on top, pinching the edges to seal. Alternatively, you can leave them open-faced, or simply press the edges of the bottom crust inward slightly.
- For Puff Pastry: Place the smaller puff pastry circles on top of the filling. Gently press the edges of the top crust down onto the bottom crust to seal them, crimping with a fork if desired. Cut a small slit in the center of each top crust to allow steam to escape.
- Egg Wash (Optional): For a golden-brown finish, brush the tops of the biscuit or puff pastry crusts with the whisked egg wash.
- Bake: Bake for 20-25 minutes, or until the crusts are golden brown and the filling is bubbly. If the tops are browning too quickly, you can loosely tent the muffin tin with aluminum foil.
- Cool and Serve: Carefully remove the muffin tin from the oven. Let the mini pot pies cool in the tin for 5-10 minutes before gently removing them with a knife or small spatula. This helps them hold their shape. Garnish with fresh parsley and an extra grind of black pepper, if desired. Serve warm.
Cooking Tips and Variations
To ensure your Mini Chicken Pot Pies are always a hit, here are some expert tips and exciting variations to try:
- Achieving the Perfect Crust: For extra golden and slightly crispier biscuit crusts, brush the tops with an egg wash (one egg whisked with a tablespoon of water) before baking. If using puff pastry, an egg wash is essential for that beautiful sheen. Don’t overwork your dough, whether it’s biscuits or puff pastry, to keep it tender and flaky.
- Preventing Soggy Bottoms: While these mini pies generally bake through well, if you’re concerned about a soggy bottom, you can blind bake your crusts for 5-7 minutes before adding the filling. This is more common with traditional pie crusts, but can be applied if you find your biscuit dough or puff pastry isn’t crisping up enough on the bottom. Ensure your filling has cooled a bit before adding it to the raw crusts.
- Filling Consistency is Key: The filling should be thick enough to hold its shape but still creamy. If it’s too thin, simmer it a little longer to reduce. If it’s too thick, you can stir in a splash more chicken broth or milk until it reaches the desired consistency.
- Time-Saving Hacks: The easiest way to save time is by using a pre-cooked rotisserie chicken. You can also use frozen mixed vegetables (thawed and drained) instead of chopping individual carrots and peas. Pre-chopped mirepoix (onions, carrots, celery) from the grocery store is another great shortcut.
- Vegetable Variations: Feel free to customize your vegetable mix! Add corn, green beans, diced potatoes (par-boiled first), mushrooms, or even a handful of fresh spinach (stirred in at the very end).
- Protein Swaps: Not a fan of chicken? This recipe works beautifully with cooked, shredded turkey (perfect for Thanksgiving leftovers!), or even diced cooked ham. For a vegetarian option, use vegetable broth and add extra veggies like mushrooms, bell peppers, and zucchini.
- Herb and Spice Boosters: Beyond thyme and poultry seasoning, consider adding a pinch of dried rosemary, sage, or a bay leaf to the simmering filling (remember to remove the bay leaf before assembling). A dash of smoked paprika can add a lovely depth of flavor.
- Cheesy Goodness: For an extra layer of richness, stir in 1/4 cup of shredded cheddar cheese or Gruyere into the filling just before assembling.
- Make Ahead Tip: The filling can be made up to 2-3 days in advance and stored in an airtight container in the refrigerator. Assemble the pies just before baking for the freshest crust.
- Don’t Overfill: Overfilling the muffin cups can lead to spillage and a messy oven. Aim to fill them about two-thirds to three-quarters full.
- Serving Suggestions: These mini pot pies are hearty enough to be a meal on their own, but they also pair wonderfully with a light green salad or a side of cranberry sauce for a touch of sweetness.
Storage and Reheating
Proper storage and reheating ensure your Mini Chicken Pot Pies remain delicious long after they’re baked.
Storage:
- Refrigeration: Allow the baked mini pot pies to cool completely to room temperature. Store them in an airtight container in the refrigerator for up to 3-4 days.
- Freezing (Baked): Once completely cooled, wrap individual mini pot pies tightly in plastic wrap, then place them in a freezer-safe bag or container. They can be frozen for up to 2-3 months.
- Freezing (Unbaked): Assemble the mini pot pies as directed, but do not bake. Place the muffin tin with the unbaked pies in the freezer for about 1-2 hours, or until solid. Once frozen, remove them from the muffin tin and wrap each pie individually in plastic wrap, then place them in a freezer-safe bag or container. Freeze for up to 1-2 months.
Reheating:
- From Refrigerator:
- Oven: For best results, reheat in a preheated oven at 350°F (175°C) for 10-15 minutes, or until heated through and the crust is crisp again.
- Microwave: While convenient, the microwave can make the crust soggy. If using, heat for 1-2 minutes until warm, but be aware the crust texture will change.
- From Frozen (Baked):
- Oven: Do not thaw. Place the frozen mini pot pies (unwrapped) on a baking sheet. Reheat in a preheated oven at 350°F (175°C) for 25-35 minutes, or until heated through and the crust is golden and crisp. You may want to cover them loosely with foil if the crust starts to brown too much.
- From Frozen (Unbaked):
- Oven: Place the frozen, unbaked mini pot pies (unwrapped) in a muffin tin. You might need to add an extra 10-15 minutes to the baking time specified in the recipe. Bake at 375°F (190°C) for 30-40 minutes, or until the crust is golden brown and the filling is bubbly. Keep an eye on them to prevent over-browning.
Frequently Asked Questions
Can I use leftover turkey instead of chicken?
Absolutely! This recipe is fantastic for using up leftover cooked turkey, especially after holidays like Thanksgiving. Simply shred or dice the turkey and incorporate it into the filling as you would the chicken. The flavors meld beautifully.
What kind of biscuit dough works best for this recipe?
Standard refrigerated biscuit dough (the kind that comes in a tube) works wonderfully for creating a sturdy, bready crust. Avoid the “flaky layers” style biscuits if you want a more traditional pot pie crust, as they tend to separate too much. Puff pastry is also an excellent choice for a lighter, more delicate, and very flaky crust.
Can I make these gluten-free?
Yes, with a few substitutions. Use a gluten-free all-purpose flour blend (one that contains xanthan gum) for the roux in the filling. For the crust, look for gluten-free refrigerated biscuit dough or gluten-free puff pastry, both of which are available in many grocery stores. Ensure your chicken broth is also gluten-free.
My filling seems too thin/thick. What should I do?
If your filling is too thin, continue to simmer it gently over medium-low heat, stirring occasionally, until it thickens to your desired consistency. If it’s too thick, simply stir in a tablespoon or two of extra chicken broth or milk until it loosens up. Adjust seasonings after any additions.