Instructions
- Prepare the Dough: In a large mixing bowl, combine the all-purpose flour, semolina flour, salt, sugar, and instant dry yeast (if using). Gradually add the warm water, mixing with your hands or a stand mixer fitted with a dough hook until a shaggy dough forms.
- Knead the Dough: Turn the dough out onto a lightly floured surface and knead for 10-15 minutes until it becomes very soft, smooth, and elastic. If using a stand mixer, knead for 8-10 minutes on medium speed. The dough should be pliable and slightly sticky, but not wet. Adjust with a tiny bit more flour or water if necessary.
- First Rest: Lightly oil the bowl, place the dough ball inside, and turn to coat. Cover the bowl tightly with plastic wrap or a clean kitchen towel. Let the dough rest in a warm place for at least 30 minutes, or up to 1 hour. This resting period is crucial for relaxing the gluten, making the dough much easier to stretch.
- Prepare the Oil/Butter Mixture: While the dough rests, combine the ½ cup vegetable oil and ¼ cup melted butter in a small bowl. This mixture will be used for oiling your hands, the work surface, and brushing the dough during shaping. Have the 2 tablespoons of fine semolina flour ready in a separate small bowl for dusting.
- Divide the Dough: Lightly oil your hands. Gently punch down the rested dough and divide it into 10-12 equal-sized balls, roughly the size of a golf ball or small plum. Roll each piece smoothly between your palms.
- Second Rest (Shaping Balls): Arrange the dough balls on a lightly oiled tray or baking sheet, leaving some space between them. Brush the tops of the balls with a little of the oil/butter mixture to prevent them from drying out. Cover loosely with plastic wrap and let them rest for another 15-20 minutes. This second rest is vital for the dough to become extremely pliable and easy to stretch thinly.
- Shape the Msemen (The Layering Process):
- Lightly oil your clean work surface (a large, flat surface like a countertop or a large cutting board is ideal). Take one dough ball and place it on the oiled surface.
- Using your oiled hands, begin to gently stretch the dough outwards from the center. Work slowly and patiently, pushing the dough outwards from the middle towards the edges. The goal is to stretch it into a very thin, translucent square or rectangle, almost paper-thin, without tearing. If it tears slightly, don’t worry too much; just patch it up.
- Once stretched thin, generously brush the entire surface of the dough with the oil/butter mixture.
- Sprinkle a pinch of the fine semolina flour evenly over the oiled dough. This semolina helps create distinct layers and adds to the crispness.
- First Fold: Fold one side of the dough (e.g., the right side) one-third of the way towards the center. Brush this folded section with more oil/butter mixture and sprinkle with semolina.
- Second Fold: Fold the opposite side (e.g., the left side) over the first fold, creating a long, narrow rectangle. Again, brush with oil/butter and sprinkle with semolina.
- Third Fold: Now, fold one end of this rectangle (e.g., the bottom end) one-third of the way up towards the center. Brush and sprinkle.
- Fourth Fold: Fold the remaining end (e.g., the top end) over the previous fold, creating a neat square packet. This is your Msemen.
- Place the shaped Msemen on a lightly oiled tray and cover loosely with plastic wrap to prevent drying. Repeat this stretching and folding process with the remaining dough balls. Allow the shaped Msemen to rest for at least 10-15 minutes before cooking, which makes them easier to flatten slightly before frying.
- Cook the Msemen:
- Heat a large, heavy-bottomed non-stick pan or griddle over medium heat. Do not add oil to the pan initially, as the Msemen is already well-oiled.
- Take one shaped Msemen square. Gently flatten it with your hands to your desired thickness (usually about ¼ to ½ inch thick). Be careful not to press too hard and squeeze out all the layers.
- Carefully place the flattened Msemen onto the hot pan. Cook for 2-3 minutes per side, or until golden brown and slightly puffed. You’ll see the layers begin to separate and crisp up. Flip occasionally to ensure even cooking and browning.
- Once cooked, transfer the Msemen to a plate. As soon as it comes off the pan, some people like to gently clap or “crush” the Msemen between their hands (careful, it’s hot!) to further encourage the layers to separate and become airy.
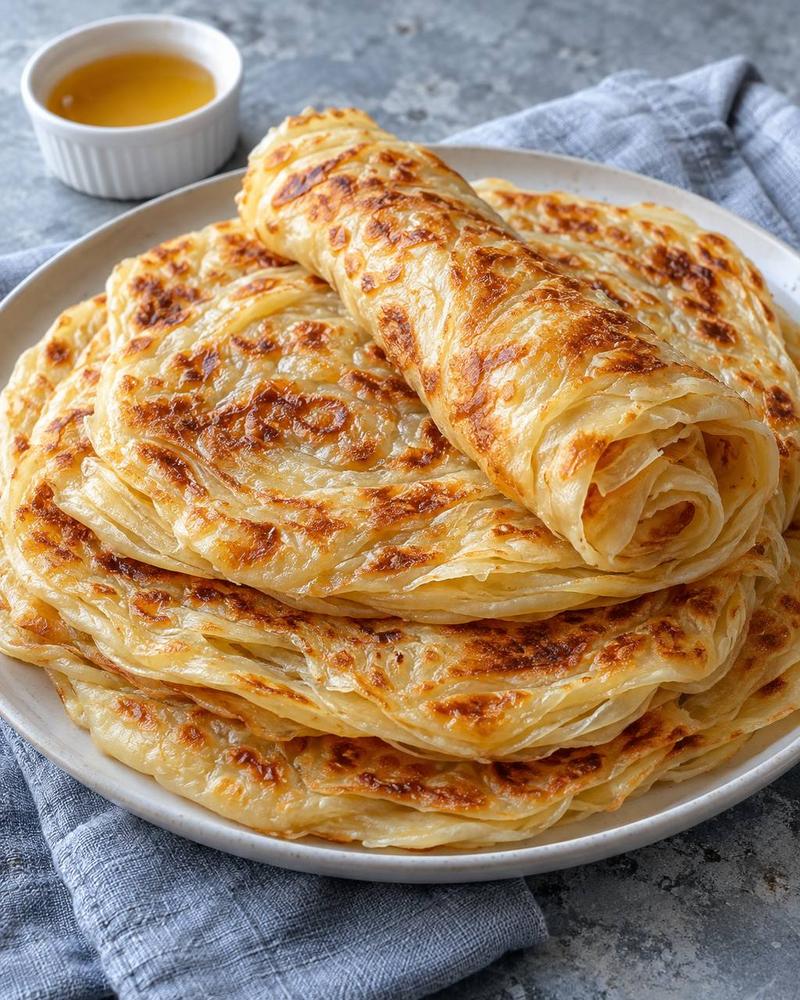
- Serve Immediately: Msemen is best enjoyed fresh off the pan, while still warm and crisp. Serve with a generous drizzle of honey, your favorite jam, or a dusting of powdered sugar. A glass of traditional Moroccan mint tea is the perfect accompaniment.
Cooking Tips and Variations
Dough Consistency is Key: The success of Msemen hinges on a very soft, pliable, and well-kneaded dough. It should be slightly sticky but manageable. Don’t be afraid to knead it for the full recommended time; this develops the gluten, making it easier to stretch super thin without tearing. If your dough feels stiff, add a tablespoon of warm water at a time during kneading until it reaches the right consistency.
Generous Oiling: Do not skimp on the oil and butter mixture. It’s essential for preventing the dough from sticking to your hands and work surface, and more importantly, it helps create those distinct, flaky layers. Each fold should be brushed generously. The semolina dusting also plays a crucial role in preventing layers from sticking together.
Resting Times are Non-Negotiable: The multiple resting periods are not optional. They allow the gluten to relax, making the dough incredibly elastic and easy to stretch to paper-thinness. Rushing this step will result in a tough, uncooperative dough that tears easily and won’t form those beautiful layers.
Stretch Thin, but Don’t Force It: The thinner you can stretch the dough, the flakier your Msemen will be. However, don’t force it to the point of constant tearing. If the dough resists stretching, let it rest for another 5-10 minutes on the oiled surface before trying again. Patience is your best friend here.
Medium Heat for Frying: Cook Msemen on medium heat. If the heat is too high, the outside will burn before the inside cooks through and the layers have a chance to puff. If the heat is too low, the Msemen will absorb too much oil and become greasy rather than crisp. Adjust as needed to achieve a golden-brown exterior and cooked interior.
Variations:
- Semolina Ratio: For a chewier Msemen, you can increase the semolina flour slightly, up to a 1:1 ratio with all-purpose flour. For an exceptionally soft Msemen, use only all-purpose flour.
- Round Msemen (Meloui): Instead of folding into a square, after stretching the dough thinly and oiling, roll it up into a long rope, then coil the rope into a spiral. Flatten and cook as usual. This creates a round, spiraled flatbread with a different visual appeal and a slightly chewier texture.
- Stuffed Msemen (Rghayef): For a savory meal, Msemen can be stuffed. Prepare a filling of seasoned ground meat (kefta), sautéed vegetables (onions, peppers, tomatoes), or a spicy potato mixture. After the first few folds, place a spoonful of cooled filling in the center before completing the final folds to seal it. Cook as usual, ensuring the filling is heated through.
- Flavor Infusions: A pinch of mahleb (ground cherry pits) or a touch of orange blossom water can be added to the dough for a subtle aromatic touch, though this is less traditional for basic Msemen.
Storage and Reheating
Storage: Msemen is best enjoyed fresh and warm. However, if you have leftovers, allow them to cool completely before storing. You can stack them in an airtight container or a freezer bag. They will keep at room temperature for 1-2 days, or in the refrigerator for up to 5 days. For longer storage, Msemen freezes exceptionally well. Wrap individual pieces tightly in plastic wrap, then place them in a freezer-safe bag or container. They can be frozen for up to 2-3 months.
Reheating: The key to reheating Msemen is to restore its crispness without making it dry or greasy. Avoid the microwave if possible, as it tends to make Msemen soft and chewy rather than flaky.
- On the Stovetop: This is the best method for reheating. Heat a dry non-stick pan or griddle over medium heat. Place the Msemen directly on the hot pan (no oil needed). Reheat for 1-2 minutes per side, flipping occasionally, until it’s warmed through and the layers have crisped up again.
- In the Oven/Toaster Oven: Preheat your oven or toaster oven to 350°F (175°C). Place the Msemen directly on a baking sheet or the oven rack. Reheat for 5-7 minutes, or until warm and crisp.
- From Frozen: You can reheat frozen Msemen directly on a dry pan over medium heat, or in a preheated oven at 350°F (175°C). It will take a bit longer, about 5-8 minutes on the stovetop (flipping often) or 10-15 minutes in the oven, until heated through and crisp.
Frequently Asked Questions
What is the difference between Msemen and Meloui?
Both Msemen and Meloui are Moroccan layered flatbreads made from similar dough. The primary difference lies in their shaping technique. Msemen is traditionally folded into a square packet, resulting in a distinct square shape and very neat layers. Meloui, on the other hand, is rolled into a long rope and then coiled into a spiral before being flattened and cooked, giving it a round shape and a slightly different, more intricate layered texture.
Can I make Msemen without yeast?
Yes, absolutely! Many traditional Msemen recipes do not include yeast. The yeast in this recipe is optional and is added to provide a slightly softer texture and a very subtle rise, making the Msemen a bit lighter. If you omit the yeast, your Msemen will still be wonderfully flaky and delicious, perhaps with a slightly denser chew, which some purists prefer. Ensure you still allow adequate resting times for the gluten to relax.
Why is my Msemen not flaky?
There are a few common reasons why Msemen might not be as flaky as desired. The most frequent culprits are not stretching the dough thin enough, not using enough oil/butter mixture during the layering process, or insufficient resting times for the dough. The oil and semolina create separation between the layers, allowing them to puff and crisp. If your dough is too thick or the layers stick together, you won’t get that signature flakiness. Ensure you knead the dough until it’s very elastic and follow the resting periods diligently.
Can I prepare Msemen dough ahead of time?
Yes, you can prepare the Msemen dough ahead of time. After the initial kneading and first rest, you can oil the dough ball, place it in an airtight container, and refrigerate it for up to 24 hours. When you’re ready to make the Msemen, take the dough out of the refrigerator about 30-60 minutes beforehand to allow it to come closer to room temperature, which makes it easier to work with. Then proceed with dividing, shaping, and cooking as per the instructions.