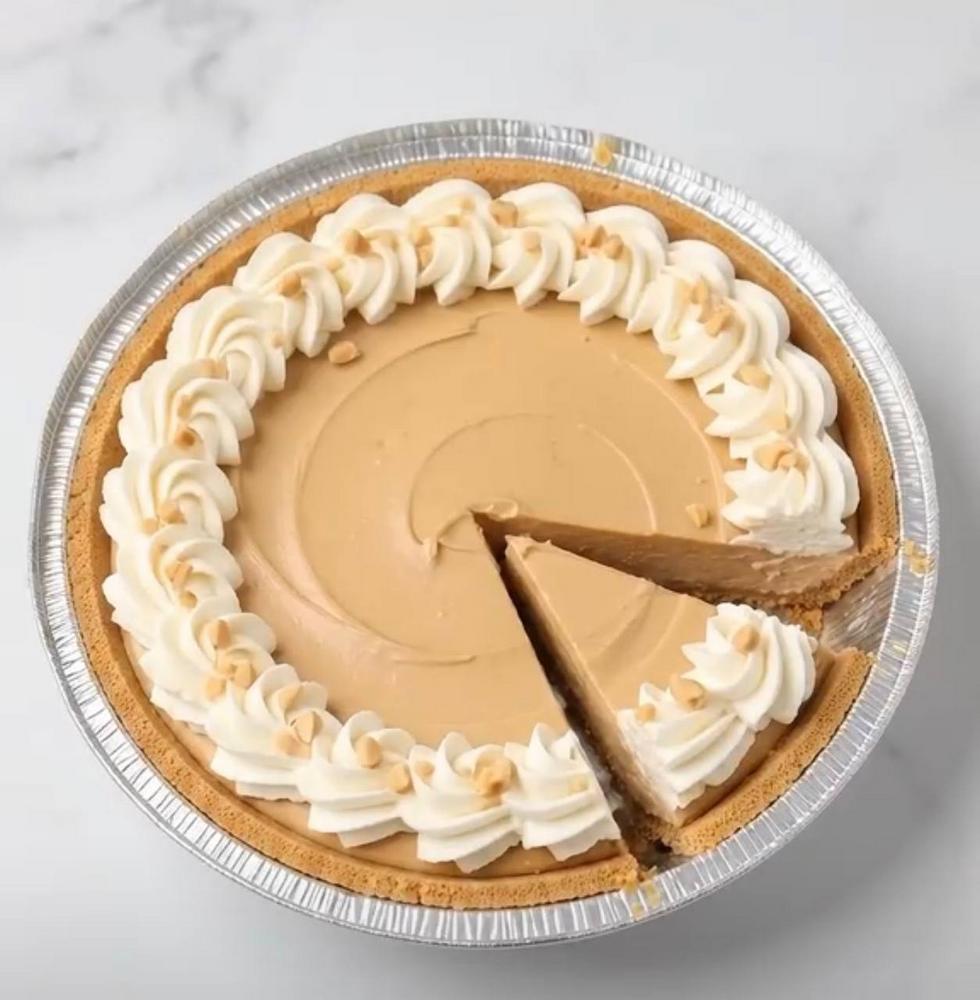
Instructions
- Prepare the Crust: In a medium bowl, combine the graham cracker crumbs and granulated sugar. Pour in the melted butter and mix well with a fork until the crumbs are evenly moistened and resemble wet sand.
- Press the crumb mixture firmly and evenly into the bottom and up the sides of a 9-inch pie plate. You can use the back of a spoon or the bottom of a flat glass to compact the crust.
- Place the prepared crust in the refrigerator to chill for at least 30 minutes while you prepare the filling. This helps it set and prevents crumbling.
- Make the Peanut Butter Filling: In a large mixing bowl, using an electric mixer on medium speed, beat the softened cream cheese until smooth and creamy, about 1-2 minutes. Make sure there are no lumps.
- Add the creamy peanut butter to the cream cheese and beat until well combined and smooth, scraping down the sides of the bowl as needed.
- Gradually add the sifted powdered sugar to the peanut butter mixture, beating on low speed until incorporated, then increase to medium speed and beat until light and fluffy.
- Stir in the vanilla extract.
- In a separate bowl, if using homemade whipped cream, beat the 2 cups of heavy cream until stiff peaks form. If using thawed whipped topping, gently fold half of the thawed whipped topping into the peanut butter mixture until just combined. Be careful not to overmix, as this can deflate the filling.
- Pour the peanut butter filling into the chilled graham cracker crust, spreading it evenly with an offset spatula or the back of a spoon.
- Chill to Perfection: Cover the pie loosely with plastic wrap and refrigerate for a minimum of 4-6 hours, or preferably overnight. Adequate chilling time is crucial for the pie to set properly and achieve its firm, sliceable texture.
- Add the Whipped Topping & Garnish: Just before serving, spread the remaining half of the thawed whipped topping over the top of the pie, or pipe homemade whipped cream decoratively around the edges using a piping bag fitted with a star tip.
- Sprinkle the chopped roasted peanuts generously over the whipped topping for added crunch and flavor.
- Slice the pie into 8-10 servings using a sharp knife dipped in hot water and wiped clean between each slice for the cleanest cuts. Serve immediately and enjoy!
Cooking Tips and Variations
For the best results, always ensure your cream cheese is completely softened to room temperature before you start. This prevents lumps and ensures a smooth, creamy filling. If you’re short on time, you can cut the cream cheese into smaller pieces and microwave it for 10-15 seconds at a time until just softened, being careful not to melt it.
When pressing the graham cracker crust, use a firm hand. The more compacted the crumbs are, the less likely your crust will fall apart when sliced. Chilling the crust before adding the filling also helps it set and prevents it from becoming soggy from the filling.
Do not overmix the filling once you’ve folded in the whipped topping or homemade whipped cream. Overmixing can deflate the air incorporated, leading to a denser pie. Gently fold until just combined to maintain that light, airy texture.
Variations:
- Chocolate Lover’s Dream: For a chocolate twist, use an Oreo cookie crust instead of graham cracker. Crush about 24 Oreo cookies (filling included) and mix with 6 tablespoons of melted butter. You can also drizzle melted chocolate over the top of the pie before serving, or fold in a ½ cup of mini chocolate chips into the peanut butter filling.
- Crunchy Peanut Butter: If you prefer a bit more texture in your filling, use crunchy peanut butter instead of creamy. This will add delightful little peanut bits throughout the pie.
- Extra Sweetness: Adjust the amount of powdered sugar to your preference. If your peanut butter is very sweet, you might use slightly less. If you prefer a richer, sweeter pie, you can add an extra ¼ cup.
- Different Crusts: Experiment with other cookie crusts like Nutter Butter cookies for an even more intense peanut butter flavor, or even a chocolate wafer crust.
- Caramel Drizzle: A drizzle of warm caramel sauce over the top of the pie just before serving adds another layer of decadence that pairs wonderfully with peanut butter.
- Espresso Kick: For an adult twist, add ½ teaspoon of instant espresso powder to the peanut butter filling. It enhances the chocolate and peanut butter flavors beautifully.
Storage and Reheating
This No-Bake Peanut Butter Cream Pie is best enjoyed chilled. Store any leftover pie tightly covered with plastic wrap in the refrigerator. It will maintain its best quality for up to 3-4 days. While the pie is technically still safe to eat after this, the crust may start to soften and the texture of the filling might change slightly.
For longer storage, you can freeze individual slices or the entire pie. To freeze, place the pie (uncovered) in the freezer for about 1-2 hours until firm. Then, wrap it tightly in plastic wrap, followed by a layer of aluminum foil. Frozen pie can be stored for up to 1 month. To serve from frozen, simply transfer the pie to the refrigerator and let it thaw for several hours or overnight until soft enough to slice. Individual slices can thaw on the counter for about 30-45 minutes.
This pie does not require reheating; it is meant to be served cold directly from the refrigerator. Reheating will cause the filling to soften and potentially separate, ruining the texture.
Frequently Asked Questions
What kind of peanut butter should I use?
For the best results and a consistently smooth filling, it’s recommended to use a conventional creamy peanut butter like Jif or Skippy. Natural peanut butters, which often separate oil, can sometimes lead to a slightly different texture in the filling and may not set as firmly. If you use natural peanut butter, make sure it’s very well stirred and emulsified before adding it to the recipe.
Can I make this pie ahead of time for a party?
Absolutely! This pie is an excellent make-ahead dessert. In fact, it needs a minimum of 4-6 hours to chill and set, but chilling it overnight yields the best results. You can prepare the entire pie, cover it loosely with plastic wrap, and store it in the refrigerator for up to 2 days before serving. Add the final whipped topping and garnish just before serving for the freshest look.
Why is my pie not setting properly?
There are a few common reasons why a no-bake pie might not set. The most frequent culprit is insufficient chilling time; ensure you’ve allowed at least 4-6 hours, or preferably overnight. Another reason could be using low-fat cream cheese or an inferior quality peanut butter that doesn’t firm up well. Make sure your cream cheese is full-fat and thoroughly softened but not melted. Overmixing the filling, especially after folding in the whipped topping, can also prevent it from setting firmly.
Can I use homemade whipped cream instead of store-bought whipped topping?
Yes, you absolutely can! If you prefer homemade whipped cream, you’ll need about 2 cups of heavy cream, ¼ cup powdered sugar, and ½ teaspoon vanilla extract. Beat the cold heavy cream with the powdered sugar and vanilla until stiff peaks form. Gently fold about half of this into the peanut butter filling, and reserve the rest for the topping. Homemade whipped cream offers a richer flavor and lighter texture but may not hold its shape quite as long as stabilized store-bought whipped topping, so add it closer to serving time.