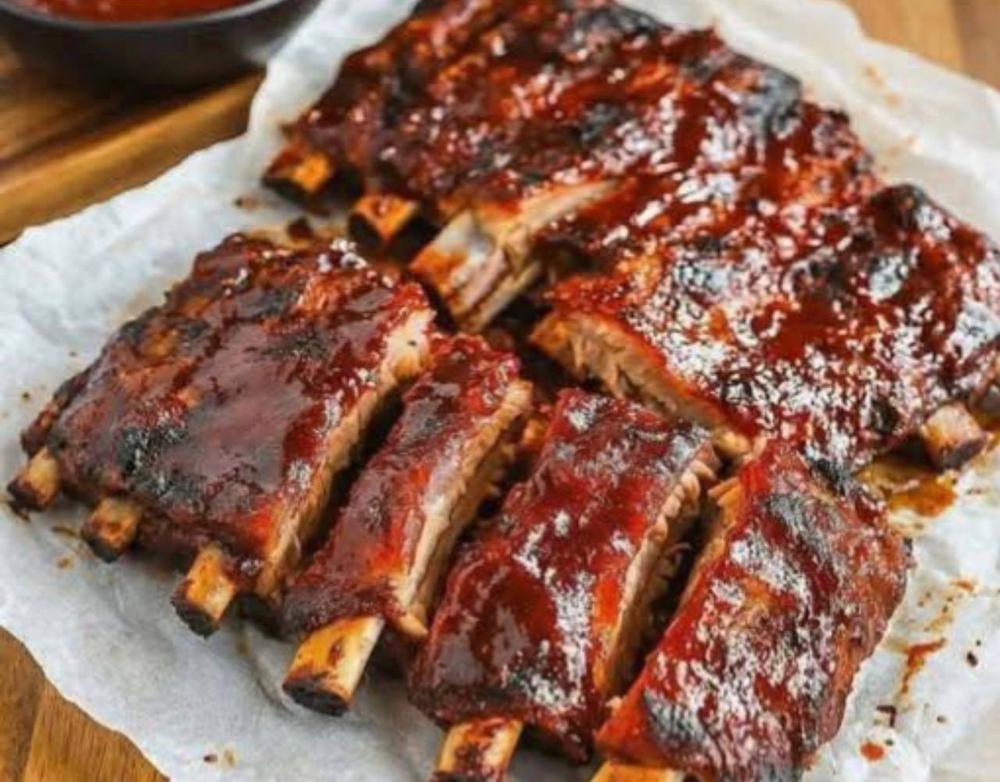
Instructions
- Prepare the Ribs: Begin by patting the ribs dry with paper towels. This helps the rub adhere better. On the underside of each rack, there’s a thin, tough membrane. It’s crucial to remove this for tender ribs. To do so, slide a butter knife or the tip of a spoon under the membrane at one end of the rack. Lift it gently, then grab it firmly with a paper towel (it can be slippery!) and pull it away from the bones. It should come off in one piece. Trim any excess fatty bits from the ribs, but leave a decent layer for flavor and moisture.
- Make the Dry Rub: In a small bowl, combine the smoked paprika, brown sugar, garlic powder, onion powder, chili powder, kosher salt, black pepper, and cayenne pepper (if using). Mix well until all spices are evenly distributed.
- Apply the Dry Rub: Generously sprinkle the dry rub all over both sides of the ribs. Use your hands to gently massage the rub into the meat, ensuring an even coating. Don’t be shy – this is where a lot of the flavor comes from!
- Preheat Oven & Prepare Baking Pan: Preheat your oven to 275°F (135°C). Line a large, sturdy baking sheet or roasting pan with heavy-duty aluminum foil. This will make cleanup much easier. If your ribs are too long for one pan, you can cut them in half.
- Prepare for Baking: Place the seasoned ribs, bone-side down, onto the foil-lined baking sheet. Pour the apple cider vinegar and water into the bottom of the pan, around the ribs. This liquid will create steam, keeping the ribs moist and tender during the long cooking process.
- Wrap and Bake (Low & Slow): Tightly wrap the ribs in the aluminum foil, creating a sealed packet. Ensure there are no gaps for steam to escape. Place the wrapped ribs in the preheated oven and bake for 2.5 to 3.5 hours. For baby back ribs, start checking around 2.5 hours. For spareribs or St. Louis style, allow 3 to 3.5 hours. The goal is for the meat to be very tender, easily pierced with a fork, and starting to pull back from the bones.
- Unwrap and Drain: Carefully remove the ribs from the oven. Be cautious when opening the foil packet, as hot steam will escape. Gently unwrap the ribs and carefully drain off most of the accumulated cooking liquid from the pan. You can discard this liquid.
- Apply First Layer of BBQ Sauce: Increase your oven temperature to 375°F (190°C). Brush a generous layer of your favorite BBQ sauce evenly over the top side of the ribs.
- Bake for Glazing: Return the ribs (uncovered) to the 375°F (190°C) oven and bake for 15-20 minutes, or until the sauce is bubbly and slightly caramelized.
- Apply Second Layer & Broil (Optional, for Extra Char): For an even stickier, more caramelized finish, remove the ribs from the oven again. Apply another layer of BBQ sauce. If desired, you can now switch your oven to the broiler setting (keep a close eye on them!). Broil for 2-5 minutes, watching constantly, until the sauce is slightly charred in spots and deeply caramelized. Be very careful, as BBQ sauce can burn quickly under the broiler.
- Rest the Ribs: Once the ribs are beautifully glazed and caramelized, remove them from the oven. Tent them loosely with aluminum foil and let them rest for 10-15 minutes. This crucial step allows the juices to redistribute throughout the meat, resulting in incredibly tender and succulent ribs.
- Slice and Serve: After resting, transfer the ribs to a cutting board. Slice them between the bones into individual or two-bone portions. Garnish with chopped fresh parsley or cilantro, if using. Serve immediately with your favorite sides.
Cooking Tips and Variations
Achieving truly fall-off-the-bone, flavor-packed oven-baked BBQ ribs is an art, but it’s an art easily mastered with a few key techniques and considerations. The “low and slow” cooking method is paramount here. While it might seem like a long time, this extended period at a lower temperature allows the tough connective tissues in the ribs to break down slowly, transforming them into gelatin and resulting in that coveted tender texture. Don’t rush this step, as it’s the foundation of incredible ribs.
The membrane removal is another non-negotiable step. That thin, silvery layer on the back of the ribs, if left on, will create a chewy barrier that prevents the seasonings from penetrating fully and makes the ribs less pleasant to eat. A simple trick using a paper towel to grip the slippery membrane makes this task surprisingly easy. As for the dry rub, feel free to customize it! If you like more heat, increase the cayenne pepper or add a pinch of red pepper flakes. For a sweeter profile, a little extra brown sugar or even some turbinado sugar can be added. You can also experiment with different types of paprika, like hot paprika, or include a touch of mustard powder for a tangy kick.
When it comes to the BBQ sauce, the sky’s the limit. While a good quality store-bought sauce is perfectly fine, making your own allows for ultimate customization. You can adjust the sweetness, tanginess, and spice level to your preference. Consider adding a splash of bourbon, a spoonful of apricot jam, or a touch of liquid smoke to your homemade or even store-bought sauce to elevate its flavor profile. Don’t apply the sauce too early in the baking process, as the high sugar content can cause it to burn before the ribs are fully tender. The layering method – applying sauce towards the end and then broiling – ensures a beautiful, caramelized glaze without scorching.
For variations, consider different flavor profiles. For a smoky twist without a smoker, you can add a few drops of liquid smoke to your apple cider vinegar and water mixture in the foil packet, or directly into your BBQ sauce. For a spicier kick, infuse your BBQ sauce with some finely chopped jalapeños or habaneros. A mustard-based BBQ sauce offers a tangy alternative, while a Korean-style gochujang-based sauce could introduce a sweet and savory umami punch. You can also experiment with different types of ribs – while pork ribs are classic, beef short ribs can also be prepared using a similar oven-baking method, though their cooking time will likely be longer due to their density and fat content. For an extra layer of flavor, consider marinating the ribs in the dry rub overnight in the refrigerator before baking.
Storage and Reheating
Proper storage and reheating are key to enjoying your delicious oven-baked BBQ ribs long after they’ve come out of the oven. If you have any leftovers (a rare but delightful occurrence!), allow the ribs to cool completely to room temperature before storing them. This prevents condensation from building up inside the container, which can lead to sogginess.
For short-term storage, place the cooled ribs in an airtight container or wrap them tightly in aluminum foil. Store them in the refrigerator for up to 3-4 days. For longer storage, you can freeze the ribs. Wrap individual portions or whole racks tightly in plastic wrap, then an additional layer of aluminum foil, and place them in a freezer-safe bag or container. Frozen ribs will maintain their quality for up to 2-3 months. Thaw frozen ribs overnight in the refrigerator before reheating.
When it comes to reheating, the goal is to warm them through without drying them out. The best method for reheating oven-baked ribs is, unsurprisingly, the oven itself. Preheat your oven to 250-300°F (120-150°C). Place the ribs in a baking dish, adding a tablespoon or two of water or apple juice to the bottom of the dish to create some steam and prevent drying. Cover the dish tightly with aluminum foil. Reheat for 20-30 minutes, or until the ribs are heated through. If you like a fresh glaze, you can uncover them for the last 5-10 minutes and brush with a little extra BBQ sauce.
For a quicker reheat, you can use a microwave, but be aware that this method can sometimes lead to slightly tougher ribs. Place a few ribs on a microwave-safe plate, cover loosely with a damp paper towel, and microwave in 60-second intervals until heated through. Alternatively, if you have an air fryer, you can reheat individual rib portions at 350°F (175°C) for 8-12 minutes, flipping halfway, for a nice crispy edge.
Frequently Asked Questions
Why are my oven-baked ribs not falling off the bone?
The most common reason for ribs not being fall-off-the-bone tender is insufficient cooking time or too high a temperature. The key to tender ribs is low and slow cooking, allowing the connective tissues to break down into gelatin. Ensure your oven temperature is accurate (an oven thermometer can help verify this) and allow the full recommended cooking time, or even a bit longer, until the meat easily pulls away from the bone and is very tender when pierced with a fork. Wrapping them tightly in foil during the initial bake is also crucial for trapping moisture and steaming them to tenderness.
Can I prepare the ribs ahead of time?
Absolutely! Ribs are an excellent make-ahead dish. You can apply the dry rub and let the ribs marinate in the refrigerator for 12-24 hours before baking. This allows the flavors to penetrate deeper into the meat. You can also fully bake the ribs (up to the point before the final saucing and broiling) a day in advance. Let them cool, wrap them tightly, and refrigerate. When ready to serve, reheat them covered in the oven at 300°F (150°C) until warm, then proceed with the saucing and broiling steps to achieve that fresh, caramelized glaze.
What’s the difference between baby back ribs and St. Louis style ribs for oven baking?
Baby back ribs are typically smaller, leaner, and more curved, coming from the upper part of the rib cage near the loin. They cook a bit faster (around 2.5-3 hours in the oven). St. Louis style ribs are spareribs that have been trimmed to a more uniform, rectangular shape, removing the sternum bone and cartilage. They are meatier, fattier, and larger than baby backs, requiring a slightly longer cooking time (around 3-3.5 hours). Both types work wonderfully for oven baking, offering delicious results; the choice often comes down to personal preference for meatiness and cooking time.
How do I prevent my BBQ sauce from burning during the final glazing step?
The high sugar content in most BBQ sauces makes them prone to burning quickly, especially under high heat like a broiler. To prevent this, apply the sauce towards the end of the cooking process, after the ribs are already tender. When using the broiler, always keep a very close eye on the ribs. Broilers can vary in intensity, so start with just a couple of minutes and check frequently. If your sauce starts to darken too quickly, reduce the broiling time or move the rack further away from the heating element. Applying multiple thin layers of sauce, allowing each to caramelize slightly, can also help build flavor without burning.