Instructions
- Preheat your oven to 375°F (190°C). Line two large baking sheets with parchment paper or silicone baking mats. This will prevent sticking and make cleanup easier.
- In a large mixing bowl, using an electric mixer on medium speed, cream together the softened unsalted butter, granulated sugar, and light brown sugar until the mixture is light, fluffy, and pale in color. This process usually takes about 2-3 minutes. Make sure to scrape down the sides of the bowl occasionally to ensure everything is well combined.
- Add the creamy peanut butter to the butter and sugar mixture. Continue to beat on medium speed until thoroughly incorporated and smooth. The mixture should be uniform in color and texture.
- Crack the two large eggs into the bowl, one at a time, beating well after each addition until fully combined. This helps to emulsify the mixture and adds structure to the cookies.
- Stir in the vanilla extract. Mix until it’s just incorporated; overmixing at this stage isn’t necessary.
- In a separate medium bowl, whisk together the all-purpose flour, baking soda, and salt. Whisking ensures these dry ingredients are evenly distributed, which is crucial for proper cookie texture and leavening.
- Gradually add the dry ingredient mixture to the wet ingredients, mixing on low speed until just combined. Be careful not to overmix the dough once the flour is added, as this can lead to tough cookies. Mix only until no streaks of dry flour remain. The dough will be thick and somewhat sticky.
- Scoop the dough into rounded balls, about 1 ½ tablespoons each. You can use a cookie scoop for consistency, or simply roll them by hand. Place the dough balls about 2 inches apart on the prepared baking sheets.
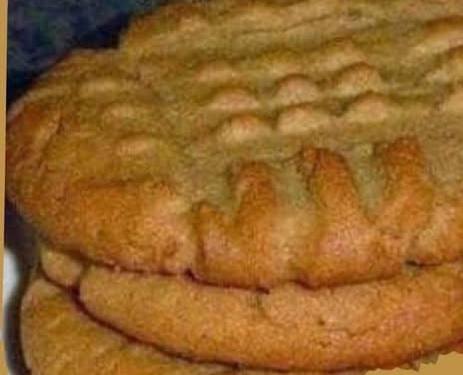
- Using a fork, gently press down on each cookie dough ball to flatten it slightly, creating a crisscross pattern. To do this, press once, then rotate the fork 90 degrees and press again. If the fork sticks, you can dip it in a little granulated sugar between presses. This step is traditional for peanut butter cookies and helps them bake evenly.
- Bake the cookies for 8-10 minutes, or until the edges are lightly golden brown and the centers appear set but still slightly soft. Peanut butter cookies can look slightly underbaked when they are perfectly done, so avoid overbaking if you want a soft, chewy texture.
- Remove the baking sheets from the oven and let the cookies cool on the sheets for 2-3 minutes before transferring them to a wire rack to cool completely. This brief cooling period on the hot sheet allows them to firm up without becoming brittle.
- Once cooled, these delicious peanut butter cookies are ready to be enjoyed!
Cooking Tips and Variations
For the absolute best peanut butter cookies, a few key tips can make all the difference. Firstly, ensure your butter is genuinely softened, not melted. Softened butter creams beautifully with sugar, incorporating air that results in a lighter, fluffier cookie texture. If your butter is too cold, it won’t cream properly; if it’s melted, the cookies can spread too much. Secondly, avoid overmixing the dough once the flour is added. Overmixing develops the gluten in the flour, which can lead to tough, dense cookies instead of the desired tender chewiness. Mix only until the ingredients are just combined. Another crucial tip is to not overbake. Peanut butter cookies often appear slightly underdone in the center when they are perfectly baked. Look for lightly golden edges and a set but still soft center. They will continue to firm up as they cool on the baking sheet. For that iconic fork pattern, dipping your fork in a little granulated sugar between presses can prevent sticking and create a cleaner, more defined design. If your dough seems too sticky to handle or is spreading too much, chilling it for 15-30 minutes before baking can help firm it up and prevent excessive spreading.
These classic peanut butter cookies are fantastic on their own, but they also serve as an excellent base for creative variations. To add a chocolatey twist, fold in 1 cup of chocolate chips (milk, semi-sweet, or dark) along with the dry ingredients. Peanut butter and chocolate are a match made in heaven! For a slightly different texture and flavor, you can use chunky peanut butter instead of creamy; this will add delightful little bits of peanut throughout the cookie. If you enjoy a bit of spice, a pinch of cinnamon or nutmeg can be a lovely addition to the dry ingredients. For an extra indulgent treat, try sandwiching two cookies together with a dollop of peanut butter frosting or even a thin layer of marshmallow fluff. You can also experiment with different nut butters, though the fat and sugar content might vary, requiring slight adjustments to the flour or baking time. Almond butter or cashew butter cookies can offer a sophisticated twist. For a decorative touch, sprinkle a little coarse sea salt on top of the cookies immediately after they come out of the oven; the saltiness beautifully complements the sweet peanut butter flavor. Lastly, for a truly decadent experience, once the cookies are cooled, drizzle them with melted chocolate or a simple powdered sugar glaze.
Storage and Reheating
Proper storage is key to keeping your homemade peanut butter cookies fresh and delicious. Once the cookies have completely cooled to room temperature, transfer them to an airtight container. Layering them between sheets of parchment paper can help prevent them from sticking together, especially if they are very soft. Store the container at room temperature, away from direct sunlight or heat sources. Stored this way, your peanut butter cookies will remain fresh and delightfully chewy for up to 5-7 days. For longer storage, these cookies freeze exceptionally well. Arrange cooled cookies in a single layer on a baking sheet and freeze until solid, about 1-2 hours. Once frozen, transfer them to a freezer-safe airtight container or heavy-duty freezer bag, separating layers with parchment paper. Frozen peanut butter cookies can last for up to 2-3 months. Thaw them at room temperature for a few hours before serving.
Reheating peanut butter cookies can bring back that warm, fresh-baked experience. While they are perfectly delicious at room temperature, a quick warm-up can enhance their flavor and texture. To reheat, place the cookies on a microwave-safe plate and microwave for 10-15 seconds. Be careful not to overheat, as this can make them tough or dry. Alternatively, you can reheat them in a preheated oven or toaster oven at 275°F (135°C) for about 5-7 minutes. This method works particularly well for a slightly crisper exterior while maintaining a soft interior. Always allow them to cool for a minute or two after reheating, as they will be quite hot. Reheating is an excellent way to enjoy leftover cookies as if they just came out of the oven, perfect for pairing with a glass of milk or a cup of coffee.
Frequently Asked Questions
Why do my peanut butter cookies spread too much?
Cookies spreading too much can be due to several factors. Your butter might have been too soft or even melted, which makes the dough less stable. Not enough flour, or too much sugar/fat in the recipe, can also contribute. Additionally, baking on a greased baking sheet instead of parchment paper or silicone mats can make them spread more. Chilling the dough for 15-30 minutes before baking can often help prevent excessive spreading.
Can I use natural peanut butter for this recipe?
While you can use natural peanut butter, it typically has a different fat and moisture content than conventional processed peanut butter (like Jif or Skippy), which can affect the cookie’s texture. Natural peanut butter tends to be oilier and can make the cookies more crumbly or prone to spreading. If you do use it, you might need to add an extra tablespoon or two of flour to compensate for the oiliness, or chill the dough for a longer period.
How do I get the perfect crisscross pattern?
To achieve the classic crisscross pattern, roll your dough into balls and place them on the baking sheet. Then, gently press down on each ball with the tines of a fork, flattening it slightly. Rotate the fork 90 degrees and press again to create the crosshatch. If the fork starts to stick to the dough, dip it lightly into a small bowl of granulated sugar between each cookie. This also adds a little extra sparkle to the finished cookie.