Instructions
- Prepare the Pork Belly: Begin by thoroughly patting the skin and all sides of the pork belly dry with paper towels. This step is crucial for achieving crispy skin.
- Score the Skin: Using a very sharp knife or a scoring tool, score the skin of the pork belly in a crosshatch pattern, making cuts about 1/4 to 1/2 inch deep, ensuring you penetrate the skin and fat layer but do not cut into the meat. This allows the fat to render and helps the skin crisp up. For even crispier results, you can also use a meat tenderizer with needle-like prongs to prick the skin all over.
- Season the Pork Belly: In a small bowl, combine the coarse sea salt and granulated sugar. Rub this mixture generously all over the pork belly, paying extra attention to working it into the scored skin. Ensure an even coating.
- Air Dry (Optional, but Recommended for Maximum Crispiness): For the ultimate crackling, place the seasoned pork belly, skin-side up, uncovered, on a wire rack set over a baking sheet. Refrigerate for at least 6 hours, or preferably overnight (up to 24 hours). This allows the skin to dry out completely, which is key for crispiness. If you’re short on time, skip this step, but be prepared for slightly less explosive crackling.
- Preheat Oven: Preheat your oven to 300°F (150°C).
- First Bake (Low and Slow): Place the pork belly, skin-side up, on a wire rack set over a baking sheet (if not already there). Pour about 1 cup of water into the baking sheet below the rack – this helps to create a moist environment for the meat while it cooks and prevents drippings from burning. Bake for 1 hour and 30 minutes to 2 hours, or until the internal temperature of the meat reaches about 160°F (71°C) and the meat is tender. This low and slow cooking renders much of the fat and tenderizes the meat.
- Increase Heat for Crisping: Once the initial slow cook is complete, increase the oven temperature to 400°F (200°C). Carefully remove the baking sheet from the oven, drain any rendered fat from the pan, and replenish the water if necessary (though often not needed for the high-heat phase). Return the pork belly to the oven.
- Second Bake (High Heat for Crisping): Continue baking at 400°F (200°C) for another 30-45 minutes, or until the skin is beautifully golden brown, puffed up, and incredibly crispy, forming a glorious crackling. Keep a close eye on it during this stage, as it can go from perfect to burnt quickly. If one side is crisping faster, rotate the pan.
- Broil for Extra Crisp (Optional): If the skin isn’t as crispy as you’d like after the high-heat bake, you can finish it under the broiler for a few minutes. Watch it *very* closely, as broilers can burn quickly. Keep the oven door ajar and the light on, and remove it as soon as it reaches your desired crispiness.
- Rest and Cut: Once the pork belly is perfectly crispy, remove it from the oven and let it rest on a cutting board for 10-15 minutes. This allows the juices to redistribute, ensuring tender, moist meat.
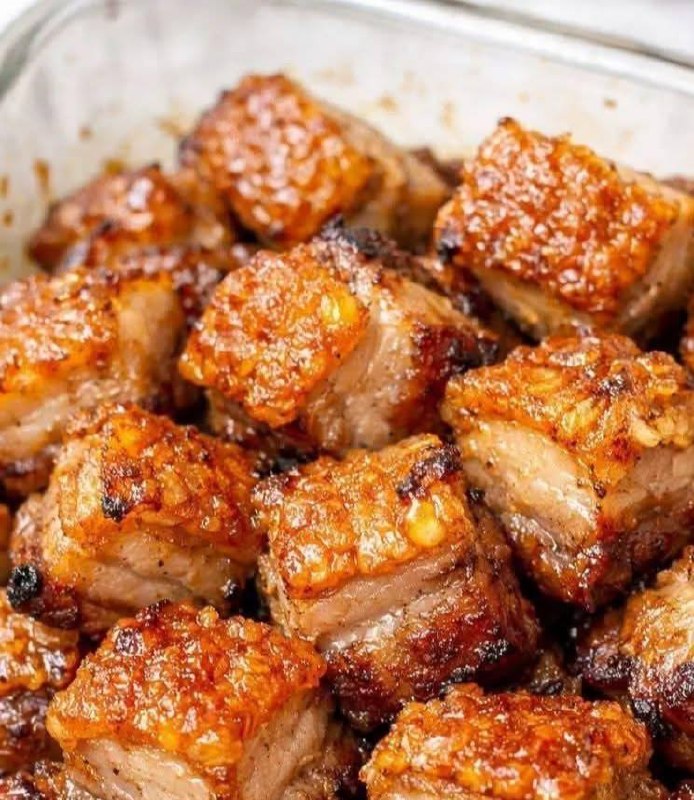
- Serve: Cut the pork belly into bite-sized cubes, following the score lines on the skin. Arrange on a platter and serve immediately.
Cooking Tips and Variations
To truly master these crispy pork belly bites, a few insider tips can make all the difference. Firstly, the key to that legendary crackling lies in a bone-dry skin. After patting it dry, consider the overnight air-drying in the refrigerator as a non-negotiable step if you have the time. The cold air works wonders to dehydrate the skin, setting it up for maximum crispiness. When scoring, ensure your knife is razor-sharp; dull knives will tear the skin rather than cleanly cut it, hindering crisping. Don’t be shy with the salt and sugar rub; these aren’t just flavor agents but also draw out moisture and contribute to the beautiful caramelization and crackle. The initial low-and-slow cook is crucial for rendering fat and tenderizing the meat, preventing a tough, chewy result. Think of it as a two-stage process: tenderize, then crisp. When it comes to the high-heat crisping phase, never walk away from the oven. Pork belly skin can go from perfectly golden to burnt in a matter of seconds, so vigilant monitoring is essential. If you notice certain spots browning faster, you can loosely tent them with foil to prevent over-browning while the rest catches up.
While the beauty of this recipe is its simplicity, there are several ways to introduce subtle variations without straying too far from the 3-ingredient concept. For a slightly different flavor profile, you could swap the granulated sugar for brown sugar, which adds a deeper, molasses-like sweetness and enhances caramelization. If you’re feeling adventurous and want to introduce a hint of spice, consider adding a pinch of white pepper or a tiny amount of five-spice powder to your salt and sugar rub – these are potent enough that a small amount will make an impact without needing a fourth “ingredient” category. For serving, while delicious on their own, these bites are fantastic with a simple dipping sauce. A classic pairing is a mixture of soy sauce, rice vinegar, and a dash of sesame oil, or for a sweet and spicy kick, a store-bought sweet chili sauce works wonders. Garnish with fresh cilantro or thinly sliced green onions for a pop of color and freshness, elevating the presentation for any crowd.
Storage and Reheating
Crispy pork belly bites are always best enjoyed fresh out of the oven when the crackle is at its peak and the meat is tender and juicy. However, leftovers can be stored and reheated, though the skin may lose some of its initial crispness. To store, allow the pork belly bites to cool completely to room temperature. Transfer them to an airtight container and refrigerate for up to 3-4 days. It’s best to store them in a single layer if possible, or with parchment paper between layers, to prevent them from sticking together and to minimize moisture buildup.
Reheating is key to revitalizing the texture. Avoid the microwave, as it will make the skin soft and rubbery. The best methods for reheating are the oven or an air fryer. To reheat in the oven, preheat it to 350°F (175°C). Place the pork belly bites on a wire rack set over a baking sheet to allow air circulation. Heat for 10-15 minutes, or until heated through and the skin has re-crisped to your liking. Keep a close eye on them to prevent burning. For an air fryer, preheat to 375°F (190°C). Place the bites in a single layer in the air fryer basket and cook for 5-8 minutes, checking frequently and shaking the basket occasionally, until they are hot and crispy again. The air fryer is often the fastest and most effective way to bring back that delightful crunch. Enjoy your re-crisped bites as a snack or a delicious addition to other dishes!
Frequently Asked Questions
What kind of pork belly should I buy for this recipe?
Look for skin-on pork belly, ideally with a good balance of meat and fat layers. Aim for a piece that is relatively uniform in thickness, which will help with even cooking. Butcher shops are often a great source, as they can cut a specific size for you.
Can I make this recipe in an air fryer from start to finish?
While an air fryer can be used for the crisping stage, cooking a whole slab of pork belly from raw in an air fryer can be tricky due to size constraints and achieving even tenderness throughout. For best results, we recommend the oven method described, perhaps finishing in the air fryer for an extra crispy boost, especially if cutting into smaller pieces after the initial bake.
My pork belly skin isn’t getting crispy. What went wrong?
The most common reasons for non-crispy skin are insufficient drying of the skin before cooking, not scoring deep enough (or at all), or not cooking at a high enough temperature (or long enough) during the crisping phase. Ensure the skin is bone dry, score it well, and don’t be afraid to use the broiler briefly at the end, watching it carefully.
Can I prepare the pork belly ahead of time?
Yes, you can prepare the pork belly by scoring and seasoning it, then refrigerate it uncovered for up to 24 hours. This air-drying step is actually beneficial for crispiness. You can then proceed with the baking instructions when you’re ready to cook.