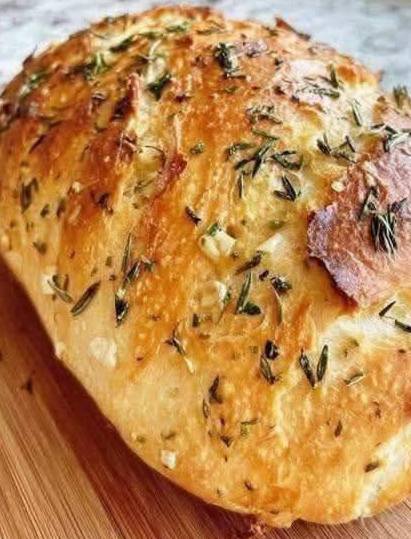
Instructions
- In a large mixing bowl, whisk together the flour, active dry yeast, and fine sea salt until well combined.
- Pour the warm water into the dry ingredients. Using a wooden spoon or a sturdy spatula, mix until a shaggy, sticky dough forms. There’s no need to knead extensively; simply ensure all the flour is incorporated.
- Lightly grease another large bowl with olive oil. Transfer the dough to the greased bowl, turning it once to coat the top. Cover the bowl tightly with plastic wrap or a clean kitchen towel.
- Let the dough rise in a warm, draft-free place for 1.5 to 2 hours, or until it has doubled in size and looks bubbly. The longer the rise, the more flavor will develop.
- While the dough is rising, prepare your garlic and herbs. Mince the fresh garlic and finely chop the fresh rosemary or thyme. In a small bowl, combine the minced garlic, chopped herbs, and 1 tablespoon of olive oil. Stir to combine.
- Once the dough has risen, gently punch it down to release the air.
- Lightly flour a clean work surface. Turn the dough out onto the floured surface. Gently shape the dough into a round or oval loaf. Avoid overworking the dough.
- Line a baking sheet with parchment paper. Carefully transfer the shaped dough to the prepared baking sheet.
- Using your fingertips, gently press indentations across the top surface of the dough. This will create pockets for the garlic and herb topping.
- Evenly spread the garlic and herb mixture over the top of the dough, gently pressing it into the indentations and surface.
- Cover the dough loosely with a clean kitchen towel and let it rest for another 20-30 minutes while you preheat your oven.
- Preheat your oven to 425°F (220°C). If you have a baking stone or a heavy-duty baking sheet, place it in the oven to preheat as well for a crispier bottom crust.
- Once the oven is preheated and the dough has rested, carefully transfer the baking sheet with the bread to the hot oven.
- Bake for 25-35 minutes, or until the crust is deeply golden brown and the internal temperature reaches 200-210°F (93-99°C). If you tap the bottom of the loaf, it should sound hollow.
- Remove the bread from the oven and immediately transfer it to a wire rack to cool completely. This is crucial for preventing a soggy bottom and ensuring a perfectly crisp crust.
- Allow the bread to cool for at least 30 minutes before slicing and serving. This allows the internal structure to set.
Cooking Tips and Variations
For the crispiest crust, consider baking this bread in a preheated Dutch oven. Place the dough (without the toppings yet) into the hot Dutch oven, cover, and bake for 20 minutes. Then, remove the lid, add the garlic and herb topping, and bake for another 15-20 minutes, or until golden brown. If you don’t have a Dutch oven, placing a shallow pan of water on the bottom rack of your oven during baking can help create steam for a better crust. Don’t over-flour your work surface when shaping; a slightly sticky dough often results in a more tender crumb. To check if your yeast is active, mix it with the warm water and a pinch of sugar. If it foams within 5-10 minutes, it’s good to go. If your dough isn’t rising, ensure your yeast isn’t expired and your water isn’t too hot (which kills yeast) or too cold (which inhibits it). A warm, draft-free spot is key for proofing – try a slightly warm oven (turned off) or near a sunny window.
This recipe is incredibly versatile! For a cheesy garlic bread, add ½ cup of shredded Parmesan or mozzarella cheese to the topping mixture. You can experiment with other herbs like dried oregano, chives, or dried basil. For an extra savory kick, fold in ¼ cup of chopped sun-dried tomatoes or pitted Kalamata olives into the dough during the initial mixing stage. A sprinkle of red pepper flakes with the garlic and herbs can add a subtle heat. For a rustic, free-form loaf, you can bake it directly on a preheated baking stone or heavy baking sheet. Before baking, you can lightly brush the top of the dough with a little olive oil to enhance the golden color and help the toppings adhere.
Storage and Reheating
Homemade bread is always best enjoyed fresh, ideally within 1-2 days of baking. To store, allow the bread to cool completely. Store it at room temperature in a bread box, a paper bag, or wrapped loosely in a clean kitchen towel. Avoid storing it in an airtight plastic bag, as this can trap moisture and make the crust soggy. If you need to store it for longer, you can wrap the cooled loaf tightly in plastic wrap, then aluminum foil, and freeze it for up to 2-3 months. To reheat from frozen, unwrap the loaf and bake in a preheated oven at 350°F (175°C) for 20-30 minutes, or until warmed through and crusty again. For a quick refresh of day-old bread, you can lightly mist it with water and bake it in a 350°F (175°C) oven for 5-10 minutes until the crust crisps up again.
Frequently Asked Questions
What kind of flour is best for this recipe?
All-purpose flour works perfectly for this easy bread recipe, yielding a tender crumb and a satisfying crust. You can also experiment with bread flour for a slightly chewier texture, but it’s not necessary for excellent results.
Can I make this recipe ahead of time?
Yes, you can! After the first rise, you can punch down the dough, shape it, apply the toppings, and then cover it loosely and refrigerate it overnight (up to 12 hours). When you’re ready to bake, take it out of the fridge and let it come to room temperature for about 30-60 minutes before baking as directed.
My bread didn’t rise. What went wrong?
The most common reasons for bread not rising are inactive yeast (check the expiration date!), water that’s too hot (which kills the yeast), or water that’s too cold (which makes the yeast sluggish). Ensure your water is between 105-115°F (40-46°C) and your rising environment is warm and draft-free.
How do I get a really crispy crust?
For an extra crispy crust, bake the bread in a preheated Dutch oven or on a baking stone. You can also create steam in your oven by placing a shallow pan of water on the bottom rack during the first half of baking. Another trick is to mist the inside of the oven with a spray bottle filled with water a few times during the first 10 minutes of baking.