Instructions
- Prepare the Flour Paste: In a medium saucepan, whisk together the all-purpose flour and granulated sugar until well combined. Gradually pour in the whole milk, whisking constantly to prevent lumps.
- Cook the Base: Place the saucepan over medium heat. Cook, whisking constantly, until the mixture thickens to a pudding-like consistency. This usually takes about 5-8 minutes. It should be thick enough to coat the back of a spoon and leave a trail when you run your finger through it. Ensure there are no raw flour tastes.
- Cool the Base: Remove the saucepan from the heat. Pour the cooked flour mixture into a shallow dish or a bowl. Cover the surface directly with plastic wrap to prevent a skin from forming. Allow it to cool completely to room temperature. This is a crucial step; if the mixture is warm, it will melt the butter and ruin the frosting’s texture. You can speed up the cooling process by placing it in the refrigerator for 1-2 hours, stirring occasionally.
- Cream the Butter: In the bowl of a stand mixer fitted with the paddle attachment, or with a hand mixer, beat the softened unsalted butter on medium-high speed for 3-5 minutes until it is light, fluffy, and pale in color. If using salt, add it here.
- Combine Mixtures: With the mixer on low speed, gradually add the completely cooled flour mixture to the creamed butter, a spoonful at a time. Once all the flour mixture has been incorporated, increase the speed to medium-high.
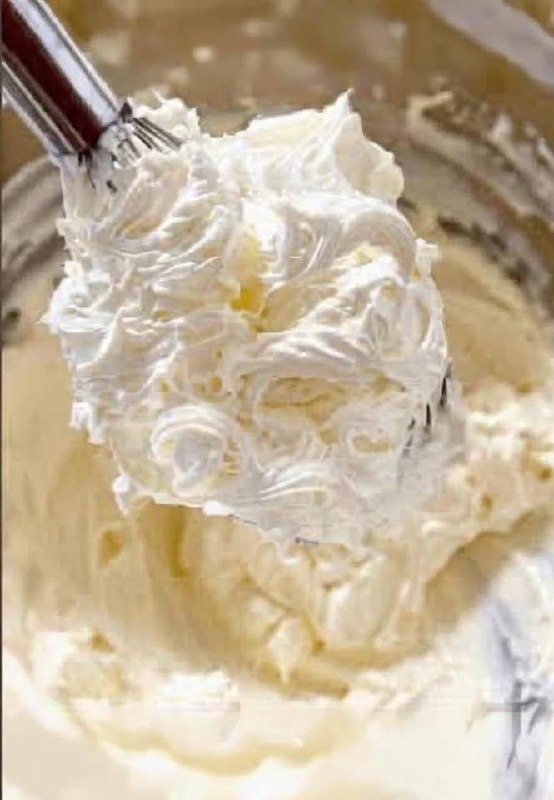
- Whip to Perfection: Continue to beat the frosting for another 5-10 minutes. The mixture will look curdled or separated at first, but keep beating! It will eventually come together, transforming into a smooth, fluffy, and cohesive frosting with a beautiful sheen. Scrape down the sides of the bowl as needed.
- Add Vanilla: Once the frosting is light and fluffy, reduce the speed to low and add the pure vanilla extract. Beat for another 30 seconds to incorporate.
- Check Consistency: The finished Ermine Frosting should be incredibly smooth, stable, and easy to spread. If it seems too soft, place the bowl in the refrigerator for 15-20 minutes, then re-whip. If it’s too stiff, add a teaspoon of milk and beat again.
- Use Immediately: Your luxurious Ermine Frosting is now ready to be spread onto your favorite cakes, cupcakes, or other desserts!
Cooking Tips and Variations
Temperature is Paramount: The most important rule for perfect Ermine Frosting is ensuring the cooked flour base is completely, unequivocally cool before adding it to the butter. Any warmth will melt the butter, resulting in a soupy, greasy mess. If in doubt, err on the side of over-cooling. You can even make the flour base a day ahead and refrigerate it.
Softened Butter is Key: Just as crucial as the cooled base is properly softened butter. It shouldn’t be melted or greasy, but soft enough to easily indent with your finger. Cold butter will lead to lumps, and overly warm butter will make the frosting too soft and difficult to whip.
Don’t Fear the Curdle: When you first combine the cooled flour mixture with the creamed butter, it will almost certainly look curdled or broken. This is normal! Resist the urge to panic or add more ingredients. Keep beating on medium-high speed, and magically, it will come together into a smooth, velvety frosting. Patience is a virtue here.
Preventing Lumps in the Base: When cooking the flour and milk mixture, whisk constantly and vigorously. Using a good quality whisk and a non-stick saucepan can help. If you do get a few small lumps, don’t worry too much; a quick strain through a fine-mesh sieve after cooking (before cooling) can smooth it out, though this is rarely necessary if whisked properly.
Flavor Variations: Ermine Frosting is a fantastic canvas for various flavors. For a citrus twist, add 1-2 tablespoons of lemon, orange, or lime zest during the final whipping stage. For a chocolate version, melt 4-6 ounces of good quality bittersweet or semi-sweet chocolate, let it cool slightly, and beat it into the finished frosting. Coffee extract, almond extract, or even a splash of your favorite liqueur can also be incorporated for unique flavor profiles. Just add them with the vanilla extract.
Coloring Ermine Frosting: Use gel food coloring for vibrant hues without adding excess liquid. Add it drop by drop at the end, mixing until the desired color is achieved. Liquid food coloring can thin the frosting.
Adjusting Consistency: If your frosting feels too stiff, add a teaspoon of milk at a time while beating on low speed until it reaches your desired consistency. If it’s too soft, chill the frosting in the refrigerator for 15-20 minutes, then re-whip until it firms up.
High-Quality Ingredients: Since this frosting has fewer intense flavors to mask, the quality of your ingredients shines through. Use good quality butter and pure vanilla extract for the best results.
Storage and Reheating
Storing Leftover Frosting: Ermine Frosting is quite stable due to its cooked base. Leftover frosting can be stored in an airtight container in the refrigerator for up to 5-7 days. Ensure the container is sealed well to prevent it from absorbing odors from other foods in the fridge.
Freezing Ermine Frosting: Yes, Ermine Frosting freezes beautifully! Place the frosting in a freezer-safe, airtight container or a heavy-duty freezer bag, pressing out as much air as possible. It can be frozen for up to 2-3 months. Label the container with the date.
Thawing Frozen Frosting: To thaw, transfer the frozen frosting to the refrigerator and let it thaw overnight. Once thawed, it will likely appear broken or separated, and its texture will not be suitable for immediate use. This is completely normal. To restore its creamy texture, place the thawed frosting in the bowl of a stand mixer and beat it on medium-high speed for 5-10 minutes until it becomes smooth, light, and fluffy again. You might need to add a teaspoon of milk or two if it’s too stiff.
Re-whipping Refrigerated Frosting: If you’ve stored the frosting in the refrigerator, it will become quite firm. Before using, let it sit at room temperature for 30-60 minutes to soften slightly. Then, transfer it to a mixer and beat on medium-high speed for a few minutes until it’s light, fluffy, and spreadable once more. If it seems too cold and stiff, a quick blast in the microwave for 10-15 seconds (stirring well after) can help, but be very careful not to melt it.
Storing Frosted Desserts: Cakes or cupcakes frosted with Ermine Frosting can be stored at room temperature for 1-2 days in an airtight container, especially if the room is cool. For longer storage or in warmer climates, it’s best to refrigerate them. Allow refrigerated desserts to come to room temperature for about 30 minutes before serving for the best texture and flavor of the cake and frosting.
Frequently Asked Questions
Why is my Ermine Frosting soupy or runny?
The most common reason for soupy Ermine Frosting is that the cooked flour and milk base was not completely cooled before being added to the butter. Even a slight warmth can melt the butter, preventing it from whipping up properly. Another possibility is that the butter itself was too warm or melted to begin with. Ensure both components are at the correct temperature (cool base, softened but not melted butter) before combining them. If it’s soupy, try chilling the entire mixture in the refrigerator for 20-30 minutes, then re-whipping it on high speed.
My frosting looks curdled, did I do something wrong?
No, you’re likely doing everything right! It’s very common for Ermine Frosting to look curdled, lumpy, or separated when you first combine the cooled flour mixture with the creamed butter. This is a natural stage in the process. The key is to keep beating it on medium-high speed in your mixer. With continued whipping (often 5-10 minutes or more), the butter and flour mixture will emulsify and transform into a smooth, light, and fluffy frosting. Don’t stop beating too early!
Can I make Ermine Frosting ahead of time?
Absolutely! Ermine Frosting is an excellent make-ahead option. You can prepare the cooked flour and milk base up to 2-3 days in advance and store it, covered, in the refrigerator. When you’re ready to make the frosting, simply let the base come to room temperature for about 30 minutes (or use it cold if you’re patient with whipping) and then proceed with creaming the butter and combining the mixtures. The finished frosting itself can also be made a few days in advance and stored in the refrigerator, then re-whipped before use.