Instructions
- Prepare Your Pan: Lightly grease an 8×8-inch baking pan. Line the greased pan with parchment paper, leaving an overhang on all sides. This “sling” will make it incredibly easy to lift the set fudge out of the pan later. Set aside.
- Melt the Butter: In a large, heavy-bottomed saucepan or a microwave-safe bowl, melt the unsalted butter over medium heat, or in the microwave in 30-second intervals until fully melted.
- Combine Wet Ingredients: Remove the melted butter from the heat (if using a saucepan). Add the creamy peanut butter to the melted butter. Stir well with a whisk or spatula until the peanut butter is completely smooth and fully incorporated with the butter. The mixture should be uniform and free of lumps.
- Introduce the Liquid: Pour the whole milk (or evaporated milk) into the peanut butter and butter mixture. Stir vigorously until everything is combined and smooth.
- Add Sweetness and Flavor: Gradually add the sifted powdered sugar to the mixture, one cup at a time, stirring continuously after each addition. It’s important to add it slowly to prevent lumps and to ensure it’s fully incorporated. Once all the powdered sugar has been added, stir in the vanilla extract and the optional salt. Continue stirring until the mixture is thick, smooth, and glossy. This step is crucial for achieving that creamy texture. If the mixture seems too thick to stir, you can return it to very low heat for just a moment to slightly warm it, but do not cook it.
- Incorporate Optional Mix-ins: If you’re adding chopped roasted peanuts, fold them into the fudge mixture now.
- Pour into Pan: Immediately pour the prepared fudge mixture into the lined 8×8-inch baking pan. Use an offset spatula or the back of a spoon to spread the fudge evenly and smooth the top.
- Chill to Set: Place the pan in the refrigerator and chill for at least 2-3 hours, or until the fudge is completely firm. For best results, you can even chill it overnight. The longer it chills, the firmer and easier it will be to cut.
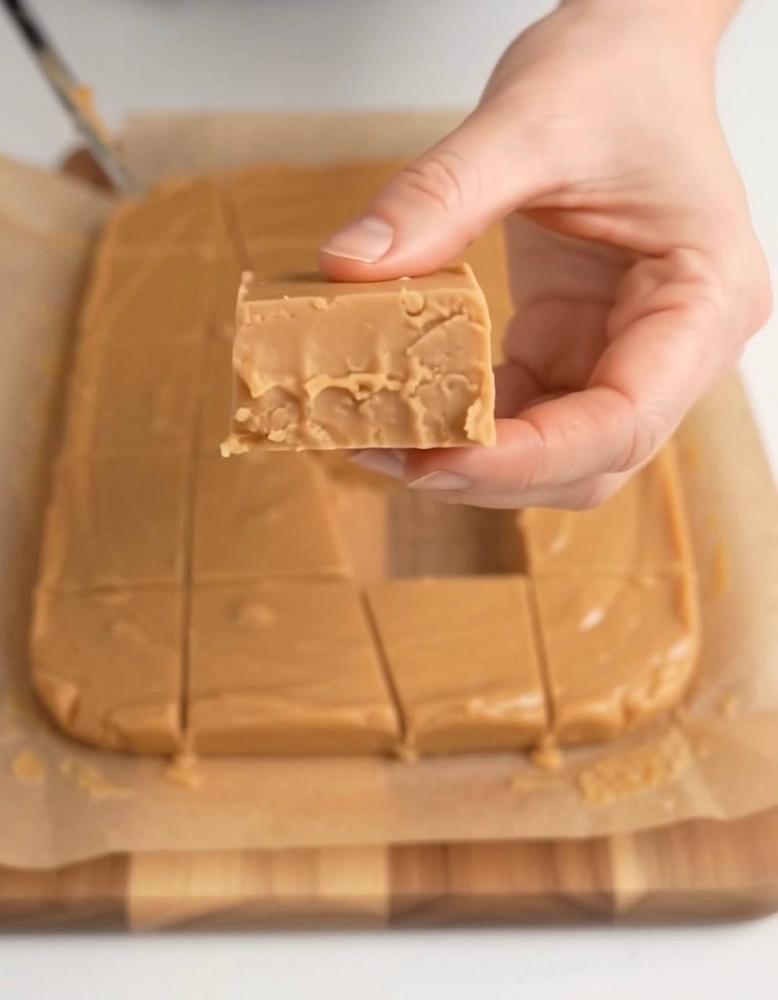
- Cut and Serve: Once the fudge is firm, use the parchment paper overhang to lift the entire block of fudge out of the pan and place it on a cutting board. Use a large, sharp knife (you can warm the knife under hot water and wipe it dry for cleaner cuts) to cut the fudge into 1-inch or 1.5-inch squares.
- Optional Chocolate Drizzle: If desired, melt the semi-sweet chocolate chips in a microwave-safe bowl in 20-second intervals, stirring until smooth. Drizzle the melted chocolate over the cut fudge squares. Allow the chocolate to set before serving.
- Enjoy: Serve your delicious Creamy Peanut Butter Fudge and savor every bite!
Cooking Tips and Variations
To ensure your Creamy Peanut Butter Fudge turns out perfectly every time, here are some expert tips. First and foremost, the quality of your ingredients truly matters. Use a good quality, creamy peanut butter – avoid natural peanut butter that separates, as its oil content can affect the fudge’s setting and texture. A classic, shelf-stable creamy peanut butter works best for this recipe. When measuring powdered sugar, it’s crucial to sift it. This prevents lumps and ensures a silky-smooth fudge. If you skip sifting, you might end up with a grainy texture, which is the opposite of the “creamy” experience we’re aiming for. Don’t be afraid to stir vigorously once all the ingredients are in; thorough mixing is key to achieving that perfect, uniform consistency.
For achieving the ultimate creaminess, pay attention to the temperature. If you’re heating the butter and peanut butter, ensure it’s just melted and combined, not cooked. Overheating can cause the sugar to crystallize, leading to a gritty fudge. Once the powdered sugar is added, work quickly but thoroughly. The mixture will thicken as it cools, so you want to get it into the pan before it becomes too difficult to spread. When chilling, patience is a virtue. Resist the urge to cut the fudge before it’s fully set; rushing this step can result in a soft, messy cut. For clean cuts, use a large, sharp knife and wipe it clean between cuts, especially if you’re cutting a large batch.
Variations to Spark Your Creativity:
- Chocolate Swirl: After pouring the fudge into the pan, melt 1/2 cup of semi-sweet chocolate chips with 1 teaspoon of butter or coconut oil. Drizzle the melted chocolate over the top of the fudge and use a skewer or toothpick to create beautiful swirls before chilling.
- Nutty Crunch: Instead of just folding in chopped peanuts, consider other nuts like chopped walnuts, pecans, or even cashews for different flavor profiles and textures. Toasting the nuts lightly before adding them will enhance their flavor even further.
- Peanut Butter Cup Fudge: Press mini Reese’s Peanut Butter Cups into the top of the fudge after pouring it into the pan, or chop them up and fold them into the mixture for an extra decadent treat.
- Flaky Sea Salt: For a sophisticated touch that perfectly balances the sweetness, sprinkle a pinch of flaky sea salt over the top of the fudge just before chilling. The salt crystals will add a delightful crunch and intensify the peanut butter flavor.
- White Chocolate Delight: Drizzle melted white chocolate over the finished fudge squares for a visually appealing contrast and an extra layer of sweetness.
- Spice It Up: Add 1/4 teaspoon of ground cinnamon or a tiny pinch of cayenne pepper to the mixture along with the vanilla for a subtle warmth and intriguing kick.
- Coffee Lover’s Fudge: Dissolve 1 teaspoon of instant espresso powder in the milk before adding it to the mixture for a rich, coffee-infused peanut butter fudge.
Storage and Reheating
Proper storage is key to maintaining the freshness and creamy texture of your homemade peanut butter fudge. Once cut into squares, the fudge should be stored in an airtight container. If you stack the pieces, it’s a good idea to place a small piece of parchment paper between each layer to prevent them from sticking together. This makes it easier to grab a single piece without damaging the others.
For short-term storage, the fudge can be kept at room temperature for up to 3-4 days, especially if your kitchen is cool. However, for optimal freshness and to maintain its firm yet creamy consistency, storing it in the refrigerator is recommended. In the fridge, it will last for up to 2-3 weeks. The cold temperature will make the fudge firmer, but it will soften slightly as it comes to room temperature, which is often preferred for serving. If you prefer a softer fudge, simply take it out of the refrigerator about 15-20 minutes before serving to allow it to come to room temperature.
Peanut butter fudge also freezes beautifully, making it an excellent make-ahead treat. To freeze, arrange the fudge squares in a single layer on a baking sheet and freeze until solid (this prevents them from sticking together). Once frozen, transfer the solid pieces to a freezer-safe airtight container or heavy-duty freezer bag, again with parchment paper between layers if stacking. Frozen fudge can last for 2-3 months. To enjoy, simply thaw the fudge in the refrigerator overnight or at room temperature for a few hours. There’s no need to “reheat” fudge in the traditional sense, as it’s meant to be enjoyed at room temperature or slightly chilled. Attempting to heat it in a microwave or oven could cause it to melt and lose its shape and desired texture.
Frequently Asked Questions
Why is my fudge crumbly instead of creamy?
A crumbly texture in peanut butter fudge can often be attributed to one of a few factors. It might be that too much powdered sugar was added, or not enough liquid (milk or butter). If the mixture was heated too much or for too long, it could have caused the sugar to crystallize, resulting in a grainy or crumbly texture. Ensure you measure ingredients accurately, don’t overcook if heating, and stir thoroughly to fully incorporate all components for that smooth, creamy finish.
Can I use natural peanut butter for this recipe?
While natural peanut butter is a healthy choice for everyday use, it’s generally not recommended for this specific fudge recipe. Natural peanut butter tends to separate more readily, and its oil content can be inconsistent, which can interfere with the fudge’s setting and overall creamy texture. For best results and the most reliable outcome, stick with a classic, shelf-stable creamy peanut butter (like Jif or Skippy) for this recipe.
How do I know when the fudge is set and ready to cut?
The fudge is ready to cut when it is completely firm to the touch. When you gently press on the surface with your finger, it should feel solid and not leave an indentation. Typically, this takes at least 2-3 hours in the refrigerator, but chilling it overnight ensures it’s perfectly firm and easy to slice into clean, neat squares. If you try to cut it too soon, it will be soft and messy.
What’s the best way to cut fudge cleanly?
For clean, precise cuts, use a large, sharp knife. A chef’s knife or a long, thin slicing knife works well. For even cleaner cuts, you can warm the knife under hot running water for a few seconds, then wipe it completely dry before each cut. The warm blade will glide through the fudge more smoothly. For extra neatness, wipe the knife clean after each cut to prevent sticky residue from transferring to the next piece.