Instructions
- Prepare the Crust: In a medium bowl, combine the graham cracker crumbs, melted butter, and granulated sugar. Mix well until the crumbs are evenly moistened. Press the mixture firmly and evenly into the bottom of a 9×13-inch baking dish. Use the bottom of a glass or a flat measuring cup to help compact the crust. Place the dish in the refrigerator for at least 15-20 minutes to chill and set while you prepare the next layer.
- Make the Strawberry Cheesecake Layer: In a large mixing bowl, using an electric mixer, beat the softened cream cheese, powdered sugar, and vanilla extract on medium speed until smooth and creamy, about 2-3 minutes. Make sure there are no lumps of cream cheese.
- In a separate bowl, whisk together the milk and instant strawberry pudding mix until well combined and slightly thickened, about 2 minutes.
- Add the prepared strawberry pudding mixture to the cream cheese mixture. Beat on low speed until just combined, then increase to medium-high and beat for another 1-2 minutes until the mixture is light and fluffy. Gently fold in the 1 cup of finely diced fresh strawberries.
- Assemble the Cheesecake Layer: Carefully spread the strawberry cheesecake mixture evenly over the chilled graham cracker crust. Return the dish to the refrigerator for at least 30 minutes to allow this layer to set further. This is a crucial step to ensure clean layers.
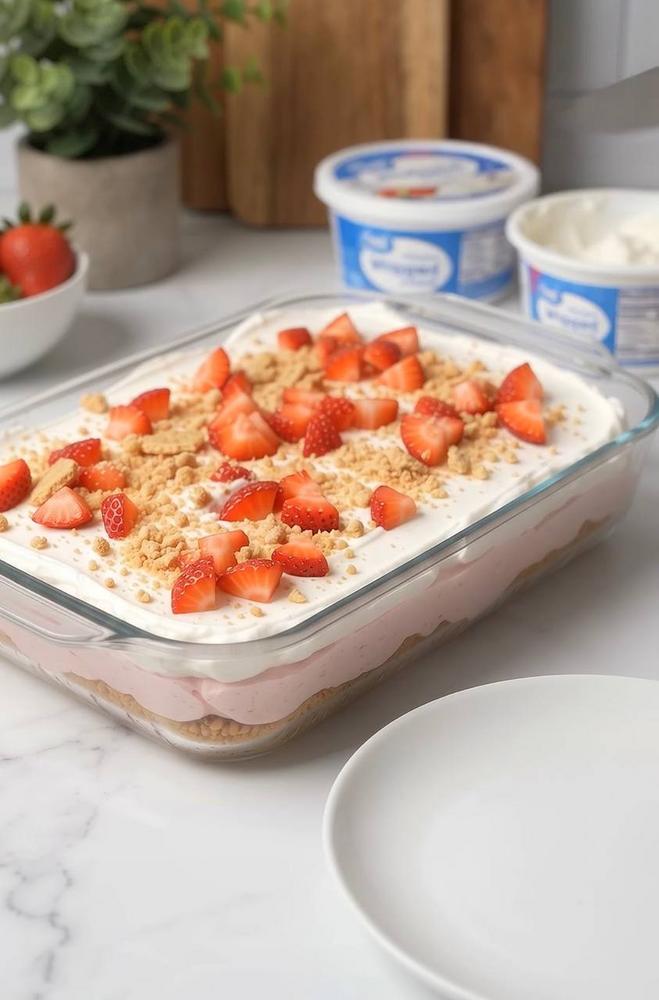
- Add the Whipped Topping: Once the cheesecake layer has set, gently spread the thawed whipped topping evenly over the strawberry cheesecake layer. Take care not to mix the layers.
- Chill Thoroughly: Cover the dish loosely with plastic wrap and refrigerate for a minimum of 4 hours, or preferably overnight. Chilling is essential for the lush to set properly, making it easier to slice and ensuring all the flavors meld beautifully.
- Garnish and Serve: Just before serving, sprinkle the remaining 1 cup of fresh diced strawberries evenly over the whipped topping. If desired, scatter an additional 2 tablespoons of graham cracker crumbs over the top for extra crunch and visual appeal. Slice into squares and serve immediately.
Cooking Tips and Variations
Achieving a perfect No-Bake Strawberry Cheesecake Lush is all about understanding a few key techniques and knowing how to adapt. First and foremost, chill time is absolutely crucial. Do not rush the refrigeration process between layers or for the final set. Each layer needs time to firm up, preventing them from bleeding into each other and ensuring clean, distinct lines when sliced. For the creamiest and lump-free cheesecake layer, always ensure your cream cheese is at room temperature. This allows it to whip up smoothly with the other ingredients, creating that desirable velvety texture.
While graham cracker crumbs are classic, don’t be afraid to customize your crust! You can substitute Nilla Wafers, shortbread cookies, or even chocolate wafers for a different flavor profile. Simply crush them finely and follow the same butter-and-sugar ratio. When it comes to the star of the show, strawberries, fresh is always best for vibrant flavor and texture. If using frozen strawberries for the cheesecake layer, make sure they are thawed and thoroughly drained to prevent excess moisture from making your filling watery. For the whipped topping, while store-bought whipped topping (like Cool Whip) is incredibly convenient, you can certainly make your own homemade whipped cream for an extra touch of decadence. Just whip 2 cups of heavy cream with 1/2 cup powdered sugar and 1 teaspoon vanilla extract until stiff peaks form.
For perfect layers and clean slices, run your knife under hot water and wipe it clean between each cut. This will prevent the layers from sticking and smearing. When serving, consider garnishing with a few whole strawberries or a sprig of fresh mint for an even more appealing presentation. This recipe is also wonderfully adaptable to other fruits. Try a raspberry or blueberry lush by swapping the strawberry pudding mix and fresh strawberries for their counterparts. You could even add a thin layer of sliced fresh fruit directly over the cheesecake layer before adding the whipped topping for an extra burst of fruitiness.
Storage and Reheating
This No-Bake Strawberry Cheesecake Lush is an excellent make-ahead dessert, making it perfect for entertaining. Once assembled and thoroughly chilled, it should be stored covered with plastic wrap in the refrigerator. It will stay fresh and delicious for 3-4 days. While it’s a no-bake dessert, it’s best enjoyed cold, straight from the refrigerator. There is no reheating involved for this type of dessert; in fact, warming it would cause the layers to soften and lose their structure. If you plan to make it more than a day in advance, hold off on adding the fresh strawberry garnish until just before serving to ensure the berries remain firm and vibrant. Freezing is generally not recommended for this lush, as the whipped topping and cream cheese layers can separate or become watery upon thawing, affecting the texture and overall quality of the dessert.
Frequently Asked Questions
Can I use sugar-free pudding mix or light cream cheese?
Yes, you can substitute sugar-free instant pudding mix and light cream cheese for a lower-calorie or lower-sugar version. However, be aware that these substitutions may slightly alter the texture and richness of the cheesecake layer. The dessert might be a bit less firm or creamy compared to using full-fat ingredients.
How far in advance can I make this dessert?
You can prepare this No-Bake Strawberry Cheesecake Lush up to 24 hours in advance. For best results, assemble all layers and chill overnight. If making it more than a day ahead, it’s best to add the fresh strawberry garnish just before serving to prevent the berries from softening or releasing too much moisture into the whipped topping.
Why did my layers mix together?
The most common reason for layers mixing is insufficient chilling time. It’s crucial to allow each creamy layer, especially the strawberry cheesecake layer, enough time to set in the refrigerator before adding the next. This helps create a firm barrier that prevents the layers from bleeding into each other when the next one is spread on top.
Can I use other fruits instead of strawberries?
Absolutely! This recipe is very versatile. You can easily adapt it by using other instant pudding flavors (like raspberry, banana, or lemon) and pairing them with their corresponding fresh fruits. Just ensure any fruit you fold into the creamy layers is finely diced and any fruit used for garnish is added just before serving.