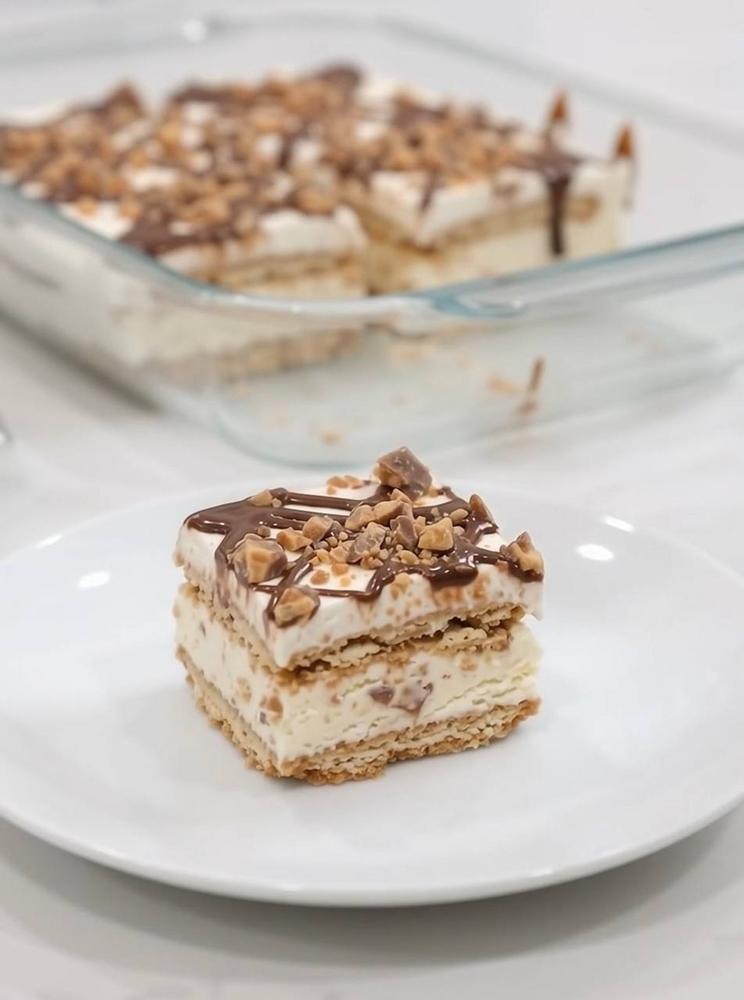
Instructions
- Line a 9×13-inch baking dish with parchment paper, leaving an overhang on the longer sides to easily lift the cake out later. This step is crucial for clean removal and slicing.
- In a large mixing bowl, using an electric mixer with a whisk attachment, beat the very cold heavy cream on high speed until stiff peaks form. Be careful not to overbeat, as it can turn into butter. Set aside.
- In a separate large bowl, beat the softened cream cheese with the granulated sugar until light and fluffy, about 2-3 minutes. Make sure there are no lumps.
- Add the vanilla extract and the chilled sweetened condensed milk to the cream cheese mixture. Beat on medium speed until well combined and smooth.
- Gently fold about two-thirds of the whipped cream into the cream cheese mixture until just combined. Be careful not to deflate the whipped cream too much.
- Fold in 1 cup of the crushed toffee bits into the creamy mixture. Reserve the remaining ½ cup of toffee bits for topping.
- Spread a thin layer (about ½ cup) of the creamy filling evenly over the bottom of the prepared baking dish. This will act as an anchor for your first layer of graham crackers.
- Arrange a single layer of graham crackers over the creamy base, breaking them as needed to fit snugly and cover the entire bottom of the dish. You’ll likely use about 6-8 full sheets per layer.
- Spread about one-third of the remaining creamy filling evenly over the graham cracker layer.
- Repeat the layering process: another layer of graham crackers, followed by another one-third of the creamy filling.
- Add a final layer of graham crackers.
- Top with the remaining creamy filling, spreading it smoothly and evenly to cover the entire surface of the cake.
- Sprinkle the reserved ½ cup of crushed toffee bits evenly over the top of the cake.
- Cover the baking dish tightly with plastic wrap or aluminum foil.
- Refrigerate the icebox cake for a minimum of 6-8 hours, or preferably overnight. This chilling time is essential for the graham crackers to soften and for the cake to set properly, ensuring clean slices.
- Once thoroughly chilled, use the parchment paper overhangs to carefully lift the cake out of the baking dish and transfer it to a cutting board.
- Just before serving, drizzle the chocolate syrup or melted chocolate generously over the top of the cake.
- Slice the cake into squares or rectangles using a sharp knife. For the cleanest cuts, you can dip your knife in hot water and wipe it clean between each slice.
- Serve immediately and enjoy your delicious No-Bake Toffee Icebox Cake!
Cooking Tips and Variations
For the best results with your No-Bake Toffee Icebox Cake, start with very cold heavy cream and chilled sweetened condensed milk. This ensures your whipped cream whips up beautifully and your filling sets firm. When beating the heavy cream, keep a close eye on it to avoid over-whipping, which can quickly turn it grainy. If your cream cheese isn’t soft enough, you can microwave it for 10-15 seconds to help it reach the right consistency for a lump-free mixture. When layering, try to spread the creamy filling gently but firmly to ensure even distribution without disturbing the cracker layers too much. The parchment paper sling is your best friend here – don’t skip it! It makes lifting the cake out of the pan incredibly easy, allowing for much cleaner presentation and less mess.
The most crucial tip for any icebox cake is patience with the chill time. A minimum of 6-8 hours is required, but overnight is truly ideal. This allows the graham crackers to fully absorb moisture from the creamy filling, transforming them from crisp crackers into a tender, cake-like layer that holds its shape when sliced. If you cut it too soon, the layers will likely separate, and the texture won’t be as cohesive. For the cleanest slices, use a long, sharp knife. Running the knife under hot water and wiping it clean between each cut can also help prevent sticking and ensure neat portions.
This recipe is wonderfully adaptable, allowing for many delicious variations. Instead of graham crackers, try using chocolate wafers for a chocolate-toffee dream, or vanilla wafers, shortbread cookies, or even digestive biscuits for a different base flavor and texture. You can experiment with the creamy filling by adding a touch of instant espresso powder for a coffee-toffee twist, or a swirl of caramel sauce directly into the filling. For an extra layer of flavor, consider adding a thin layer of sliced bananas or a drizzle of caramel between some of the cracker layers. The topping possibilities are also endless: instead of just toffee bits, you could add chopped pecans, mini chocolate chips, a sprinkle of sea salt flakes for a salted caramel effect, or even a different candy bar, chopped finely. For a more intense chocolate flavor, use melted dark chocolate for the drizzle instead of chocolate syrup. You can also swap out the chocolate drizzle for a caramel drizzle for an all-out caramel explosion. Don’t be afraid to get creative and make this icebox cake truly your own!
Storage and Reheating
This No-Bake Toffee Icebox Cake is best stored in the refrigerator. Once assembled and thoroughly chilled, cover the baking dish tightly with plastic wrap or transfer any leftover slices to an airtight container. It will keep well in the refrigerator for up to 3-4 days. The crackers will continue to soften slightly over time, but the cake will remain delicious. For optimal texture, it’s best consumed within the first 2-3 days.
While icebox cakes are not typically “reheated,” you can freeze this cake for longer storage. To freeze, wrap the entire cake (or individual slices) tightly in plastic wrap, then an additional layer of aluminum foil. It can be stored in the freezer for up to 1 month. When you’re ready to enjoy, transfer the frozen cake or slices to the refrigerator to thaw for several hours, or overnight, before serving. You can also serve it directly from the freezer for a firmer, ice cream cake-like texture, though it will be harder to cut cleanly initially. Just let it sit at room temperature for 10-15 minutes before attempting to slice if serving frozen.
Frequently Asked Questions
Can I make this icebox cake ahead of time for a party?
Absolutely! This No-Bake Toffee Icebox Cake is an ideal make-ahead dessert. In fact, it requires a minimum of 6-8 hours of chilling, and it’s even better if prepared the day before (up to 24 hours in advance). The extra time allows the graham crackers to fully soften and the flavors to meld beautifully, resulting in a more cohesive and delicious cake. Just hold off on the chocolate drizzle until right before serving for the freshest appearance.
What kind of toffee bits should I use?
You can use any brand of pre-crushed toffee bits, often found in the baking aisle near chocolate chips. Heath Bar bits are a popular and delicious choice for their buttery, crunchy texture. If you can’t find pre-crushed bits, you can buy a toffee candy bar (like a Heath bar or Skor bar), freeze it for 15-20 minutes, and then chop it finely or crush it in a food processor or by placing it in a Ziploc bag and hitting it with a rolling pin. Just make sure they are small enough to be easily incorporated and eaten.
My whipped cream isn’t getting stiff peaks. What could be wrong?
The most common reasons for whipped cream not stiffening are using warm cream or not chilling your bowl and whisk. Ensure your heavy cream is very cold, straight from the refrigerator. For best results, you can also chill your mixing bowl and whisk attachment in the freezer for 10-15 minutes before whipping. Make sure your cream cheese mixture is also at a cooler temperature when folding in the whipped cream, as a warm mixture can cause the whipped cream to deflate. Also, ensure you are using heavy cream (at least 36% milk fat) and not half-and-half or light cream, as these will not whip properly.