Instructions
- Line an 8×8-inch square baking pan with parchment paper or aluminum foil, leaving an overhang on all sides. This will make it much easier to remove the fudge once it’s set. Lightly grease the paper or foil if desired, though it’s often not necessary with a good quality liner.
- In a large, heavy-bottomed saucepan, combine the sweetened condensed milk, chocolate chips (or chopped chocolate), and butter. Place the saucepan over low heat.
- Stir continuously with a rubber spatula or wooden spoon as the ingredients melt. It’s crucial to keep the heat low and stir constantly to prevent the chocolate from scorching and the mixture from sticking to the bottom of the pan. Continue stirring until the mixture is completely smooth and all the chocolate and butter have melted and are fully incorporated. This should take about 5-8 minutes.
- Once the mixture is smooth and glossy, remove the saucepan from the heat. Stir in the vanilla extract and the pinch of sea salt (if using). Mix until well combined.
- Allow the chocolate mixture to cool slightly for about 5 minutes. This step is important to prevent the marshmallows from melting too much when added.
- Gently fold in the mini marshmallows and the toasted almonds. Stir just enough to evenly distribute them throughout the fudge base. Be careful not to overmix, as this can cause the marshmallows to disappear into the chocolate.
- Pour the fudge mixture into the prepared 8×8-inch pan. Use the back of your spatula or spoon to spread it evenly into the corners and smooth the top.
- If desired, sprinkle a few extra marshmallows and almonds on top of the fudge for a decorative finish. Gently press them down slightly so they adhere to the fudge.
- Place the pan in the refrigerator and chill for at least 2-4 hours, or until the fudge is completely firm and set. For best results, allow it to chill overnight.
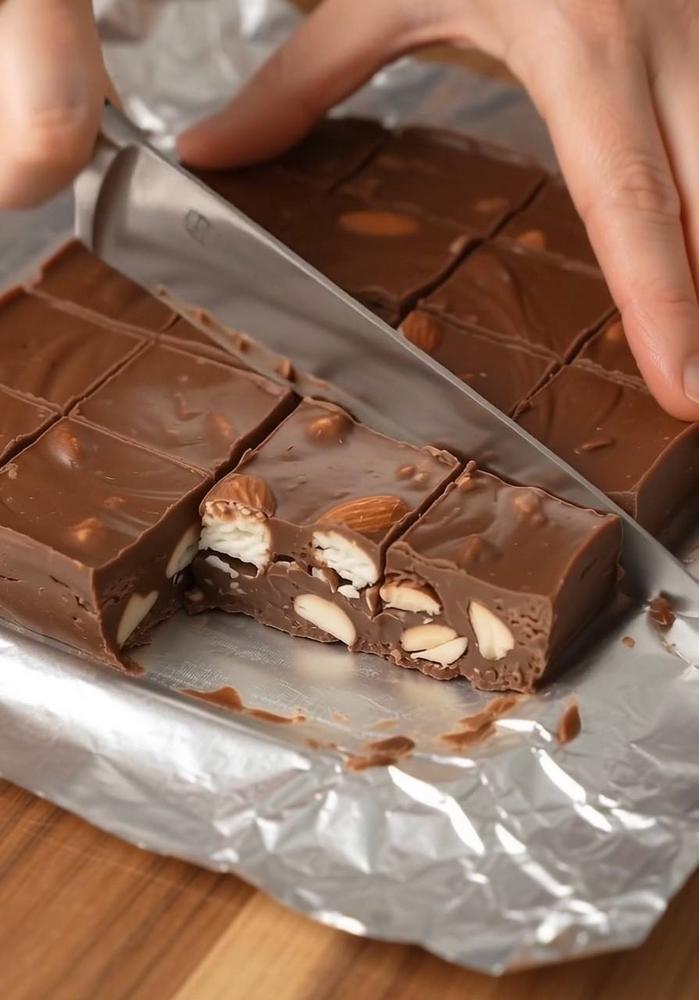
- Once the fudge is firm, use the parchment paper or foil overhangs to lift the entire block of fudge out of the pan. Place it on a clean cutting board.
- Using a sharp, warm knife, cut the fudge into 1-inch or 1.5-inch squares. For cleaner cuts, you can run your knife under hot water and wipe it dry between each cut. This helps prevent sticking and creates smooth edges.
- Serve immediately or store for later enjoyment.
Cooking Tips and Variations
For the absolute best Rocky Road Chocolate Fudge, the quality of your ingredients truly matters. Opt for good quality semi-sweet chocolate chips or, even better, chop up a premium chocolate bar. Better chocolate will yield a richer, more complex flavor and a smoother texture. When melting the chocolate mixture, always use low heat and stir constantly. High heat can cause the chocolate to seize or burn, resulting in a gritty texture. If you’re concerned about scorching, you can use a double boiler method: place your saucepan over a pot of simmering water, ensuring the bottom of the saucepan doesn’t touch the water. This provides gentle, indirect heat.
Ensuring an even distribution of your mix-ins is key to a perfect Rocky Road experience. After removing the chocolate mixture from the heat, allow it to cool for a few minutes before adding the marshmallows and nuts. If the chocolate is too hot, the marshmallows will melt completely, losing their distinct chewiness. Fold them in gently but thoroughly to ensure every piece of fudge gets a delightful combination of textures. Don’t be afraid to press a few extra marshmallows and almonds onto the top of the fudge after spreading it into the pan; this creates an appealing visual and extra textural interest.
This recipe is wonderfully versatile, allowing for endless personalization. For a different nutty flavor, swap almonds for toasted walnuts, pecans, or even peanuts. If you’re a fan of a darker chocolate experience, use dark chocolate chips (60-70% cacao) instead of semi-sweet. For a sweeter, creamier fudge, milk chocolate can be used, though you might want to reduce the sweetened condensed milk slightly to balance the sweetness. Consider adding other fun mix-ins like dried cranberries, chopped dried cherries, a sprinkle of flaky sea salt on top, or even a dash of espresso powder to deepen the chocolate flavor without making it taste like coffee. For an extra kick, a tiny pinch of cayenne pepper can add a surprising warmth that beautifully complements the chocolate.
Storage and Reheating
Rocky Road Chocolate Fudge is wonderfully easy to store, maintaining its deliciousness for an extended period. Once cut into squares, place the fudge in an airtight container. You can layer the pieces between sheets of parchment paper to prevent them from sticking together, especially if your kitchen is warm. The fudge can be stored at room temperature for up to 1 week. If your home is particularly warm or humid, or if you prefer a firmer fudge, storing it in the refrigerator is a great option. In the refrigerator, it will last for up to 2-3 weeks. Be sure the container is truly airtight to prevent the fudge from absorbing any refrigerator odors or drying out.
For longer storage, Rocky Road Chocolate Fudge freezes beautifully. Wrap individual pieces or small blocks tightly in plastic wrap, then place them in a freezer-safe airtight container or heavy-duty freezer bag. Frozen fudge can last for up to 3 months. To enjoy frozen fudge, simply remove it from the freezer and let it thaw at room temperature for about 15-30 minutes, or until it reaches your desired consistency. There’s no need for reheating; fudge is best enjoyed at room temperature or slightly chilled, allowing its textures and flavors to fully develop.
Frequently Asked Questions
Why is my fudge too soft and not setting properly?
A common reason for soft fudge is not enough chilling time, or the mixture wasn’t cooked long enough to reduce the moisture content sufficiently. Ensure you chill the fudge for at least 2-4 hours, or preferably overnight, in the refrigerator. Also, make sure your sweetened condensed milk and chocolate mixture was heated until fully melted and smooth, but not overcooked. Sometimes, too many liquid additions (like extra vanilla or other extracts) can also contribute to a softer set.
Can I use different nuts or other mix-ins?
Absolutely! This recipe is incredibly adaptable. Feel free to substitute almonds with your favorite nuts like walnuts, pecans, cashews, or even peanuts. Just be sure to toast them lightly beforehand to enhance their flavor and crunch. Other delicious additions include dried fruits like cranberries or cherries, crushed pretzels for a salty crunch, or even a swirl of caramel sauce for an extra layer of indulgence. Just be mindful not to add too much liquid when incorporating other sauces.
How do I get clean cuts when slicing the fudge?
Achieving clean, neat cuts is all about technique and temperature. First, ensure your fudge is thoroughly chilled and firm. A warm fudge will be difficult to cut cleanly. Second, use a very sharp knife. For even better results, run your sharp knife under hot water for a few seconds, then wipe it completely dry before making each cut. The warmth from the knife will help it glide through the fudge more smoothly, preventing sticking and crumbling. Wiping the knife clean between cuts also helps maintain a pristine edge.